
Tiny Bunny Amigurumi
Free Crochet Pattern
Hello Friends! I am so excited to bring you this Free Crochet Pattern! Just in time for those last minute Easter gifts, I have a pretty cute little pattern for you! I hope you enjoy my Tiny Bunny Amigurumi Crochet Pattern as much as my own kids are enjoying them!
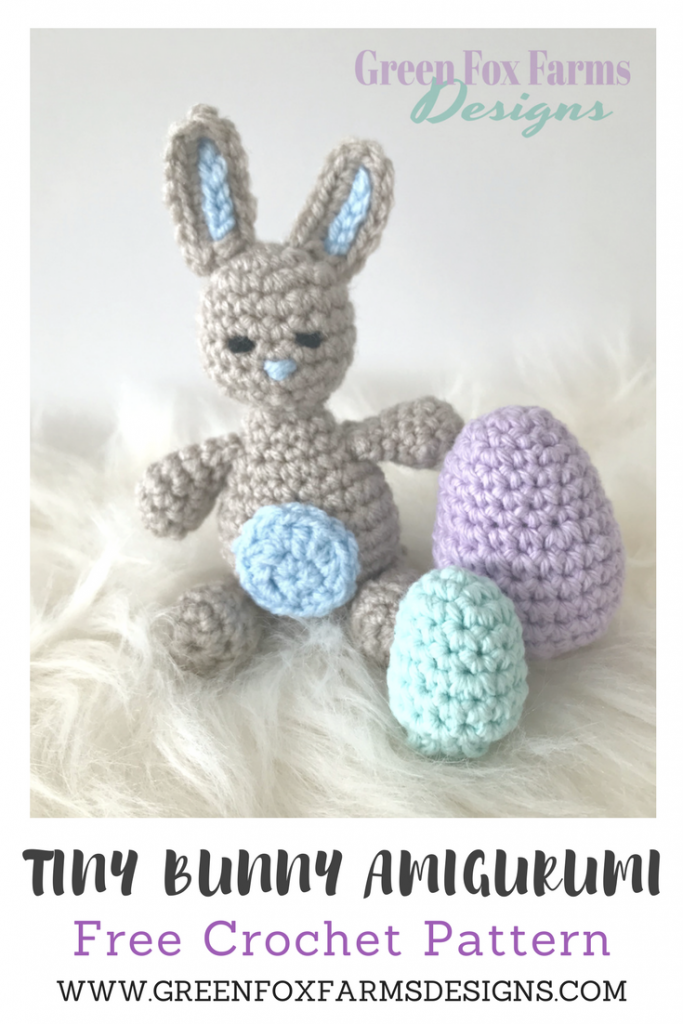
 The sweet Tiny Bunny Amigurumi is the perfect accompaniment to the Easter Toy Tote pattern! Tiny Bunny would be so hoppy to play in the toy tote with the other toys! (So punny, I know! 😉 ) The Tiny Bunny Amigurumi was inspired by the popularity of my Tiny Dinosaur Amigurumi. I knew I wanted to design another pattern like that one, and Easter was the next big holiday. So it was only natural that this fun Tiny Bunny Amigurumi pattern should be created!
 But I couldn’t have done it without the inspiration of my sweet kids! It’s so much fun designing for excited recipients! I hope the sweet kids in your life enjoy the Tiny Bunny Amigurumi too! Don’t crochet? Send me a message through my Contact Page or through my Etsy shop here! I would love to create a Tiny Bunny Amigurumi just for you!
 The Tiny Bunny Amigurumi is relatively quick and very fun to make! He would make a fun Easter Basket stuffer, Rattle for baby, fun toy to keep in car, or a gift for just because you can make for all the kids and teens in your life! The Tiny Bunny Amigurumi would look adorable in any colors you can dream up! No matter how you make it, your Tiny Bunny Amigurumi is sure to be a hit! P.S. If you want to make your Tiny Bunny some Crochet Eggs BIG and small you can find the pattern in my Ravelry Shop <– here –> Etsy Shop! 🙂


TINY BUNNY AMIGURUMI PATTERN
Materials:
(Click the links below to view & purchase the exact yarn & tools that I used to create my Tiny Bunny Amigurumi!)
Worsted weight yarn (40-60 yds)
Pattern Key:
NOTES:
- This pattern uses a Magic Circle. If you need help with this technique you can follow this link to view my video tutorial for the Magic Circle on YouTube or watch the video below!
- This pattern is FREE, but has not been tested by anyone besides myself. Please feel free to share any questions or comments you may have! I welcome your feedback!
- This pattern is my intellectual property. You are welcome to make as many as you like, sell them, give them away, etc. You may NOT sell, or alter and claim as your own this pattern. You may not use my photographs.
- If you want to share this pattern online, you must only share a link to my blog. You may not copy and paste my text / the pattern to another site. Thank you for respecting my work. 🙂
- By using this pattern you are agreeing to abide by these terms.
VIDEO TUTORIAL: SC MAGIC CIRCLE


PATTERN DIRECTIONS: (Use G 4.0 mm hook)
BELLY: (Make 1 and set aside)
- Finished size should be approximately 1.25” across.
- Use Pink or Blue yarn and G 4.0 mm hook
- Do NOT join at the end of each round. Work in continuous rounds using a stitch marker. At the end of each round, begin next round in the 1st (marked) stitch of the previous round.
- Begin with Magic Circle or ch 2 and work into the 2nd ch from
hook
EARS: (Make 2 and set aside)
-
- Finished size should be approximately 1.5” tall.
- Begin with White or Oatmeal yarn and G 4.0 mm hook
- Begin with ch 7

ARMS: (Make 2 and set aside)
- Finished size should be approximately 1.5” long.
- Use White or Oatmeal yarn and G 4.0 mm hook
- Do NOT join at the end of each round. Work in continuous rounds using a stitch marker. At the end of each round, begin next round in the 1st (marked) stitch of the previous round.
- Begin with Magic Circle or ch 2 and work into the 2nd ch from
hook

LEGS: (Make 2 and set aside)
- Finished size should be approximately 2” long.
- Use White or Oatmeal yarn and G 4.0 mm hook
- Do NOT join at the end of each round. Work in continuous rounds using a stitch marker. At the end of each round, begin next round in the 1st (marked) stitch of the previous round.
- Begin with Magic Circle or ch 2 and work into the 2nd ch from
hook
Round 4: * decr, sc in next 4, * twice (10 sc)
Round 6-8: sc in each st around, (8 sc, 3 rounds) Stuff lightly, flatten top and sl st across to close. FO and leave a long tail.

HEAD and BODY:
- Finished size should be approximately 5.5”around and 4.5” tall.
- Use White or Oatmeal yarn and G 4.0 mm hook
- Do NOT join at the end of each round. Work in continuous rounds using a stitch marker. At the end of each round, begin next round in the 1st (marked) stitch of the previous round.
- Begin with Magic Circle or ch 2 and work into the 2nd ch from
hook
Round 8:* decr, sc in next, * 6 times (12 sc)

Round 9: decr 6 times (6 sc)
STOP HERE:


TAIL:
- Finished size should be approximately 1” across.
- Use Pink or Blue yarn and Pom Pom maker or 2 fingers 😉
Step 3: Trim the edges of the pom evenly. Use the tied length of yarn to stitch the pom pom to the back of the bunny at R19. You’re finished!

[/thrive_lead_lock]

 I hope you enjoyed the Tiny Bunny Amigurumi pattern! I can’t wait to see your bunnies! I would love if you share your finished Tiny Bunny Amigurumi projects on Ravelry and social media! Please tag me (#greenfoxfarms #greenfoxfarmsdesigns) in your photos so I can see what you’ve made! If you enjoyed this Tiny Bunny Amigurumi pattern and want me to continue publishing Free Crochet Patterns like this one, please share my Blog Post so your crafty friends don’t miss out! If you subscribe to my newsletter you will never miss another post! Your support means the world to me! Please don’t hesitate to contact me with any questions you may have, I am happy to help!
 Make sure to share your pics and tag #greenfoxfarms #greenfoxfarmsdesigns @greenfoxfarms on any social media! Please share your finished creations on Ravelry too!
Want to see more? Sign up for my Newsletter!
[mc4wp_form id=”306″]
You may also enjoy these posts:


Please note: This post may contain affiliate links. These allow me to make a small percentage from any purchase you may make, but do not affect the price you pay in any way. They do allow me to continue to bring you great FREE content like this! Thanks for your support!

Trackbacks/Pingbacks