Calliope Crochet Mandala Pattern
Free Crochet Mandala Wall Hanging Pattern!
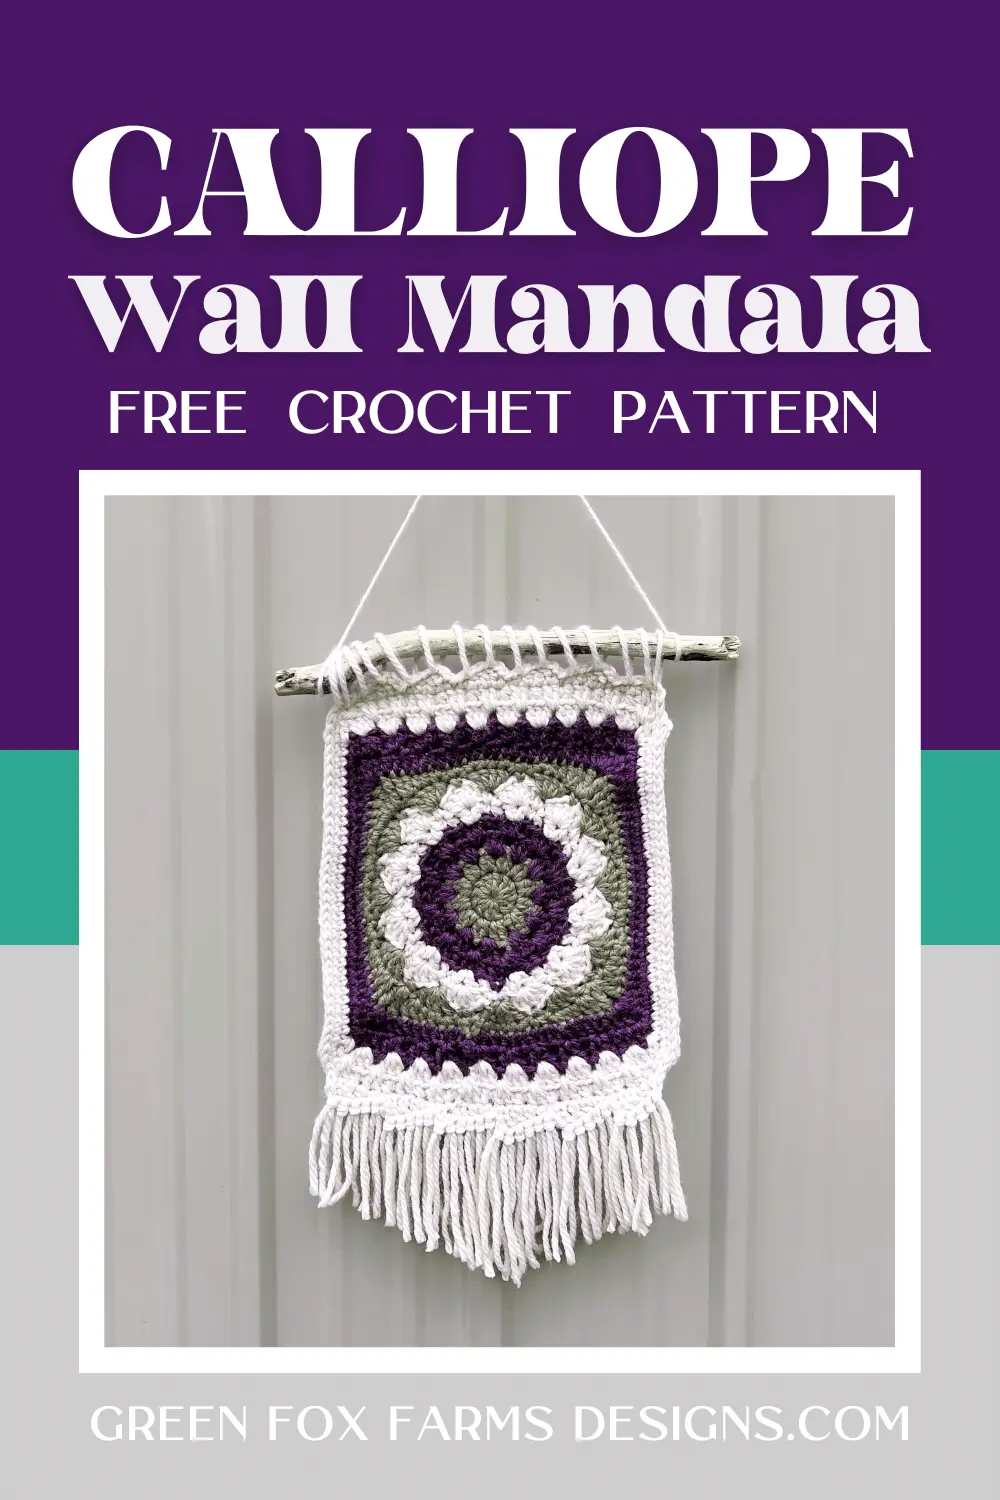
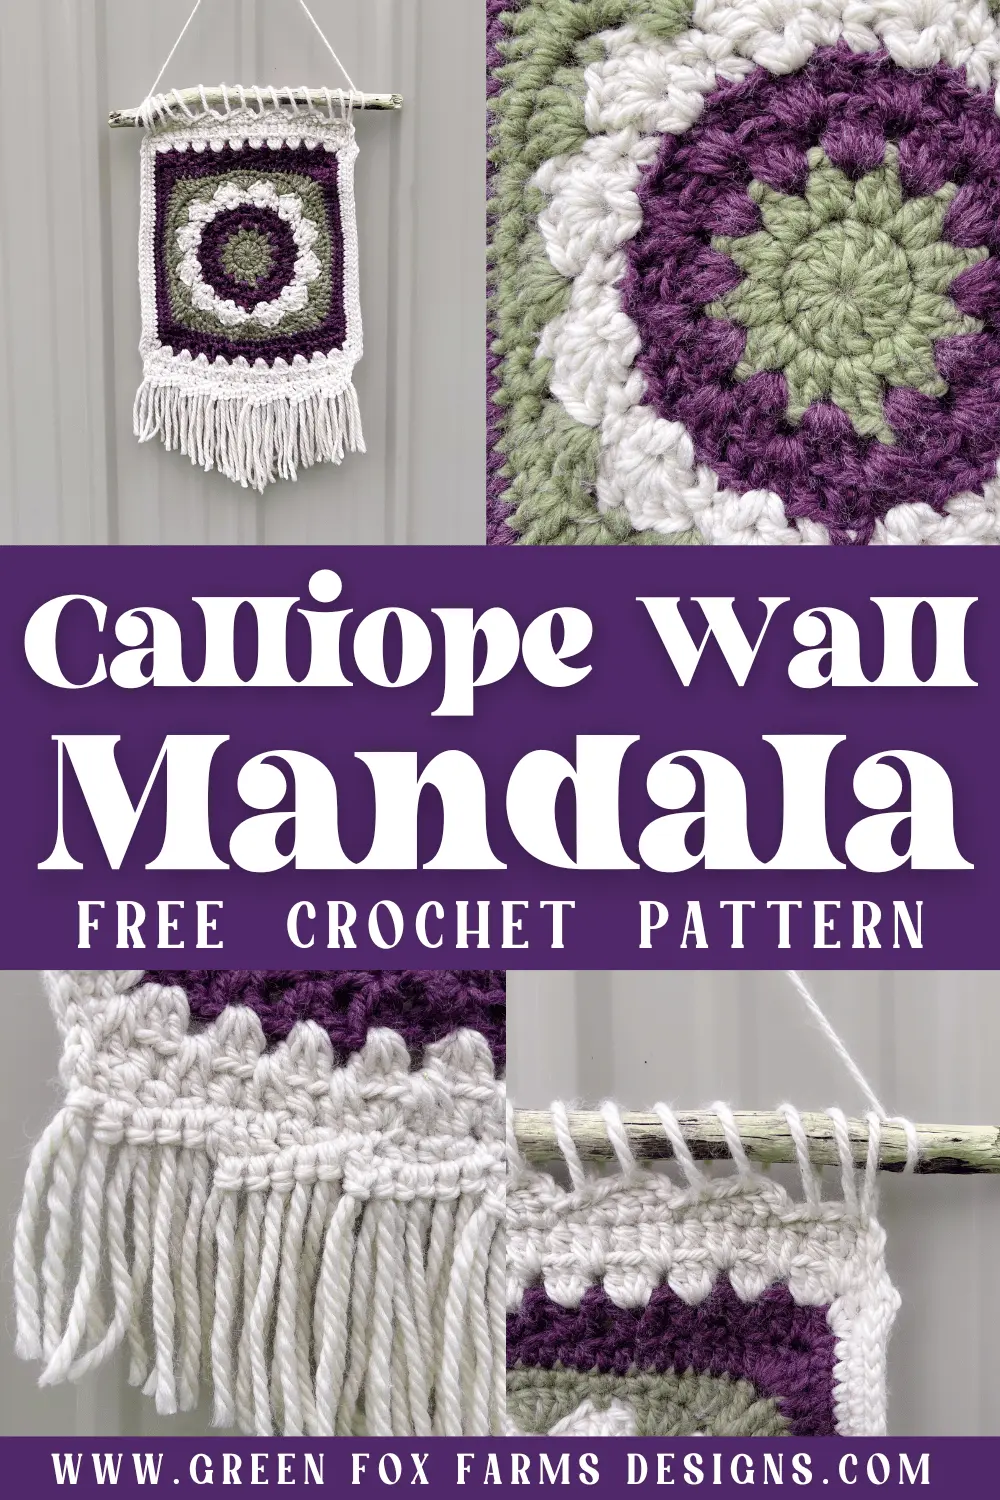
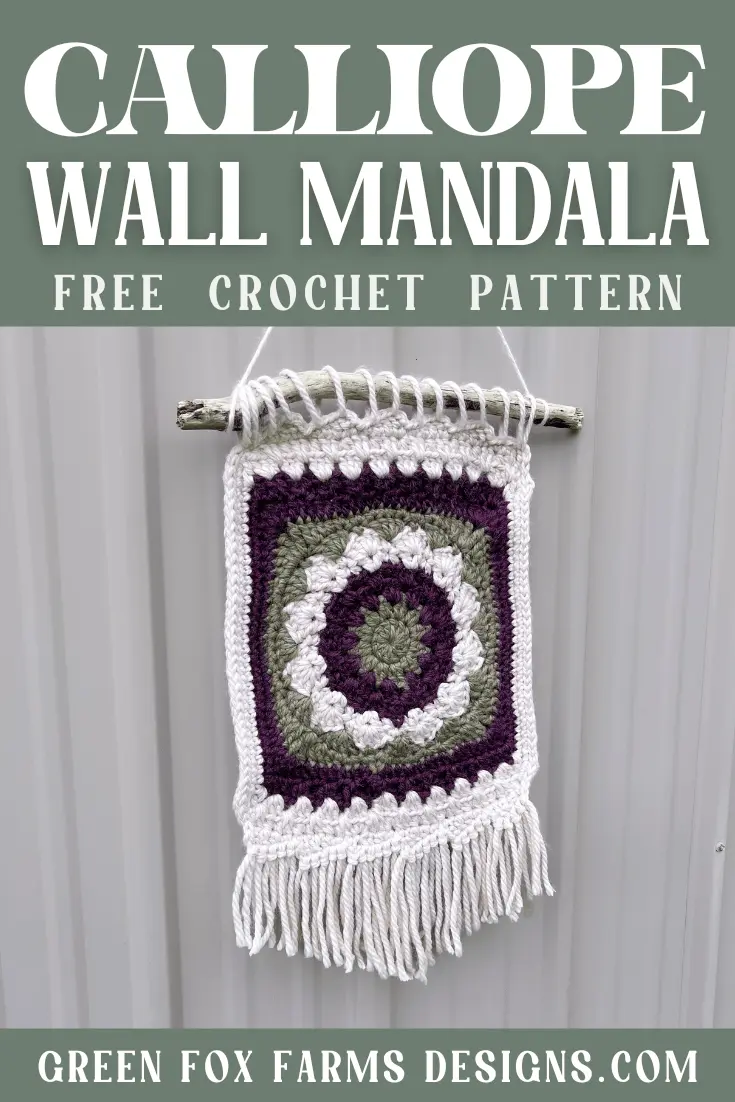
If you’re searching for a quick and colorful crochet mandala wall hanging pattern, you’ll love the stunning Calliope Crochet Mandala Pattern. This is a fun and easy way to update your home decor, perfect for using up leftover yarn, and make wonderful gifts for friends and family. Plus, you can use this pattern to learn new stitches and practice techniques.
I’m excited to share my latest pattern: the colorful Calliope Crochet Mandala Wall Hanging Pattern! This beautiful design involves color changes and stitch clusters like a traditional granny square, but with my own fun twist!
Bonus! Get ready to download the FREE PDF pattern on July 12, 2025! It includes a helpful photo tutorial to guide you as you create and learn new stitches and practice your crochet skills.
I just know you’re going to love this stunning free crochet mandala pattern that uses color and texture to help you create a unique work of art to display or gift! The pattern is written for super bulky (6) yarn, but you can also hold 3 strands of DK (3) yarn or 2 strands of worsted (4) yarn to make the free mandala pattern too!
The Calliope crochet cloth pattern provides step-by-step instructions, teaches you the stacked double crochet, stacked treble crochet, V-stitch, magic circle and invisible join too. All stitches include photo tutorials and links to video tutorials. It’s a free crochet pattern, and it looks amazing in different colors!
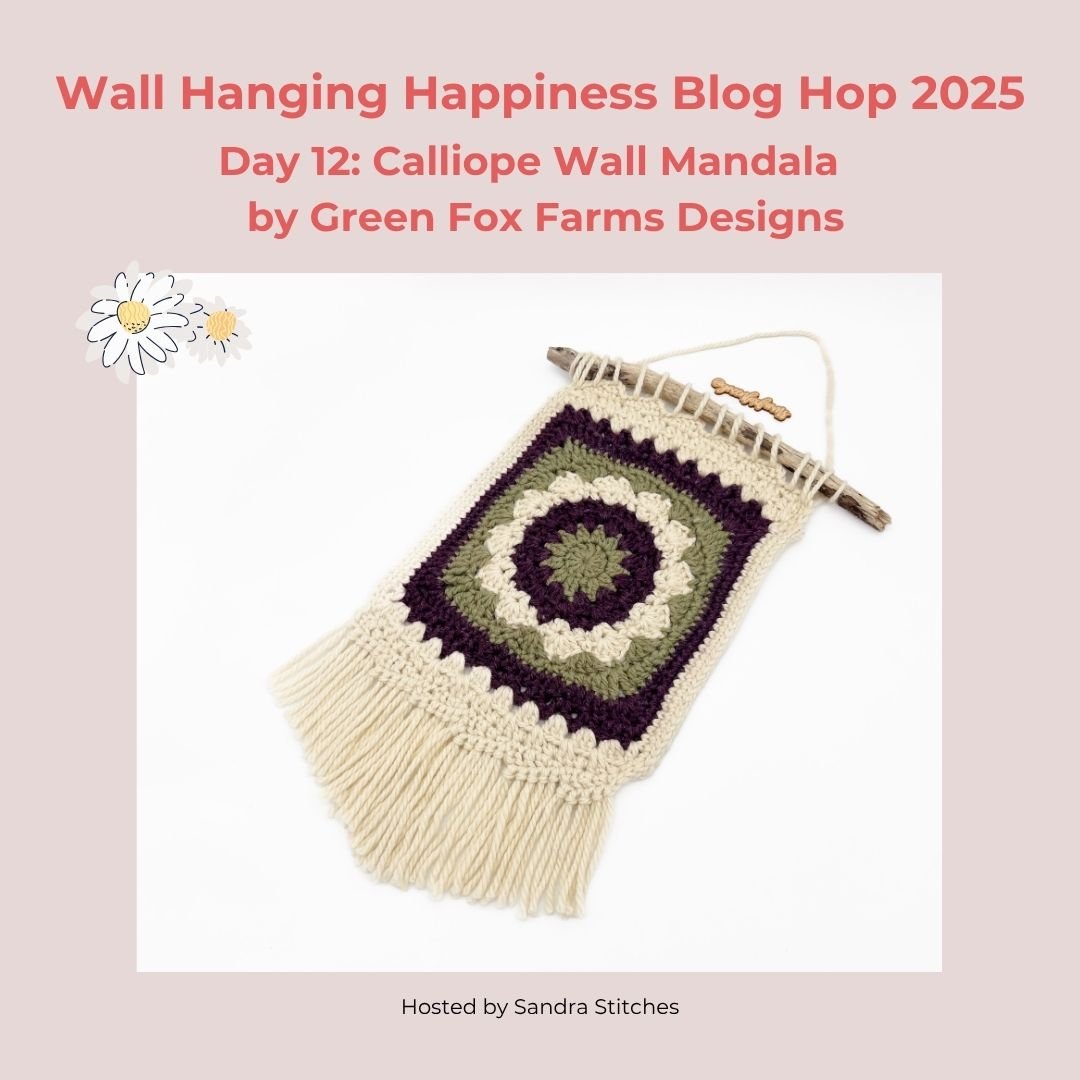
I’ve designed this pattern as part of the Wall Hanging Happiness Event by Sandra Stitches! 🧶💜 A blog hop event full of fun and free wall hanging patterns daily, to help you update your home this July 2025! Keep scrolling to find out more!
DISCLOSURE: This post may contain affiliate links. These allow me to make a small percentage from any purchase you may make, but do not affect the price you pay in any way. You can read all the details here –> Privacy Policy.
Free Crochet Mandala Pattern
This Free Crochet Mandala Pattern takes the classic circular mandala, and adds a little something extra! So you end up with a circular mandala shape, and an organic rectangle wall hanging with some nice boho fringe! While the results are distinct, this crochet mandala wall hanging is worked in the round. Working a rectangular shape in the round creates a softer, more organic feel. This stunning pattern was designed for intermediate crocheters who have masted the basic stitches, and offer a fun way to practice and refine your skills.
Free Crochet Wall Hanging Patterns
I’m super excited to be involved in this new crafty event with my crochet community! The Wall Hanging Happiness Event by Sandra Stitches, celebrates the artistry of multiple designers! Crafting together is better together, don’t you agree! Not only does this fun event foster our community, but also provides the opportunity for you to explore new talented fiber artists. All the crochet fun!
I’m thrilled to invite you to join me and 14 other talented crochet designers, in creating something extraordinary – Stunning Wall Hangings – as part of our exclusive Wall Hanging Happiness Event! Each designer brings their unique style to this event, allowing our communities to explore their creativity and skill. In all there will be 15 unique, free wall hanging patterns! Read on to discover more about my own CALLIOPE Crochet Mandala Wall Hanging pattern, to gather inspiration, update your walls, and connect with fellow crocheters.
About the Wall Hanging Blog Hop
The Wall Hanging Happiness Hop is a fun Follow-Along event that runs from July 1st – July 15th, 2025, hosted by Sandra Stitches! Wall Hangings are a fun way to update your walls or decor, make great gifts, and can be a fun way to learn new stitches and techniques! Each day in July 1-15, 2025, a new crochet pattern for the Wall Hanging Hop will be released on a different designer’s blog for FREE. There will be a total of 15 Wall Hangings with a different theme – making each design unique.
New to the world of blog hops? No sweat – it’s a piece of cake! Imagine it as a virtual scavenger hunt where you’ll uncover fresh designers to follow and get free patterns along the way. Simply “hop” from one blog to another, gathering the details of each free pattern. In this fun and easy process, you play a crucial role in helping to support each designer, while at the same time, enjoying the perks of receiving awesome, free crochet patterns.
Find out more about the event HERE!
What Is the Calliope Stitch Anyway?
It all began with an idea for a boho-inspired handbag. I wanted to design something that captured the playful charm of granny squares and full of color possibilities, but with my own unique twist. That’s how the Calliope wheel was born!
The first pattern to feature this design (and the one that gave it its name) was the Calliope Crossbody Boho Bag. This vibrant summer accessory quickly became a favorite. One of the things I loved most about it was the use of linked stitches, which gave the bag enough structure that it didn’t even need a liner. Plus, it’s generously sized and perfect as a day bag or even a stylish on-the-go project bag!
I knew I wasn’t done with the Calliope motif just yet. I had more ideas just waiting to burst forth, and soon new designs featuring the colorful Calliope wheel followed. The next pattern was my Calliope Wash Cloths, which included both a round and square version, and allowed me to bring that modified granny style full circle (and square)!
Next up was the Calliope Coasters. This free pattern that blends elements of both the original and the wash cloth designs. But around here, we like to keep things fun and a little unexpected. So when one of my testers said the coasters reminded her of a set that could be tucked inside a “plant pot” because of the cute picot edging, I couldn’t resist. I added a matching plant pot to the pattern so you’d have the most adorable little storage spot when the coasters aren’t in use!
Most recently came the biggest spin yet! The Calliope became the beautiful and colorful shell of a turtle! The Calliope No-Sew Turtle Amigurumi was an instant hit! All the fun of an amigurumi pattern, none of the sewing! The coolest part is that the turtle’s body can be removed from the Calliope Shell, allowing you to create and change out the shells, and allowing the pattern to be both realistic, and no-sew! I do love a fun challenge like this one – and you’ll love the detailed instructions and many photo tutorials to guide you through this adorable pattern!
There are 2 more Calliope Patterns in the design stages, one of which will be released later this summer. The other may take a little longer, but it’s worth it! So stay tuned for those equally fun and colorful patterns coming soon!
And best of all? Each one of the Calliope Wheel Patterns make GREAT Scrapbusters!! Woo hoo! 💜🧶
Like Free Patterns? Then make sure you check out my most popular Free Pattern –> Tiny Dinosaur Amigurumi! Want to see even more? You can find all of my other Free Crochet Patterns <– Right here!!
The CALLIOPE Crochet Mandala Wall Hanging
Make Your Own FREE Crochet Mandala Pattern!
Materials:
- YARN: Lion Brand Re-Spun Thick & Quick Super Bulky Weight 6 yarn (100% recycled polyester, 12 oz/340 g, 223 yds/204 m)
- YARDAGE: TOTAL: 140 – 160 yards Total, with 3 Colors, MAIN: 70-90 yds, ACCENTS: 25-50 yds each x2 colors
- Sample Colors: Olive Branch, Whipped Cream, and Cosmos
Experience Level: Intermediate
Pattern Key:
st(s) – stitch(es)
sp(s) – space(s)
sl st – slip stitch
ch – chain
sc – single crochet
hdc – half double crochet
dc – double crochet
tr – treble crochet
st dc – stacked dc – see special stitches
st tr – stacked tr – see special stitches
v-st – v-stitch – see special stitches
sc2tog – single decrease by sc 2 sts together
hdc3tog – half double decrease by hdc 2 sts together
BLO – back loop only
yo – yarn over
FO – fasten off
Special Stitches + Tutorials:
Magic Circle Tutorial: VIDEO TUTORIAL: https://youtu.be/iPx5PpxT8HA
STEP 1: Create a loop, place hook through the loop, yo and pull the yarn through the loop, keeping the loop open, not pulling the yarn tight, ch 2. STEP 2: Yo, insert hook back in circle, yo and pull up a loop through the circle. STEP 3: Yo again and pull through 1st 2 loops on the hook, yo and pull through last 2 loops on hook, dc completed! Repeat Steps 2-3 to create additional stitches. Hold stitches with one hand, gently pull yarn end to close the circle.
Stacked Double Crochet (st dc) Tutorial:
STEP 1: Single crochet in magic circle (or next st), insert hook into front vertical bar of single crochet, yo and pull up a loop, yo and pull through both loops on hook. St dc complete.
Stacked Treble Crochet (st tr) Tutorial:
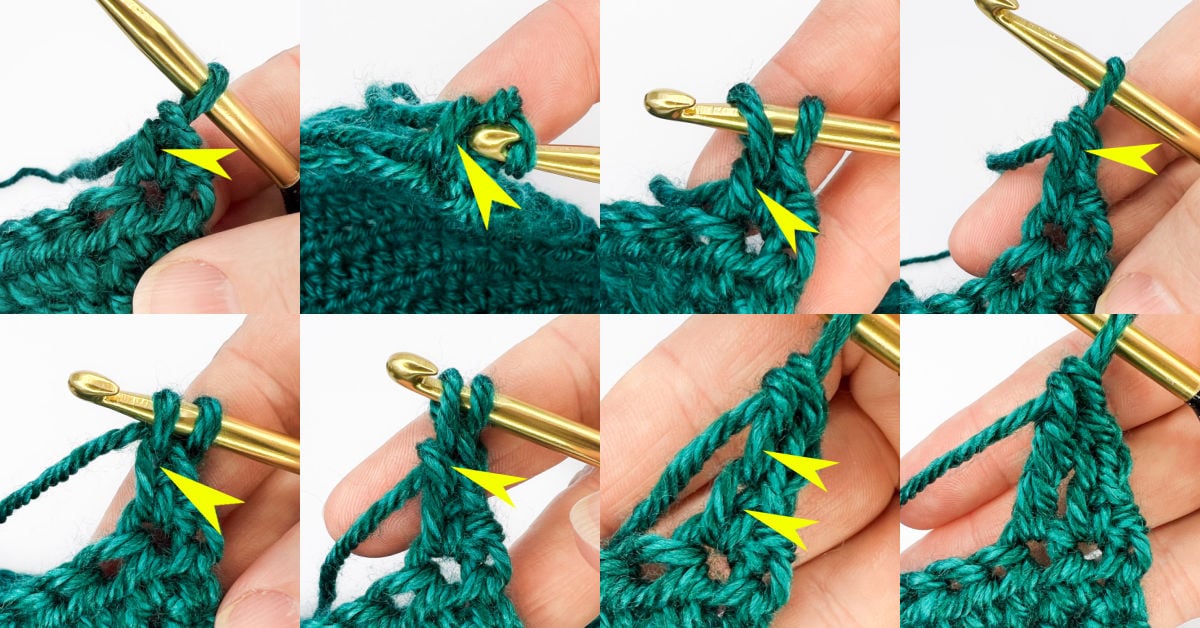
STEP 1: Stacked Treble Crochet (st tr): Sc, insert hook into front vertical bar of single crochet, yo and pull up a loop, yo and pull through both loops on hook.
STEP 2: Insert hook into next front vertical bar, yo and pull up a loop, yo and pull through both loops on hook. Stacked Treble Crochet (st tr) completed!
V-Stitch (v-st) Tutorial:
STEP 1: In the same stitch (dc, ch 1, dc). V-st completed.
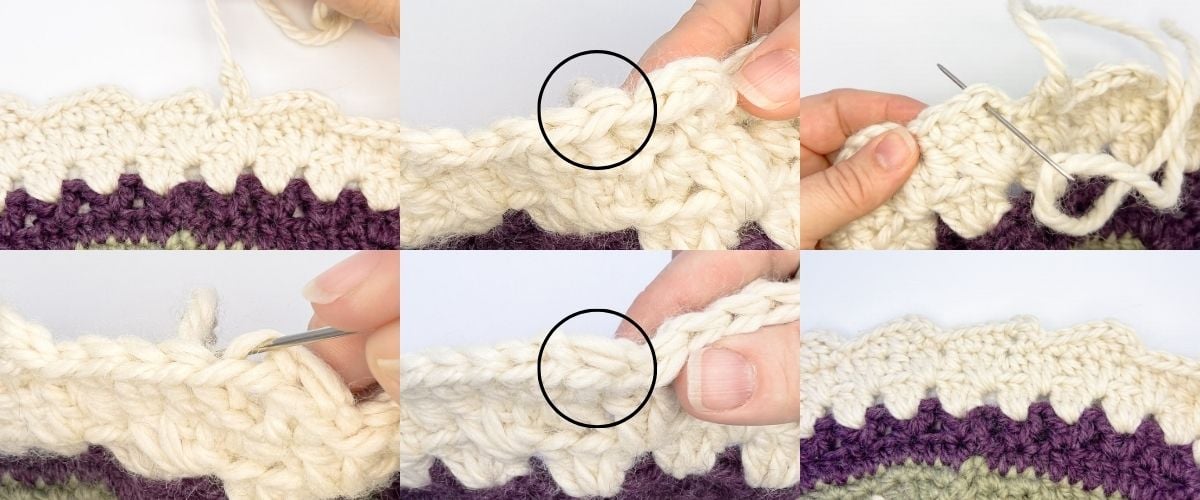
OPTIONAL INVISIBLE JOIN: (Video Tutorial: https://youtu.be/ngbIlUHOres)
STEP 1: Finish last stitch but do NOT sl st to join. Cut yarn, leave a 6 inch tail and pull on the loop on your hook until the yarn end pulls through. Thread the yarn end on an embroidery needle, or just use your hook.
STEP 2: From the front of your work, pass the yarn under the front and back loops of the first stitch of the round.
STEP 3: From the back of your work, pass the needle over the back loop of the last stitch and through the middle space between the front and back loop. Invisible join complete!
NOTES:
- Read through the entire pattern first.
- Beginning chain does not count as a stitch. First st of each round should be placed in the same st as beginning ch.
- Repeat stitches between [ and ] the number of times indicated.
- Place/work all stitches between ( and ) in the same stitch.
- Colors can be carried between rounds, just drop the yarn after the round is complete and pick it back up when you’re ready to use it. You can also cut the yarn after each round and weave in ends if you prefer a neater back.
- New colors should be joined in last stitch of the previous round at the final pull through for the final stitch.
- This pattern is FREE, and has been thoroughly tested and tech edited. Please feel free to share any comments or ask any questions you may have! I welcome your feedback!!
- This post and all it contains including the pattern and photographs are my intellectual property and copyright protected property of GreenFoxFarms LLC © 2025. You are welcome to make as many as you like to sell, giveaway, etc. You may NOT sell, or alter and claim as your own this pattern. You may not use my photographs. This pattern is not for mass production.
- If you want to share this pattern online, you must only share a link to my blog post. You may not copy and paste my text or the pattern to another site. Thank you for respecting my work.
- By using this pattern, you are agreeing to abide by these terms.
My Super Talented Testers!
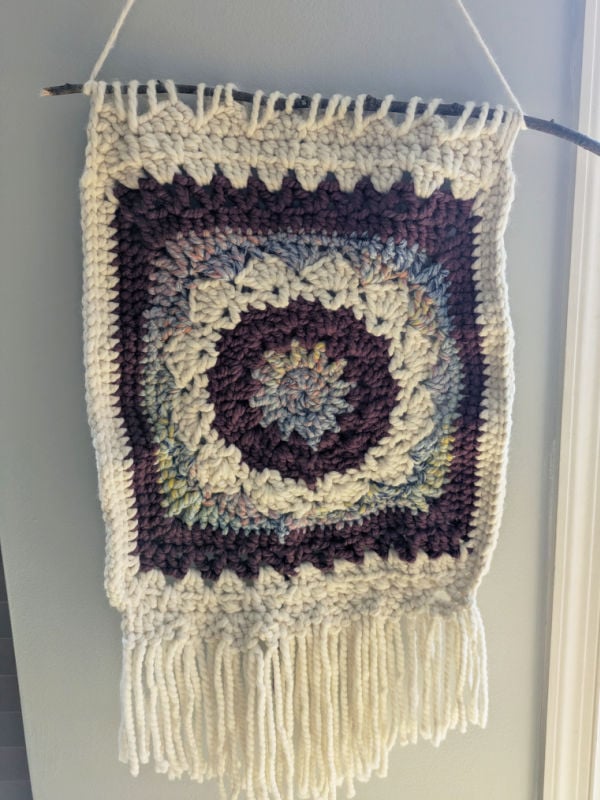
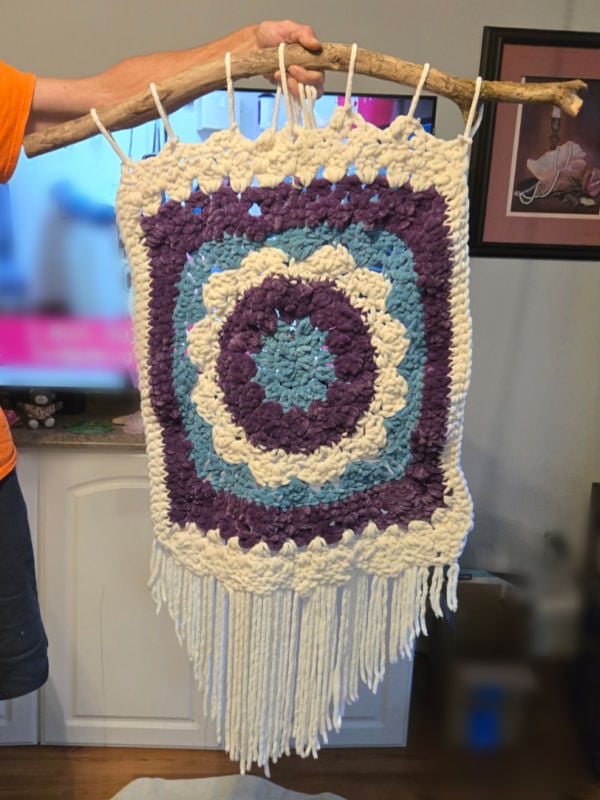
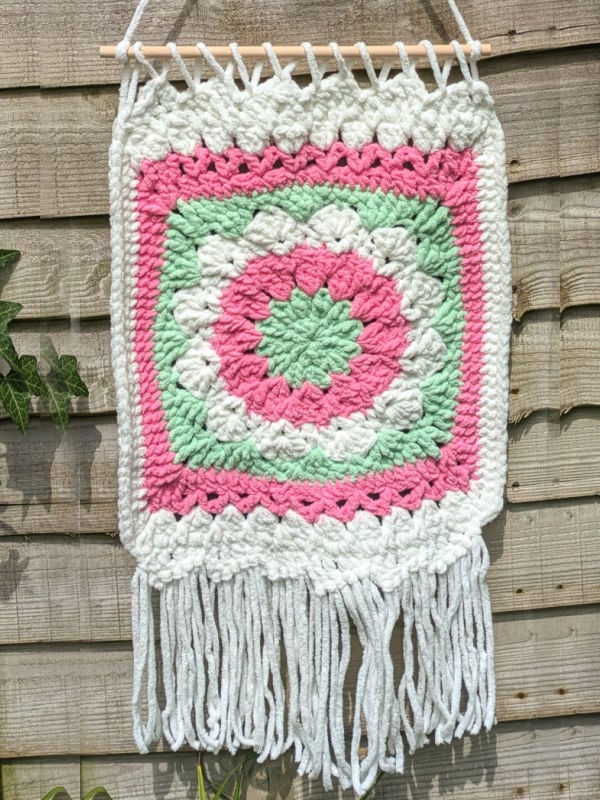
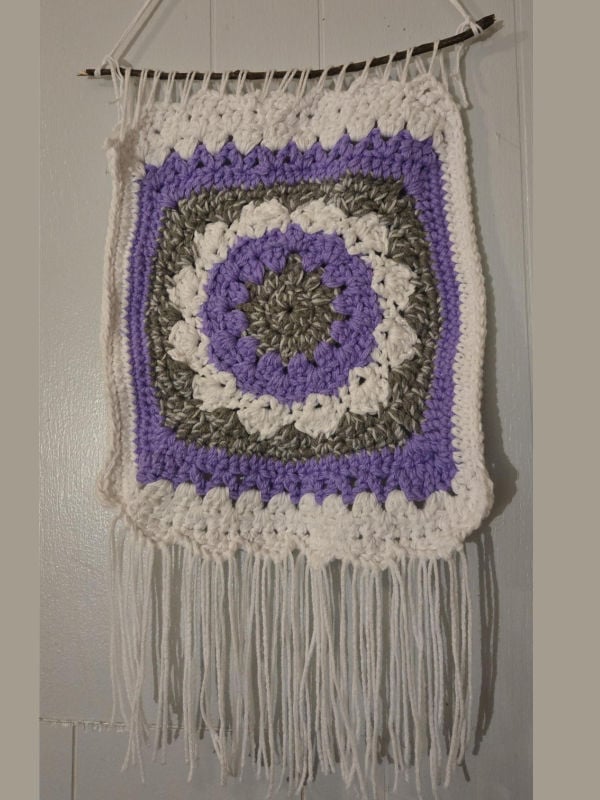
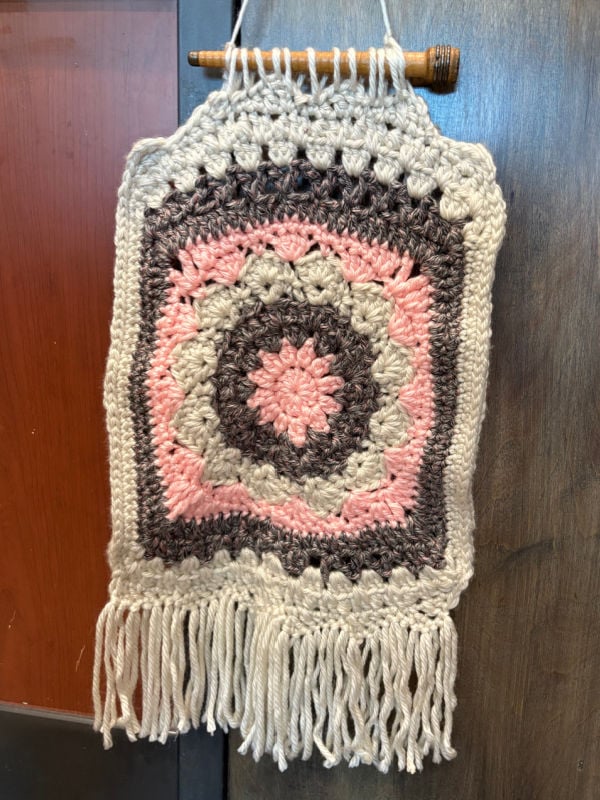
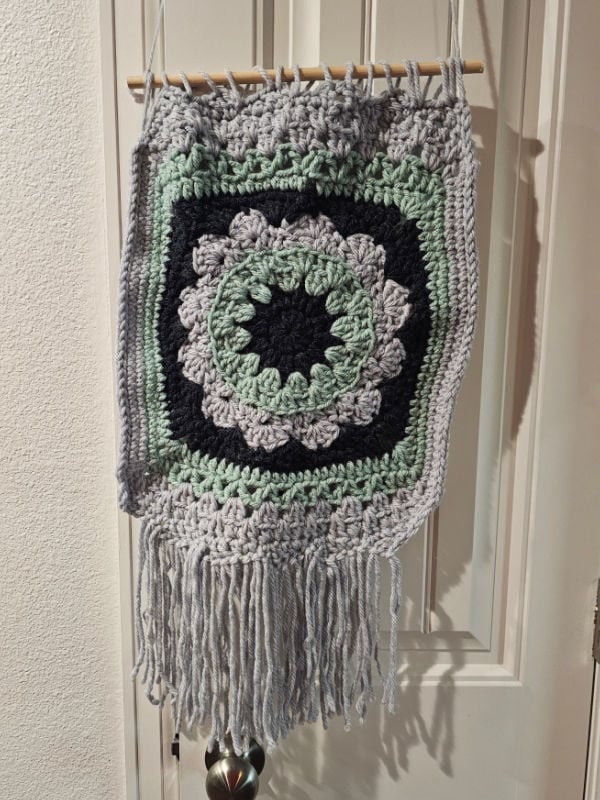
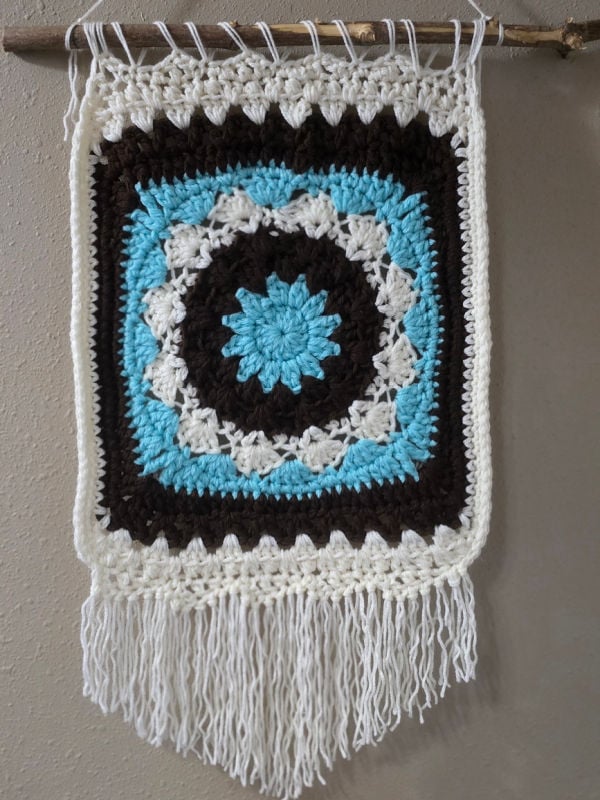
I am truly lucky to have such amazing pattern testers!! They worked so hard, creating their stunning mandalas and provided me with such great feedback about the CALLIOPE Crochet Mandala Wall Hanging pattern! I am so grateful for their help getting this pattern ready to share with y’all!
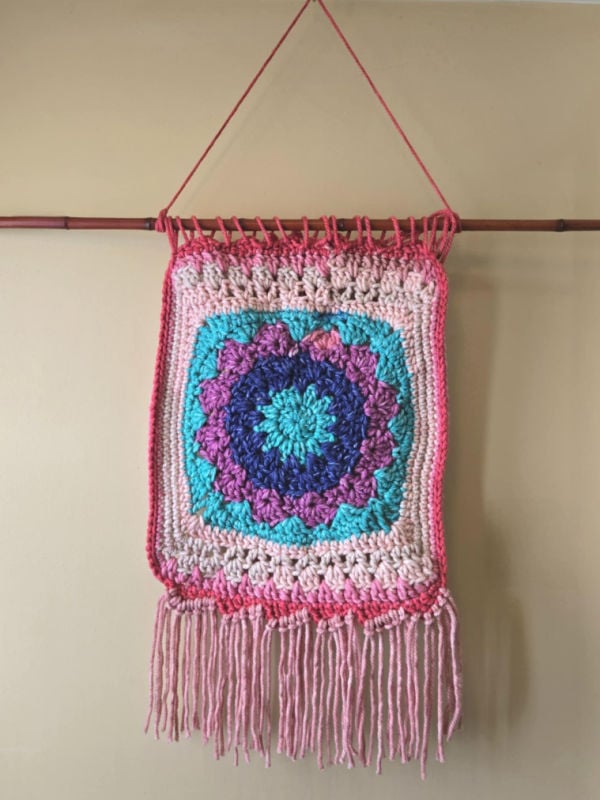
I adore getting to see the gorgeous projects you amazing hookers create with my designs! My fabulous testers are such an important part of creating the highest quality pattern that I can. Check out their stunning crochet mandala wall hangings they made with this pattern, below!
Thank you so much for testing the Calliope Crochet Mandala Wall Hanging Pattern Joanne Green, Tina Haneline, Sandra Strickler, Darcy Johnson, Kristin Enyart, Carol Schupp, Linda Woodthorpe, Stephanie Rhoads, and Mary Dredge.
Calliope Mandala Wall Hanging Pattern Release Details
This gorgeous crochet mandala wall hanging pattern is now available for purchase in my Etsy and Ravelry Shops! The pattern is free here on my blog, OR you can purchase the ad-free, printer friendly, PDF copy for a couple of dollars. The PDF also includes a detailed written instructions and photo tutorials as well as complete pattern support. I want you to succeed when you make my patterns and I’m here to help as needed.
I would love it if you would visit and save the pattern on your platform of choice, which helps my patterns get seen by more people and makes it easier for you to find it too! Thanks so much for your amazing support!! Just click the button below to find the pattern PDF available for purchase!
Do you love a discount? How about specials, exclusive sneak peeks, and giveaways? If so, you want to join my VIP List and/or Facebook Community where you can find all of those things AND a special coupon to use on patterns in my Etsy or Ravelry shop! In addition, my VIPs are the first to hear about new pattern releases, sales (some are exclusive to the group/list), CALs (crochet alongs) and lots of fun crochet discussions!
Pattern Download ETSY
Click the Buy NOW button below to purchase a Printer Friendly, Ad-Free, PDF Download FULL Premium version of the Calliope Crochet Mandala Wall Hanging Pattern on ETSY!
Pattern Download RAVELRY
Click the Buy NOW button below to purchase a Printer Friendly, Ad-Free, PDF Download FULL Premium version with photo tutorials of the Calliope Crochet Mandala Wall Hanging Pattern on RAVELRY!
Calliope Mandala on Wall Hanging Happiness Hop
I’m so excited to share that my Calliope Crochet Mandala Wall Hanging Free Pattern was featured on the Wall Hanging Happiness Blog Hop! The Wall Hanging Happiness Hop will help you with a fun way to update your walls or decor, all while getting to learn new stitches and techniques! Find a new featured pattern each day from 7/1/25 – 7/15/25! Each pattern is FREE to download for 24 hours only, so make sure to check back each day of the event! This fun event is hosted by Sandra Stitches.
The FREE Download day for the Calliope Mandala Wall Hanging Pattern has ended. However, the pattern is forever free to view here on my website. Just keep scrolling down to find the Free Pattern! You can also purchase an ad-free PDF from my shops, linked above. Happy Hooking!
FREE CROCHET MANDALA PATTERN:
CALLIOPE CROCHET MANDALA WALL HANGING:
Pattern Directions:
USING US K/10.5 6.5 MM – L/11 8.0 MM HOOK
Round 1: With Color 1, make a Magic Circle, ch 1, st dc and 11 dc in magic circle, sl st to join, (12 dc).
Round 2: Ch 1, (st dc, dc) in next st, 2 dc in next 11 sts, sl st to join, (24 dc). Drop Color 1.
Round 3: With Color 2, ch 1, (st dc, 2 dc,) in sp below join, [3 dc in sp between pairs of dc sts,] 11 times, sl st to join, (36 dc).
For Round 4, skipped stitch before sc2tog may be covered by the last double crochet.
Round 4: Ch 1, (st dc, 2 dc,) in sp below join, skip next st, sc2tog in BLO, [3 dc in sp between sts, skip next st, sc2tog in BLO,] 11 times, sl st to join, (12 sc, 36 dc). Drop Color 2.
Round 5: With Color 3, ch 1, [sc in BLO, v-st, sc2tog in BLO,] 12 times, sl st to join, (24 sc, 12 v-st).
Round 6: Ch 1, [sc, skip next st, 5 dc in ch-1 sp of v-st, skip next 2 sts,] 12 times, sl st to join, (12 sc, 60 dc). Drop Color 3.
Round 7: With Color 1, (st dc, 3 dc, ch 1,) skip next 2 sts, sc, ch 1, skip next 2 sts, [4 dc in next st, ch 1, skip next 2 sts, sc, ch 1, skip next 2 sts,] 11 times, sl st to join, (24 ch-1 sps, 12 sc, 48 dc).
Round 8 will create 4 corners. Skip over all ch-1 sps. Stitches in 4 dc groups in this pattern: (increase, st, st, increase). Scs will either: (increase) or form corner: (tr, ch 1, tr).
Round 8: Ch 1, [2 sc, sc in next 2 sts, 2 sc, skip ch-1, 2 sc in next st, skip ch-1, 2 sc, hdc in next 2 sts, 2 dc, skip ch-1, (tr, ch-1, tr,) in next st, skip ch-1, 2 dc, hdc in next 2 sts, 2 sc, skip ch-1, 2 sc, skip ch-1,] 4 times, sl st to join, (4 ch-1 sps, 56 sc, 16 hdc, 16 dc, 8 tr). Drop Color 1 and FO.
NOTE: Stitches worked in the corner spaces may cover the 1st stitch on the next side.
From Round 9 forward, we will begin adding vertical length to the mandala, so the stitches worked on the top and bottom edges of the mandala will vary from those used on the sides.
Round 9: With Color 2, ch 1, hdc in next 10 sts, dc in next 5 sts, (2 dc, ch 2, 2 dc,) in ch-1 sp, hdc in next 5 sts, sc in next 14 sts, hdc in next 5 sts, (2 dc, ch 2, 2 dc,) in ch-1 sp, dc in next 5 sts, hdc in next 14 sts, dc in next 5 sts, (2 dc, ch 2, 2 dc,) in ch-1 sp, hdc in next 5 sts, sc in next 14 sts, hdc in next 5 sts, (2 dc, ch 2, 2 dc,) in ch-1 sp, dc in next 5 sts, hdc in next 4 sts, sl st to join, (4 ch-2 sps, 28 sc, 48 hdc, 36 dc).
Round 10: Skip 1st st, (sl st, st dc, ch 1, dc,) in next st (v-st formed), [skip next 2 sts, v-st,] 4 times, skip next st, dc in next 2 sts, (dc, ch 2, sc,) in ch-2 sp, sc in next 28 sts, (sc, ch 2, dc,) in ch-2 sp, dc in next 2 sts, skip next st, v-st, [skip next 2 sts, v-st,] 7 times, skip next st, dc in next 2 sts, (dc, ch 2, sc,) in ch-2 sp, sc in next 28 sts, (sc, ch 2, dc,) in ch-2 sp, dc in next 2 sts, skip next st, [v-st, skip next 2 sts,] 2 times, v-st, skip next st, sl st to st dc to join, (4 ch-2 sp, 60 sc, 12 dc, 16 v-st). Drop Color 2 and FO.
In Round 11, v-sts will only have sts worked in the ch-1 sps, dcs of v-sts will be skipped.
Round 11: With Color 3, (sl st, ch 1, st dc, 2 dc,) in ch-1 sp of next v-st, [(3 dc,) in ch-1 sp of v-st,] 4 times, skip next st, (3 dc,) in next st, skip next st, (dc, ch-2, sc,) in ch-2 sp, sc in next 30 sts, (sc, ch 2, dc,) in ch-2 sp, skip next st, (3 dc,) in next st, skip next st, [(3 dc,) in ch-1 sp of v-st,] 8 times, skip next st, (3 dc,) in next st, skip next st, (dc, ch 2, sc,) in ch-2 sp, sc in next 30 sts, (sc, ch 2, dc,) in ch-2 sp, skip next st, (3 dc,) in next st, skip next st, [(3 dc,) in ch-1 sp of v-st,] 3 times, sl st to join, (4 ch-2 sp, 64 sc, 64 dc).
For Round 12 skipped stitch before the hdc2tog may be covered by the last double crochet.
Round 12: Ch 1, (st dc, dc) in sp below join, skip next st, hdc2tog in BLO next 2 sts, [2 dc in sp between sts, skip next st, hdc2tog in BLO of next 2 sts,] 5 times, sc in next st, (2 sc) in ch-2 sp, sc in next 32 sts, (2 sc) in ch-2 sp, sc in next st, [2 dc in sp between sts, skip next st, hdc2tog in BLO of next 2 sts,] 10 times, sc in next st, (2 sc) in ch-2 sp, sc in next 32 sts, (2 sc) in ch-2 sp, sc in next st, [2 dc in sp between sts, skip next st, hdc2tog in BLO of next 2 sts,] 4 times, sl st to join, (76 sc, 20 hdc, 40 dc).
Round 13, will have 6 peaks (5 sts) across the top and bottom of the hanging. Sl sts are worked in all sc, bringing them into the sides of the hanging to balance the shape.
Round 13: Ch 1, hdc, sc, sl st, [st tr, dc, hdc, sc, sl st,] 3 times, sl st in next 38 sts, [st tr, dc, hdc, sc, sl st,] 8 times, sl st in next 38 sts, [st tr, dc, hdc, sc, sl st,] 3 times, st tr, dc, in last 2 sts, invisible join, (62 sl st, 12 sc, 12 hdc, 12 dc, 12 st tr). FO and weave in ends. Continue with Finishing.
Finishing Calliope Crochet Mandala Wall Hanging:
ADDING THE FRINGE:
Step 1: Cut 32 pieces of Color 3 yarn, about 18 inches long.
Step 2: Insert hook upward through any st of bottom of Round 13, place center of a piece of yarn over the hook and pull it down creating a loop. Pull both ends of the yarn through the loop and tug gently at the ends to tighten.
Step 3: Repeat Step 2 for each of the 31 remaining sts on the bottom of Round 13. I placed 5 pieces of fringe on each “triangle” and the remaining 2 on the outer edges.
Step 4: Trim ends evenly. An easy way to do this is to lay the piece down on a table, with the fringe laid flat and neat. Place a piece (or 2) of masking tape across the fringe where you plan to cut. You can leave all pieces the same length, or use 2 pieces of tape to create a triangular shape for visual interest, which is my personal favorite.
ADDING THE STICK/DOWEL AND HANGER:
Step 1: Cut a length of yarn about 6 – 8 feet long depending on the thickness of your stick. With a tapestry needle, bring the yarn through the upper right corner stitch from the back. Place the stick along the top of the hanging. Stitch over the top of the stick and through the 3rd from right stitch, from back to front, then repeat in the same stitch.
Step 2: Continue whip stitching around the stick along the top of the hanging. Stitch into every 2nd or 3rd stitch, working from back to front. I placed a stitch near the peak and near the valley of my triangles. Keep your stitches loose enough to leave a 1-2” gap between the stick and the top of the hanging so the triangle edging is visible. Add an extra stitch at the end for extra security.
Step 3: Cut an additional length of yarn or string 2 – 4 feet long and tie to each end of the stick for hanging. An easy way to do this is create a slip knot on each end and adjust until you get the hanging length you like. Then conceal ends as desired – I like to tie the ends from the stitching and hanger together first, then weave in so they stay out of sight. Hang up your work!
If you enjoyed this washcloth crochet pattern and you would like to see more Free Crochet Patterns (<– like these) going forward, please help me grow by sharing Blog Post ❤️ and subscribe to my newsletter?!? You can use the social media buttons below the post to easily share! Thank you so much for your amazing support! If you have any questions or need assistance with the pattern, feel free to contact me or leave a comment on the blog. I would love to help!








oh this is so cute! Ive got some stash yarn that has been waiting for a pattern like this!!! cant wait to try it!