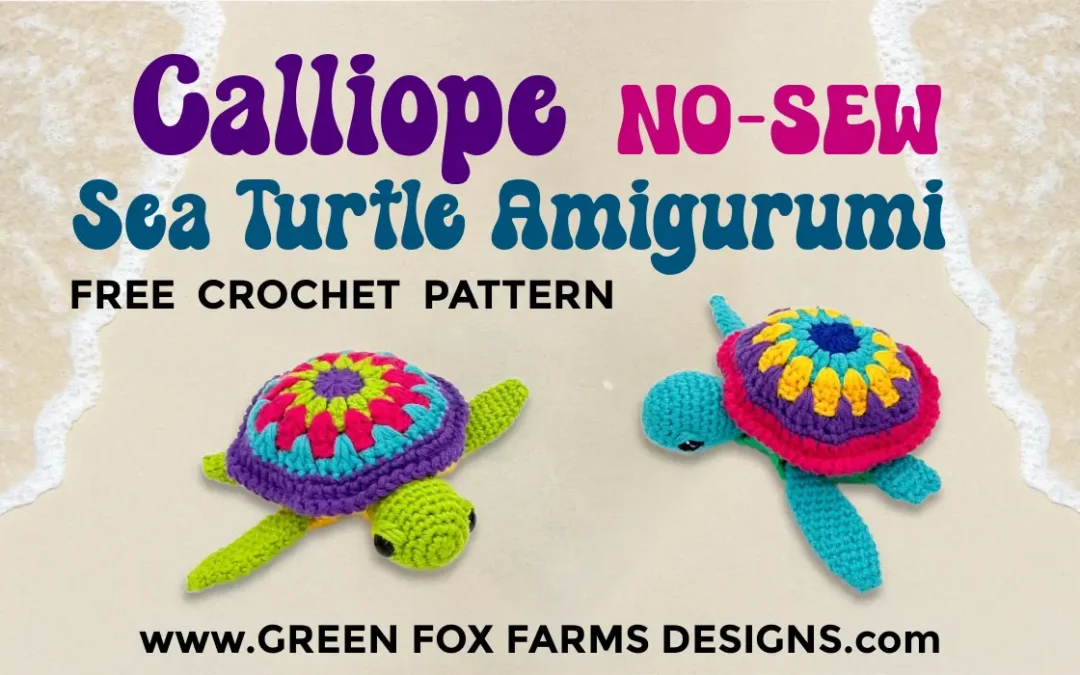
New Calliope the No-Sew Sea Turtle
Free Amigurumi Pattern!
Whew – this fun no-sew free sea turtle crochet pattern is bringing together so many of my favorite things in one place! Y’all know by now that amigurumi was my first love and my reason for learning to crochet in the first place! Add to that my passion for protecting the ocean and its diverse wildlife, especially those in danger of extinction… like many species of sea turtles! Plus I got to use the base of my Calliope Pattern (see more below!) to create a colorful and fun shell for your cute crochet turtle plushie!
And as always, I’m passing on the free sea turtle crochet pattern to you wonderful hookers! For you to craft your own cute and colorful, mini sea turtle amigurumi!
If I do say so myself, this is a great pattern, best suited to advanced beginners and intermediate crocheters! However, I have included very clear written instructions and many detailed tutorials to help you understand the trickier sections. So, adventurous beginner crocheters might quite easily be able to achieve this free n cute sea turtle project as well!
DISCLOSURE: This post may contain affiliate links. See my Privacy Policy for more infomation.

What Is the Calliope Crochet Shell?
It all started with an idea for a boho handbag. I wanted to create a pattern that had granny square vibes, perfect for playing with colors, but it needed a unique look. The Calliope wheel was born!
The first Calliope pattern (and namesake) was my Calliope Crossbody Boho Bag! This gorgeous summer bag was a definite hit, and I loved everything about the design. One of my favorite features is that this bag uses linked stitches to create a sturdy bag that doesn’t need a liner! It’s also generously sized so you can carry everything you need, including using it as a chic project bag on the go!
But I knew I wanted to do more with this pattern design, and so some more patterns utilizing the colorful Calliope wheel came later on. Next up was the Calliope Wash Cloths, featuring a round cloth that took and expanded on the Calliope wheel, and a square cloth that turned our granny riff back into a square again! Such fun!
Next up was the Calliope Coasters. This free pattern was created as a blend of the original and the wash cloth version. But we like to have a little fun with our patterns around here, so when a tester suggested that the coasters would make a cool set to tuck in a “plant pot” due to the picot edging I was game! So I added the plant pot to the pattern, so you can store your coasters in the cutest way possible when they’re not in use!
There are 2 more Calliope Patterns in the design stages, which will be released later this summer. So stay tuned for those equally fun and colorful patterns coming soon!
And best of all? Each one of the Calliope Wheel Patterns make GREAT Scrapbusters!! Woo hoo! 💜🧶
Join the 2025 Toy Box Crochet Along – Free Amigurumi CAL!
I’m super excited to be part of – and let you know about – this wonderful Toy Box CAL hosted by Underground Crafter! (March – August 2025). The event includes 4 fun mini CALs with a different theme and you’ll find a new pattern that fits the theme and is free on the designer’s blog each Monday of the event!
- Garden Friends (March 3 – April 7, 2025)
- Farm Friends (April 14 – May 19, 2025)
- Beach and Ocean (May 26 – June 30, 2025)
- Woodland Creatures (July 7- August 11, 2025)
I adore creating amigurumi patterns, and every time my kids try to adopt my creations immediately! All of my crochet animal patterns are Sew Cute!! 😍 My testers tell me, this happens to them alot too. How about you? If so, this Toy Box CAL is the solution to your “problem” because you’ll find dozens of cute new amigurumi friends to make, using professinoal patterns from talented designers across the web! So, I hope you’ll start by joining me on this journey as I craft this no-sew sea turtle amigurumi tutorial!
How To Join the 2025 Toy Box CAL
Read all the details on the main event post from Underground Crafter!
https://undergroundcrafter.com/2025/03/03/2025-toy-box-crochet-along/
Follow my Blog on Bloglovin’

Make a no-sew sea turtle plush with this free crochet pattern! Beginner-friendly instructions, step-by-step photos, and zero sewing required. 🧶🐢

Ocean Lovers Free Sea Turtle Crochet Pattern
Why the ocean? The ocean is the heart of our planet, and a marker for how well the earth is doing. Our seas produce over half of the oxygen we breathe, regulate our climate, and support a massive range of life, from tiny plankton to sea turtles to the largest whales. When our oceans suffer from pollution, overfishing, and rising temperatures, it disrupts this delicate balance.
If you’d like to learn more about the ocean or do more to help, I invite you to explore the Ocean Conservancy website HERE and consider getting involved where you can and supporting their mission! This is my personal favorite charity and the one both myself and my business contribute to!
Ready to bring your no-sew free amigurumi sea turtle pattern to life, stitch by stitch? This pattern post goes beyond the written instructions, offering a detailed photo tutorials that will guide you through the entire process! I will take you through the creation of your sea turtle amigurumi carefully describing and demonstrating each step, from stitching to assembling without a single sewn seam. This clear and detailed pattern will make even advanced beginners feel confident in tackling this project!
Tips for Making Your Sea Turtle Amigurumi Safe for Little Ones
Worried about those plastic safety eyes being a choking hazard for your babes and toddlers? No problem! It’s easy to adapt this no-sew free sea turtle crochet pattern for kid-safe fun. The best way to make stuffies safe for kids 3 and under (or kids of any age who put things in their mouths) is to use hand embroidery to create the eyes instead of using safety eyes.
Learn simple stitches like French knots and satin stitches to bring your sea turtles’s eyes, to life with a tapestry needle and scrap yarn! Instructions are included to embroider eyelids, and can be adapted to create eyes, mouths, and more to customize your no-sew sea turtle amigurumi! Not only is this safer for young children, but it also adds a unique, personalized touch to each prickly pal you make!
Like Free Patterns? Then make sure you check out my most popular Free Pattern –> DC Dice Bag & Tray! Want to see even more? You can find all of my other Free Crochet Patterns <– Right here!!

What I’m Watching & Listening To (While I Crochet)
I love to binge a series on Prime and/or book on Audible while I Crochet. I know that many of y’all do too! The simple, repetitive stitches of this adorable sea turtle amigurumi mean you can get into a rhythm and enjoy crocheting, while still leaving plenty of attention for that new show you’ve been dying to see. Plus, this no-sew amigurumi sea turtle is a relatively quick project, so you can easily finish your own in a few days time!
Right now, I’m obsessed with anything dystopian and/or fantasy, as always.
I’m really enjoying watching Handmaid’s Tale and planning to start watching Wheel of Time once I’ve finished that. I’ve seen the first 2 seasons, so that will be a rewatch for me before catching the third season too! And on Audible, I’m listening to Dragonfly in Amber the second book in the Outlander series by Diana Gabaldon and I’m also listening to The Familiar by Leigh Bardugo. I’ve read almost every book she’s written and they do not disappoint!
What are you watching and listening to these days? Tell me in the comments! 🧶💜
My No-Sew Sea Turtle Pattern Testers!
I have such amazing and dedicated pattern testers, y’all!! A grateful thank you to my fabulous pattern testers for talents in creating such adorable amigurumi projects, for test crocheting the no-sew sea turtle crochet pattern and offering your feedback! I couldn’t do this without you amazing hookers!
It truly makes my day getting to see the ami-adorable projects y’all create from my designs! My amazing pattern testers play a very important role in bringing you the highest quality patterns that I can. Check out their just gorgeous and colorful Calliope No-Sew Sea Turtle amigurumis made using my pattern, below!
Thank you so much for testing the No-Sew Amigurumi Calliope Sea Turtle Crochet Pattern: Beryl Wilson Hartmann, Lisa Reinsch-Johnson, Nicolle Watts, Sara Harris, Anjonette Pezan, Carissa Lindsay, Kami Jones, Linda Woodthorpe, Collene Van Noord, Cheryl Klassen, Gail Halling, and Angela Livingston!


Calliope No-Sew Free Sea Turtle Crochet Pattern is featured on the Toy Box Crochet Along!
I’m so excited to be a part of the Toy Box Crochet Along with CAL Central! The organizers have put together an amazing Event to celebrate creating dolls and stuffies and amigurumi! Not only can you find a Brand NEW FREE Crochet Pattern every Monday from March 3 – August 11, but you can win prizes from some amazing crafting companies too!
This event is hosted in the CAL Central Facebook and Ravelry groups to bring you free crochet patterns for creating cute and cuddly stuffies. You can make them to keep, as gifts or even donate them to charity. The Toy Box CAL offers a great opportunity to connect with fellow crocheters and enjoy the creative process.
The Calliope No-Sew Free Sea Turtle Crochet Pattern is the featured CAL Pattern for the week of June 23 – June 29, 2025!
EVENT DETAILS:
Every Monday from March 3 to August 11, 2025, we’ll share a free crochet pattern for a toy! These toys can include dolls, amigurumi, plushies, and more. The Toy Box CAL will include four themed mini CALs:
- Garden Friends (March 3-April 7)
- Farm Friends (April 14-May 19)
- Beach and Ocean (May 26-June 30)
- Woodland Creatures (July 7-August 11)
How To Join the 2025 Toy Box CAL
Read all the details on the main event post from Underground Crafter!
https://undergroundcrafter.com/2025/03/03/2025-toy-box-crochet-along/
Join the Crochet Along Group on Facebook:
https://www.facebook.com/groups/CALCentral/
Join the Crochet Along on Ravelry:
https://www.ravelry.com/discuss/cal-central-crochet/topics/4342580

MAKE A FREE SEA TURTLE CROCHET PATTERN!
A really fun and easy Ami NO-SEW FREE Sea Turtle Crochet Pattern!
Materials:
- YARN: Paintbox Aran Worsted Weight 4 yarn (100% cotton, 1.7 oz/50 g, 93 yds/85 m)
- YARDAGE: 100 – 140 total
- Body (Color 7): 50-60 yds
- Shell Bottom (Color 6): 30-40 yds
- Shell Top: 5-8 yds each of Colors 1-5
Size: (Sizing is approximate)
SHELL: 5” diameter x 2.5” tall
BODY: 6” head to tail x 7” fin to fin
Experience Level: Advanced Beginner/Easy – Intermediate
Gauge: 22 sc x 22 rows = 4” square
Gauge is not very important.
Pattern Key: Written in US English Crochet Terms
st(s) – stitch(es)
sp(s) – space(s)
ch – chain
sl st – slip stitch
sc – single crochet
hdc – half double crochet
dc – double crochet
sc2tog – decrease by sc 2 sts together
SPdc – spike stitch double crochet
st dc – stacked double crochet
3rd lp – crochet in third loop of hdc
BLO – back loop only
FLO – front loop only
yo – yarn over
FO – fasten off


Free No-Sew Sea Turtle Crochet Pattern Instructions (Step-by-Step)
Special Stitches:
OPTIONAL Invisible Decrease (sc2tog): Insert hook in next st, yo, pull up a loop, insert hook in FLO of next st, yo, pull up a loop, yo and pull through all 3 loops on hook. Invisible sc2tog.
Stacked Double Crochet (st dc) Tutorial: Single crochet in magic circle (or next st), insert hook into front vertical bar of single crochet, yo and pull up a loop, yo and pull through both loops on hook. St dc complete.
Crocheting in 3rd Loop: The 3rd loop is found on the wrong/bottom side, just below the working loops or 1st and 2nd loop. Turn the working (1st & 2nd) loops toward you, then a little further so you can see the wrong side of the last row. Find the loop just past the 2nd loop, this is the 3rd loop you will be working your stitches into. Work your stitches just as you would in the 1st and 2nd loops.
OPTIONAL INVISIBLE JOIN: (Video Tutorial: https://youtu.be/ngbIlUHOres)
STEP 1: Finish last stitch but do NOT sl st to join. Cut yarn, leave a 8 inch tail and pull on the loop on your hook until the yarn end pulls through. Thread the yarn end on an embroidery needle, or just use your hook.
STEP 2: From the front of your work, pass the yarn under the front and back loops of the first stitch of the round.
STEP 3: From the back of your work, pass the needle over the back loop of the last stitch and through the middle space between the front and back loop. Invisible join complete!
Spike Stitch Double Crochet (SPdc): Instead of working in the next stitch, you will work into the previous round – one round down as indicated by the pattern. Yo, insert hook in stitch/space one round below, yo and pull up loop, yo and pull through first 2 loops, yo again and pull through both loops. SPdc completed.

FOR TURTLE BODY:
Magic Circle SINGLE CROCHET Tutorial: https://youtu.be/biDTzo6IRiQ (aka magic ring)
STEP 1: Create a loop with yarn, place hook through the loop, yo and pull the yarn through the loop, keeping the loop open in a circle instead of pulling the yarn tight.
STEP 2: Ch 1, insert hook back in circle, yo and pull up a loop through the circle.
STEP 3: Yo again and pull through the 2 loops on the hook, 1 sc completed! Repeat Step 2 to create additional stitches. Hold stitches with one hand, gently pull yarn end with other hand to close the circle.
FOR TURTLE SHELL:
Magic Circle DOUBLE CROCHET Tutorial: https://youtu.be/iPx5PpxT8HA
STEP 1: Create a loop, place hook through the loop, yo and pull the yarn through the loop, keeping the loop open, not pulling the yarn tight, ch 2.
STEP 2: Yo, insert hook back in circle, yo and pull up a loop through the circle.
STEP 3: Yo again and pull through 1st 2 loops on the hook, yo and pull through last 2 loops on hook, dc completed! Repeat Steps 2-3 to create additional stitches. Hold stitches with one hand, gently pull yarn end to close the circle.
NOTES:
- Read through the entire pattern first to familiarize yourself with the process.
- Turtle is worked in 2 separate pieces – the shell and the body.
- Shell Top is created, then shell bottom is worked on the bottom, in the third loop of hdc.
- Body is created as a separate piece and is inserted into the shell through openings in the shell bottom.
- Body is largely worked in continuous rounds (Head, Tail, Flippers). Mark 1st st of these rounds with a stitch marker.
- Belly is worked in rows, joined to head. Then worked in the round ending in tail.
- Flippers are directly crocheted onto openings created on the body.
- Repeat stitches between [ and ] the number of times indicated.
- New colors should be joined in the last stitch of the previous round at the final pull through for the sc stitch for best results.
- This pattern is FREE, and has been thoroughly tested and tech edited. Please feel free to share any comments or ask any questions you may have! I welcome your feedback!!
- This post and all it contains including the pattern and photographs are my intellectual property and copyright protected property of GreenFoxFarms LLC © 2025. You are welcome to make as many as you like to sell, giveaway, etc. You may NOT sell, or alter and claim as your own this pattern. You may not use my photographs. This pattern is not for mass production.
- If you want to share this pattern online, you must only share a link to my blog post. You may not copy and paste my text or the pattern to another site. Thank you for respecting my work.
- By using this pattern, you are agreeing to abide by these terms.

Pattern Release Details:
This adorable No-Sew amigurumi Sea Turtle crochet pattern is now available for purchase in my Ravelry and Etsy shops! If you love the pattern, will you please go and show it some love ❤️ on the platform of your choice, which not only helps YOU easily find it quickly in your faves, but it will also help my patterns to get seen by more people! Thank you so much friends!! 🙂 The links below will take you to this Sea Turtle Crochet Pattern in my Ravelry or Etsy shop, so you can shop at your favorite place to buy the pattern now or save it for later!
Do you love discounts? I mean, you’re human right?? If YES then you will love my VIP List and/or Facebook Community where you can find a coupon to use on patterns in my Etsy or Ravelry shop! Also, my VIPs are the first to hear about new pattern releases, sales (some are exclusive to my VIPs only!), CALs (crochet alongs) ← (There’s a NEW one starting in April!) and lots of fun crochet discussions!
Pattern Download RAVELRY
Click the Buy NOW button below to purchase a Printer Friendly, Ad-Free, FULL PDF Pattern Download version including many more detailed photo tutorials of the Amigurumi No-Sew Calliope the Sea Turtle Crochet Pattern on RAVELRY!
Pattern Download ETSY
Click the Buy NOW button below to purchase a Printer Friendly, Ad-Free, FULL PDF Version Download: including many more detailed photo tutorials of the Amigurumi No-Sew Calliope the Sea Turtle Crochet Pattern on ETSY!


FREE SEA TURTLE CROCHET PATTERN:
No-Sew Amigurumi Pattern Directions:
USING E/4 3.5 MM OR F/5 3.75 MM HOOK
TURTLE SHELL:
SHELL TOP:
Round 1: With Color 1, make a Magic Circle, ch 1, st dc and 11 dc in magic circle, sl st to join, (12 dc). Drop Color 1 and FO.
Round 2: With Color 2, ch 1, (st dc, dc) in next st, 2 dc in next 11 sts, sl st to join, (24 dc).
Round 3: Ch 1, sc in each st around, sl st to join, (24 sc). Drop Color 2 and FO.
For Round 4, you will work over Round 3, into the spaces between stitches of Round 2.
Round 4: With Color 3, ch 1, (3 SPdc,) in sp below join of round 2, [3 SPdc in sp between pairs of dc sts of round 2,] 11 times, sl st to join, (36 SPdc).
Round 5: Ch 1, sc in each st around, sl st to join, (36 sc). Drop Color 3 and FO.
For Round 6 you will work over Round 5, into the stitches and spaces between stitches of Round 4. The skipped stitch before sc2tog may be covered by the last double crochet.
Round 6: With Color 4, ch 1, (3 SPdc,) in sp below join of round 4, skip next st, sc2tog in BLO next 2 sts, [3 SPdc in sp between sts, skip next st, sc2tog in BLO of next 2 sts,] 11 times, sl st to join, (12 sc, 36 SPdc).
Round 7: Ch 1, sc in each st around, sl st to join, (48 sc). Drop Color 4 and FO.
Round 8: With Color 5, ch 1, [hdc in next 3 sts, 2 hdc in next st,] 12 times, sl st to join, (60 hdc).
Round 9: [Ch 1, sl st in next st,] 60 times, sl st or invisible join. FO and weave in ends. Continue with Shell Bottom.

USING E/4 3.5 MM OR F/5 3.75 MM HOOK
SHELL BOTTOM:
For Round 10 you will work in the 3rd loop of the hdc of Round 8 to form shell bottom.
Round 10: With Color 6, join to 1st st of Round 8 with a sl st and ch 1, sc in 3rd loop each st around, sl st to join, (60 sc).
Round 11: Ch 1, [sc in next 8 sts, sc2tog,] 6 times, sl st to join, (54 sc).
Round 12: Ch 1, [sc in next 4 sts, sl st in next 5 sts,] 2 times, sc in next 4 sts, sl st in next 7 sts, [sc in next 4 sts, sl st in next 5 sts,] 2 times, sc in next 4 sts, sl st in next 3 sts, sl st to join, (30 sl sts, 24 sc).
Round 13: Ch 1, [sc in next 4 sts, ch 5 and skip next 5 (sl) sts,] 2 times (2 flipper openings formed), sc in next 4 sts, ch 7 and skip next 7 (sl) sts (head opening formed), [sc in next 4 sts, ch 5 and skip next 5 (sl) sts,] 2 times, (2 flipper openings formed), sc in next 4 sts, ch 3 and skip next 3 (sl) sts (tail opening formed), sl st to join, (1 ch-3 sp, 1 ch-7 sp, 4 ch-4 sp, 24 sc).
Round 14: Ch 1, [sc in next 4 sts, 6 sc evenly in ch-5 sp,] 2 times, sc in next 4 sts, 8 sc evenly in ch-7 sp, [sc in next 4 sts, 6 sc evenly in ch-5 sp,] 2 times, sc in next 4 sts, 4 sc evenly in ch-3 sp, sl st to join, (60 sc).
Round 15: Ch 1, [sc in next 8 sts, sc2tog,] 6 times, sl st to join, (54 sc).
Round 16: Ch 1, [sc in next 7 sts, sc2tog,] 6 times, sl st to join, (48 sc).
Round 17: Ch 1, [sc in next 2, sc2tog,] 12 times, sl st to join, (36 sc).
Round 18: Ch 1, [sc, sc2tog,] 12 times, sl st to join, (24 sc).
Round 19: Sl st in each st around, sl st to join, (24 sl sts). FO and weave in ends. Set aside Shell. Continue with Turtle Body.
USING E/4 3.5 MM OR F/5 3.75 MM HOOK
TURTLE BODY:
HEAD:
- Do not join, work in continuous rounds using a stitch marker.
Round 1: Make a Magic Circle with Color 7. Ch 1, 6 sc in magic circle, (6 sc).
Round 2: 2 sc in each st around, (12 sc).
Round 3: [Sc, 2 sc in next st,] 6 times, (18 sc).
Round 4: Sc in each st around, (18 sc).
Round 5: [Sc in next 2 sts, 2 sc in next st,] 6 times, (24 sc).
Rounds 6-9: Sc in each st around, (24 sc, 4 rounds).
Round 10: [Sc in next 2 sts, sc2tog,] 6 times, (18 sc).
Rounds 11-12: Sc in each st around, (18 sc, 2 rounds).
STOP HERE AND ADD SAFETY EYES
** IMPORTANT: Where the stitch marker is marking the 1st stitch at the end of round 12 is the approximate center of the bottom of the turtle head. (See the red stitch marker in the next set of photos.) Add eyes between rounds 6 and 7, on either side of the head. Leave the same number of stitches between them on top/ bottom. The number of stitches will vary based on eye size. I have about 9 stitches between my 14 mm eyes. You can also embroider eyes, for young children this is the safest method. Or if using felt eyes, glue eyes after the turtle body is complete.
Round 13: [Sc, sc2tog,] 6 times, (12 sc).
Rounds 14-15: Sc in each st around, (12 sc, 2 rounds).
Round 16: [Sc, 2 sc in next st,] 6 times, (18 sc).
Rounds 17-18: Sc in each st around, (18 sc, 2 rounds). Stuff the head, taking care not to overstuff. Continue with Belly.

USING E/4 3.5 MM OR F/5 3.75 MM HOOK
BELLY:
- You will now begin working back and forth in rows to form the center/belly.
- You will not work into the slip stitches used to join even Belly rows to the head.
Rows 20-27 of Belly should be lined up with center of head between eyes. If positioning is off on your belly you can adjust by moving starting point at Row 20 back a stitch or 2.
Row 20: Ch 9, sl st in 2nd ch from hook, sc in next 6 chs, 2 sc in last ch, sl st in next 2 sts of Round 18, turn, (8 sc).
Row 21: No ch-1, sc in all 8 scs of Row 20, skip the sl st and turn, (8 sc).
Row 22: Ch 1, sc in each st, sl st in next 2 sts of Round 18, turn, (8 sc).
Rows 23-27: Repeat Rows 21-22, (8 sc, 5 rows).

Row 28: Ch 3, skip next 2 sts, (fin hole formed) sc in next 4 sts, ch 2, skip next 2 sts (fin hole formed), sl st in next st of Round 18, turn, (ch-2 sp, ch-3 sp, 4 sc).
Row 29: Ch 1, sc in next 2 chs, sc in next 4 sts, sc in next 2 chs, turn, (8 sc).
For even Rows 30-46 you will only sl st into 1 st of Round 18. This allows the number of rows to increase, creating a larger top of the body, which will give more shape to the shell.
Row 30: Ch 1, sc in each st across, sl st in next st of Round 18, turn, (8 sc).
Row 31: No ch-1, sc in each st across, turn, (8 sc).
Rows 32-46: Repeat Rows 30-31, (8 sc, 15 rows).
For Row 47 you will work between row 46 and beginning row 20 to seam them together and also to create the other 2 fin holes.
Row 47: Sl st in 1st 2 sts of row 20, ch 1, sc in next st of row 20, then skipping the 1st 2 sts of row 46, sl st to the 3rd st of row 46 (fin hole formed), [sc in next st of 20, then sl st in next st of 46,] 3 times, sl st in last 2 sts of row 46, ch 1, sl st to the final ch/sl st of row 20 skip last 2 sts (fin hole formed), (4 sl st, 4 sc).

We will now work in the round to close the end of the turtle and form the tail.
Round 48: Ch 1, working around, work sc in the end each row, all the way around, sl st to join, (28 sc).
Round 49: Ch 1, [sc in next 5 sts, sc2tog,] 4 times, sl st to join, (24 sc).
Round 50: Ch 1, [sc in next 2 sts, sc2tog,] 6 times, sl st to join, (18 sc).
Round 51: Ch 1, sc in each st around, (18 sc).
Round 52: Ch 1, [sc in next st, sc2tog,] 6 times, sl st to join, (12 sc).
STOP HERE AND STUFF THE BODY
** Some of my testers found it easier to drop the yarn here and add the flippers before stuffing the body, then finish the tail after.
TAIL:
- Do not join, work in continuous rounds using a stitch marker.
Round 53: Sc2tog 6 times, (6 sc).
Rounds 54-56: Sc in each st around, (6 sc, 3 rounds).
Round 57: [Sc in next st, skip next st,] 3 times, sl st to join, (3 sc). FO and use the yarn end to close any opening in the tail. Weave in ends. I did not stuff my tail.
USING E/4 3.5 MM OR F/5 3.75 MM HOOK
FLIPPERS:
FRONT RIGHT FLIPPER:
Right side when looking at belly of turtle
- Do not join, work in continuous rounds using a stitch marker. Do not stuff.
- Increases for the Front Right Flipper will be on the inner/body side, decreases on the outer side, both moving front to back.
Round 1: With Color 7, join to top left st in the opening with a sl st and ch 1, work 6 sc evenly around flipper opening in chs and sts, (6 sc).
Rounds 2-4: Sc in each st around, (6 sc, 3 rounds).
Round 5: Sc in next 4 sts, 2 sc in next 2 sts, (8 sc).
Round 6: Sc in next 5 sts, 2 sc in next 2 sts, sc in next st, (10 sc).
Round 7: Sc in next 6 sts, 2 sc in next 2 sts, sc in next 2 sts, (12 sc).
Round 8: Sc in each st around, (12 sc).
Round 9: Sc2tog 2 times, sc in next 3 sts, 2 sc in next 2 sts, sc in next 3 sts, (12 sc).
Round 10: Repeat Round 8.
The fin should be curving back toward the body with these increases and decreases. If the positioning is off on your fin, you can adjust each round to move the inc or dec by a couple of stitches by adjusting the location of your first stitch of the round marker.
Round 11: Sc2tog, sc in next 5 sts, 2 sc in next st, sc in next 4 sts, (12 sc).
Round 12: Repeat Round 8.
Rounds 13-14: Repeat rounds 11-12.
Round 15: Sc2tog, sc in next 8 sts, sc2tog, (10 sc).
Round 16: Sc2tog, sc in next 6 sts, sc2tog, (8 sc).
Round 17: Sc2tog, sc in next 4 sts, sc2tog, sl st to join, (6 sc). FO and use the yarn tail to close any opening and weave in the end.

USING E/4 3.5 MM OR F/5 3.75 MM HOOK
FRONT LEFT FLIPPER:
Left side when looking at belly of turtle
- Do not join, work in continuous rounds using a stitch marker. Do not stuff.
- Increases for the Front Left Flipper will be on the inner/body side, decreases on the outer side, both moving front to back.
Round 1: With Color 7, join to top right st in the opening with a sl st and ch 1, work 6 sc evenly around flipper opening in chs and sts, (6 sc).
Rounds 2-4: Sc in each st around, (6 sc, 3 rounds).
Round 5: Sc in next 2 sts, 2 sc in next 2 sts, sc in next 2 sts, (8 sc).
Round 6: Sc in next 3 sts, 2 sc in next 2 sts, sc in next 3 sts, (10 sc).
Round 7: Sc in next 4 sts, 2 sc in next 2 sts, sc in next 4 sts, (12 sc).
Round 8: Sc in each st around, (12 sc).
Round 9: Sc2tog 2 times, sc in next 3 sts, 2 sc in next 2 sts, sc in next 3 sts, (12 sc).
Round 10: Repeat Round 8.
The fin should be curving back toward the body with these increases and decreases. If the positioning is off on your fin, you can adjust each round to move the inc or dec by a couple of stitches by adjusting the location of your first stitch of the round marker.
Round 11: Sc, sc2tog, sc in next 5 sts, 2 sc in next st, sc in next 3 sts, (12 sc).
Round 12: Repeat Round 8.
Rounds 13-14: Repeat rounds 11-12.
Round 15: Sc2tog 2 times, sc in next 8 sts, (10 sc).
Round 16: Sc2tog 2 times, sc in next 6 sts, (8 sc).
Round 17: Sc2tog, sc in next 4 sts, sc2tog, sl st to join, (6 sc). FO and use the yarn tail to close up opening and weave in the end.
USING E/4 3.5 MM OR F/5 3.75 MM HOOK
BACK RIGHT FLIPPER:
Right side when looking at belly of turtle
- Do not join, work in continuous rounds using a stitch marker. Do not stuff.
- Increases for the Back Right Flipper will be on the inner/body side, decreases on the outer side, both moving front to back.
Round 1: With Color 7, join to top left st in the opening with a sl st and ch 1, work 6 sc evenly around flipper opening in chs and sts, (6 sc).
Rounds 2-3: Sc in each st around, (6 sc, 2 rounds).
Round 4: Sc in next 4 sts, 2 sc in next 2 sts, (8 sc).
Round 5: Sc in next 5 sts, 2 sc in next 2 sts, sc in next st, (10 sc).
Rounds 6-8: Sc in each st around, (10 sc, 3 rounds).
Round 9: Sc in next 2 sts, sc2tog 2 times, sc in next 4 sts, (8 sc). Sl st to join and FO leaving a long tail. Flatten the flipper and use the yarn end to stitch both sides together at the end.
BACK LEFT FLIPPER:
Left side when looking at belly of turtle
- Do not join, work in continuous rounds using a stitch marker. Do not stuff.
- Increases for the Back Left Flipper will be on the inner/body side, decreases on the outer side, both moving front to back.
Round 1: With Color 7, join to top right st in the opening with a sl st and ch 1, work 6 sc evenly around flipper opening in chs and sts, (6 sc).
Rounds 2-3: Sc in each st around, (6 sc, 2 rounds).
Round 4: Sc in next 3 sts, 2 sc in next 2 sts, sc in next st, (8 sc).
Round 5: Sc in next 4 sts, 2 sc in next 2 sts, sc in next 2 sts, (10 sc).
Rounds 6-8: Sc in each st around, (10 sc, 3 rounds).
Round 9: Sc2tog 2 times, sc in next 6 sts, (8 sc). Sl st to join and FO leaving a long tail. Flatten the flipper and use the yarn end to stitch both sides together at the end. See photos below.
How to Put your Calliope Sea Turtle in the Shell:
Step 1: Place the head through the center opening in the shell bottom in the direction of the neck opening and then pull through the neck and adjust as needed.
Step 2: Next pull the front flippers and then back flippers through the flipper openings.
Step 3: Finally push the body through the center opening and pull tail through tail opening. Done!

Turtle Power: Building a Sea Turtle Family
Imagine a seascape filled with life, each resilient member a unique Calliope Sea Turtle with a fun colorful shell and crafted with love. You could hook a whole family of these adorable creatures using this free amigurumi pattern. Why not explore fun variations in size, color, and even facial expressions to bring out their unique characters? Try using a larger or smaller weight yarn and hook to change the size of your free sea turtle crochet pattern creation!
As a creative Mom, I love using amigurumi for storytelling and inspiring imaginative play! From crafting distinct personalities (think unique voices for each ami) to weaving different characteristics into their design (color choices are key). Perhaps you’ll make a sneaky little brother sea turtle or a wise, aging grandma who loves to pass on her wisdom? Get creative and as imaginative as you’d like, to create a whole family of sea turtle amigurumi with their own uniquely colorful shells and personality stitched right in!

Please Share your Cute Amigurumi Sea Turtles!
I hope you enjoy making this super cute free sea turtle crochet pattern as much as I enjoyed designing it – just for you! I would love if you would share your sea turtle projects on social media and on Ravelry!!! I adore getting to see your finished amigurumis!! The best part about being a crochet pattern designer is getting to see the amazing creations y’all make with my patterns! It makes me smile and it’s the reason I do what I do!! (TBH: The yarn benefits are pretty sweet too! 😉)
Do you LOVE Free Crochet Patterns (<– like these) and do you want to see more of them on my blog? If so, please help me grow by sharing this blog Post with you crochet loving friends, and subscribing to my VIP newsletter! Thank so much for your support and for joining me on this journey, filled with yarn! If you have questions or need help of any kind with the pattern, don’t hesitate to contact me or leave a comment on the blog. I’m here to help!