FUN Freeze Pop Holders
Free Crochet Pattern
Hey there Crochet Friends! I am so very excited to bring you another Free Crochet Pattern! I had a lot of fun making and designing the FUN Freeze Pop Holder Pattern. I sure hope y’all enjoy it too!
I don’t know about y’all, but my kids want to eat Freeze Pops non-stop during the summer! It’s not even that hot here in Minnesota, but whatever keeps them playing outside, am I right?? But, little fingers do get cold quickly so a Freeze Pop Holder is basically a necessity. Crochet Queen to the rescue y’all!
DISCLOSURE: This post may contain affiliate links. These allow me to make a small percentage from any purchase you may make, but do not affect the price you pay in any way. You can read all the details here –> Privacy Policy.
Make a FUN Freeze Pop Holder Crochet Pattern!
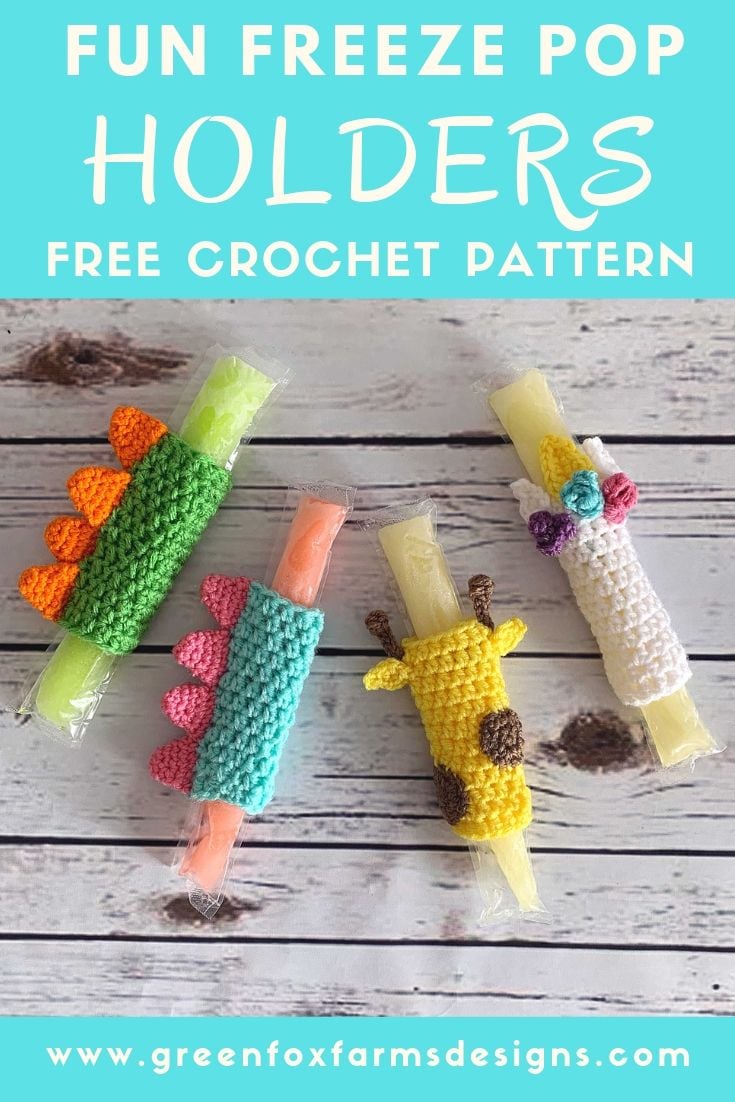
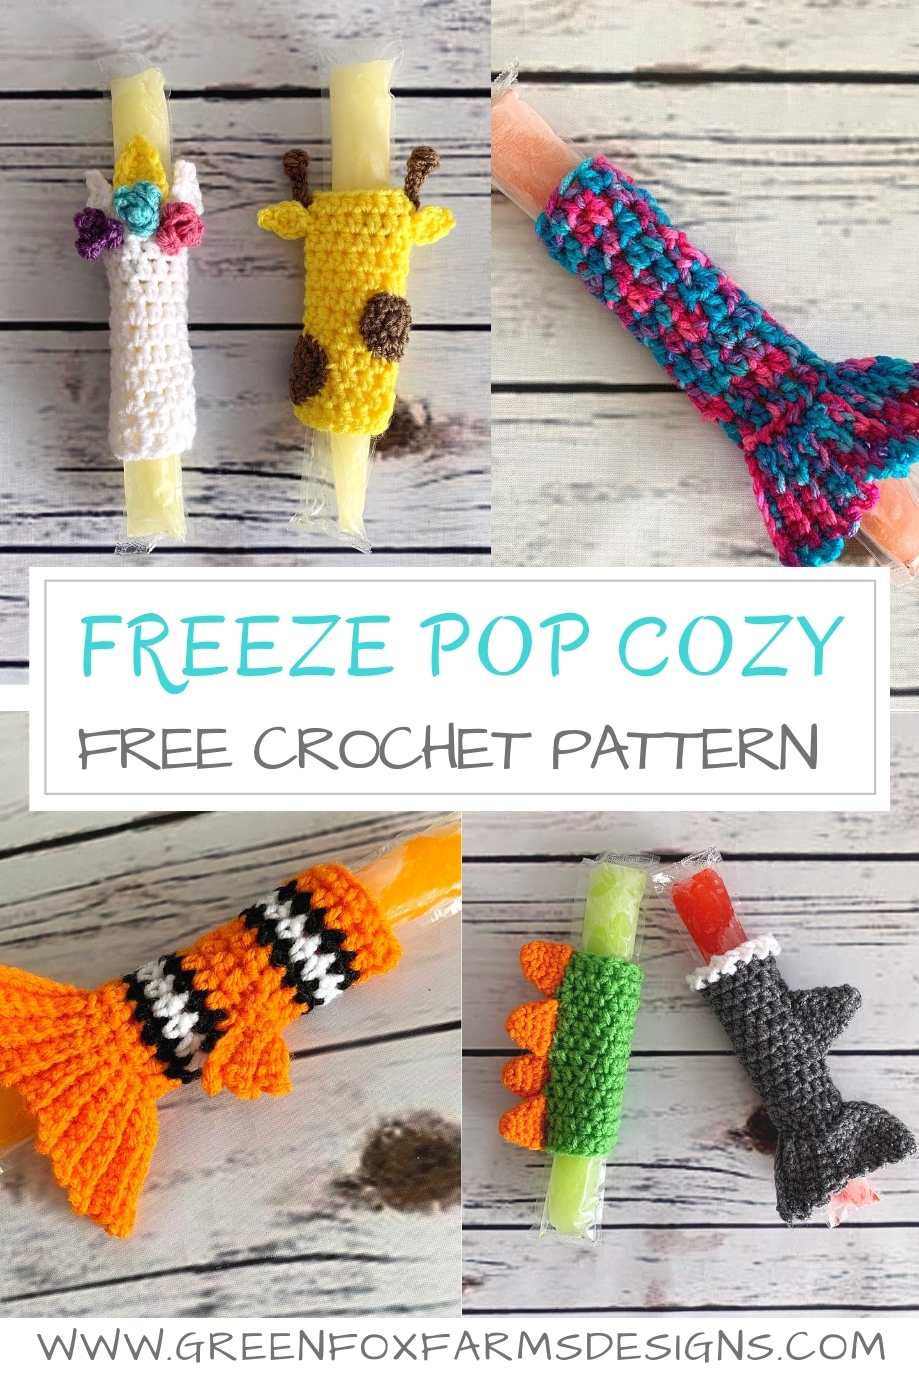
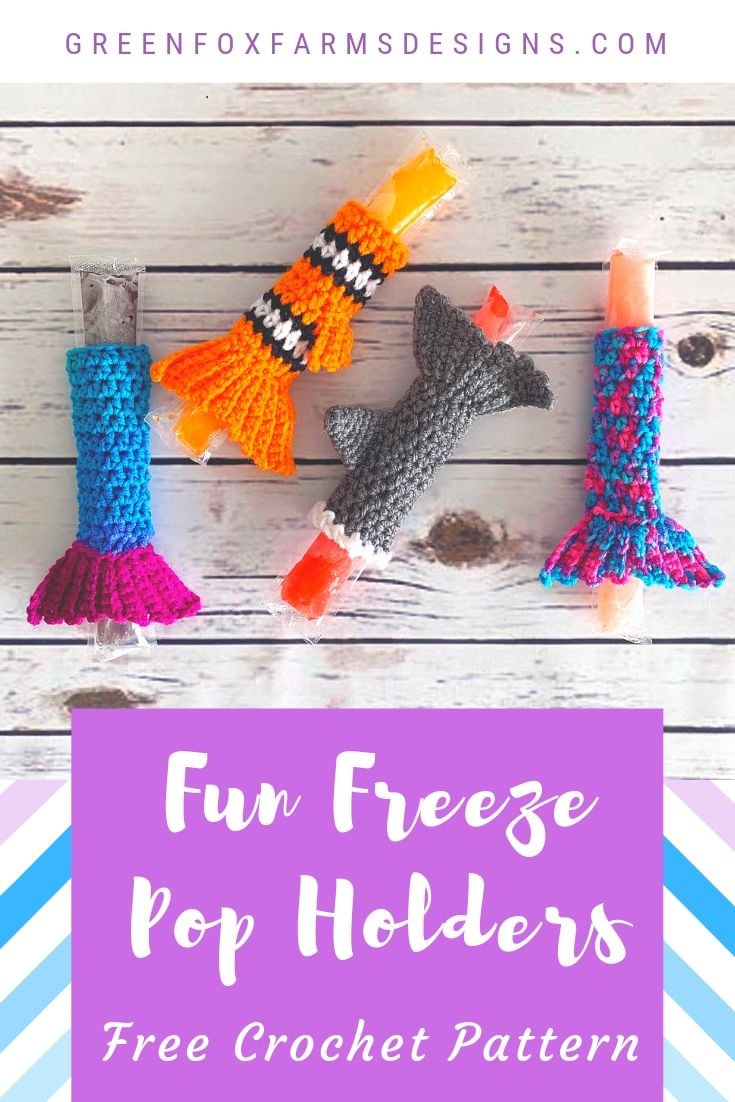
The FUN Freeze Pop Holder Pattern is very quick and easy to make, great for instant gratification and giving them as gifts! These are great for your own kids, party favors, and perfect for craft markets too! FUN Freeze Pop Holders make a great gift, especially given with a pack of Freeze Pops of course! Don’t forget to make a few for yourself too!
FUN Freeze Pop Holders are great for Craft Sales!
The FUN Freeze Pop Holder pattern is very quick to make. You could make several in an hour! These Popsicle Holders make great items to sell at your markets and craft shows! It’s always good to stock your table with quick projects you can sell for a lower price point!
Like Free Patterns? Then make sure you check out my most popular Free Pattern –> Tiny Dinosaur Amigurumi! Want to see even more? You can find all of my other Free Crochet Patterns <– Right here!!
Make your Crochet Popsicle Holder!
This crochet pattern is written in US terms
Materials:
(Click the links below to view & purchase the exact yarn that I used to create my Freeze Pop Holders!)
Gauge:
Pattern Key:
Special Stitches:
NOTES:
- This pattern uses a Foundation Half Double Crochet. If you need help with this technique you can follow this link to view my video tutorial for the Foundation Half Double Crochet and post about Foundation Crochet Stitches.
- This pattern uses a Magic Circle. If you need help with this technique you can follow this link to view my video tutorial for the Magic Circle and post about the Magic Circle stitches.
- Make a gauge swatch to ensure a good fit!
- Repeat between * and * number of times indicated.
- Beginning Chain (ch) of each round does NOT count as a stitch EXCEPT WHERE it is specified.
- This pattern is FREE, but has not been tested by anyone besides myself. Please feel free to share any questions or comments you may have! I welcome your feedback!
- This post and all it contains including the pattern and photograghs are my intellectual property and copyright protected property of GreenFoxFarms LLC © 2019. You are welcome to make as many as you like, sell them, give them away, etc. You may NOT sell, or alter and claim as your own this pattern. You may not use my photographs. This Pattern is not for mass production.
- If you want to share this pattern online, you must only share a link to my blog. You may not copy and paste my text / the pattern to another site. Thank you for respecting my work.
- By using this pattern you are agreeing to abide by these terms.
Free FUN Freeze Pop Holders Pattern Release!
This quick 6-in-1 crochet popsicle cozy pattern is now available for purchase in my Ravelry and Etsy Shops!
- The free pattern is available here on my blog.
- Want an ad-free, printer-friendly PDF? Grab it for a small fee in my shops.
- Saving 💜 the pattern on your favorite platform helps more people find it!
- Thanks so much for your support—I truly appreciate it! 😊
Just click the buttons below to find the pattern PDF available for purchase!
Don’t crochet? I would love to help you Learn to Crochet with my fun Crochet Tutorials! There’s a video tutorial for all the different basic stitches, will which help you uplevel your skill level in no time!
Do you enjoy discounts? How about specials, exclusive sneak peeks, and giveaways? If so, you want to join my VIP List and/or Facebook Community where you can find all of those things AND a special coupon to use on patterns in my Etsy shop or Ravelry store! In addition, my VIPs are the first to hear about new pattern releases, sales (some are exclusive to the group/list), CALs (crochet alongs) and lots of fun crochet discussions!
Pattern Download RAVELRY
Click the Buy NOW button below to purchase a Printer Friendly, Ad-Free, PDF Download version of the FUN Freeze Pops Pattern on RAVELRY!
Pattern Download ETSY
Click the Buy NOW button below to purchase a Printer Friendly, Ad-Free, PDF Download FULL Premium version of the FUN Freeze Pops Pattern on ETSY!
FUN Freeze Pop Holder Crochet Pattern:
Pattern Directions:
FREEZE POP HOLDER BASE:
- Finished size should be approximately 5” in length x 2” wide.
- Use WW yarn and H 5.0 mm hook.
Round 1: Work 12 fhdc, sl st to beg ch to join, being careful not to twist ch, (12 fhdc). Alternately you can ch 13, and hdc in 2nd ch from hook and each ch, sl st to join, (12 hdc).
Rounds 2-11: Ch 1, hdc in each st around, sl st to join, (12 hdc, 10 rounds).
Round 12: Ch 1, hdc in each st around, sl st to join, (12 hdc). FO and weave in the ends. Simple Freeze Pop Holder complete, or continue with fun additions below.
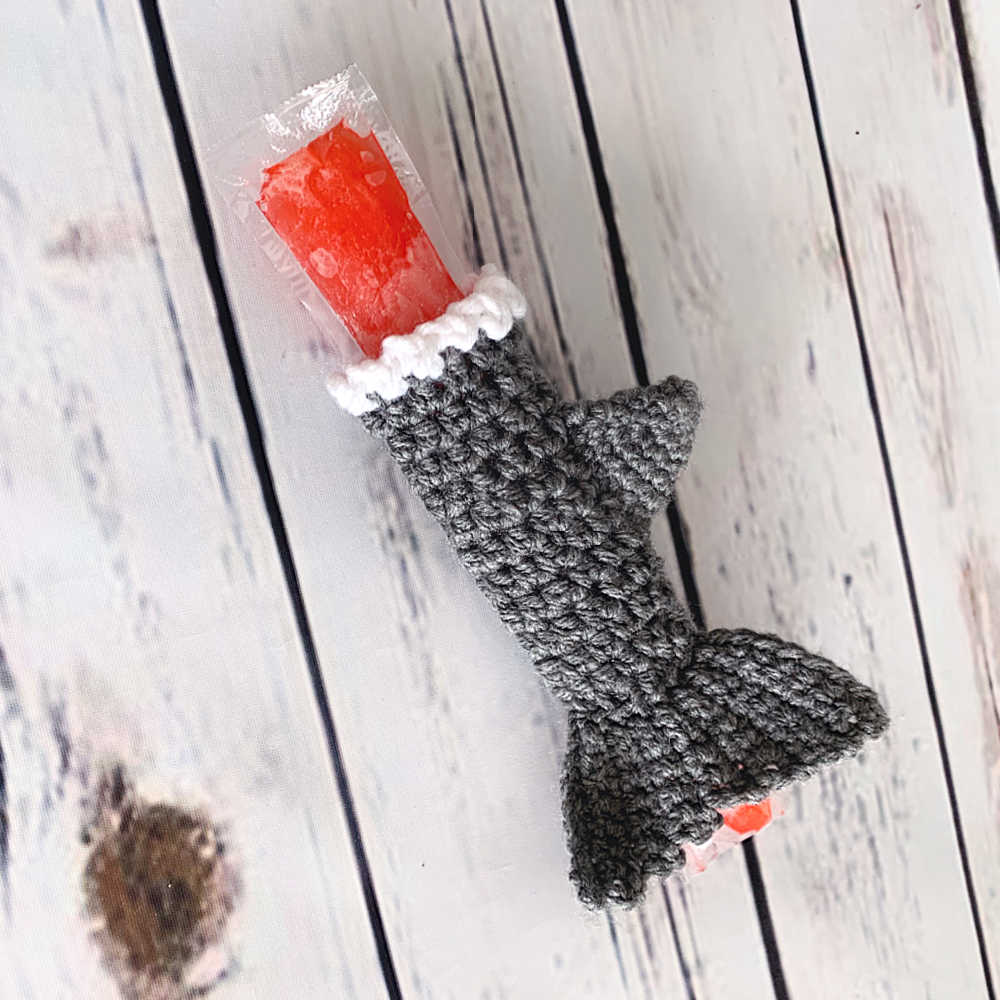
SHARK VARIATION:
- Finished size should be approximately 5” in length x 2” wide.
- Use WW yarn and H 5.0 mm hook.
Round 1: Work 12 fhdc, sl st to beg ch to join, being careful not to twist ch, (12 fhdc). Alternately you can ch 13, and hdc in 2nd ch from hook and each ch, sl st to join, (12 hdc).
Rounds 2-11: Ch 1, hdc in each st around, sl st to join, (12 hdc, 10 rounds).
Round 12: Ch 1, hdc in each st around, sl st to join, (12 hdc).
Round 13: Change to white yarn, * ch 2 – sl st, * into each st, sl st to join, FO and weave in the ends.
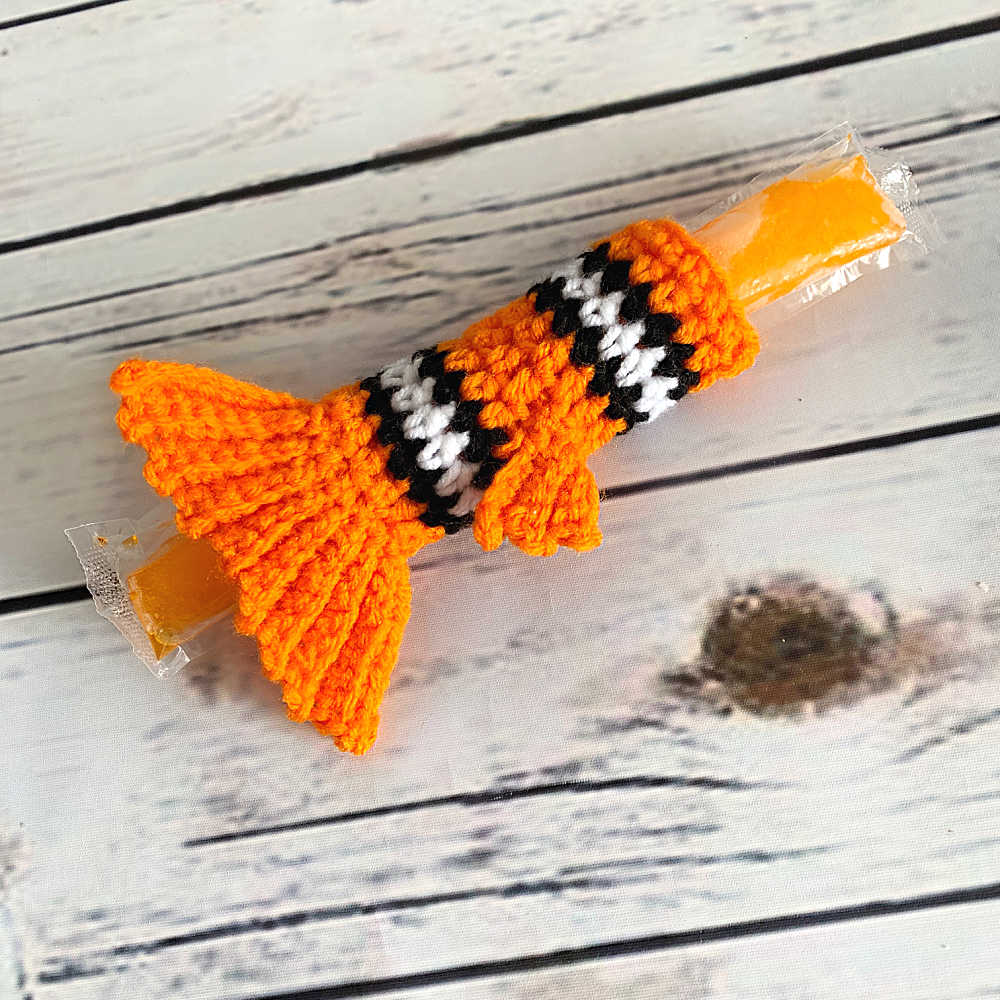
STRIPED (CLOWN FISH) VARIATION:
- Finished size should be approximately 5” in length x 2” wide.
- Use WW yarn and H 5.0 mm hook.
Round 1: With Orange yarn, work 12 fhdc, sl st to beg ch to join, being careful not to twist ch, (12 fhdc). Alternately you can ch 13, and hdc in 2nd ch from hook and each ch, sl st to join, (12 hdc).
Round 2: With Orange yarn, ch 1, hdc in each st around, sl st to join, (12 hdc).
Round 3: With Black yarn, ch 1, sc in each st around, sl st to join, (12 sc).
Round 4: With White yarn, ch 1, hdc in each st around, sl st to join, (12 hdc).
Round 5: With Black yarn, ch 1, sc in each st around, sl st to join, (12 sc).
Rounds 6-8: With Orange yarn, ch 1, hdc in each st around, sl st to join, (12 sc, 3 rounds).
Round 9: With Black yarn, ch 1, sc in each st around, sl st to join, (12 sc).
Round 10: With White yarn, ch 1, hdc in each st around, sl st to join, (12 hdc).
Round 11: With Black yarn, ch 1, sc in each st around, sl st to join, (12 sc).
Rounds 12-13: With Orange yarn, ch 1, hdc in each st around, sl st to join, (12 hdc, 2 rounds). FO and weave in the ends.
ADD EMBELLISHEMENTS:
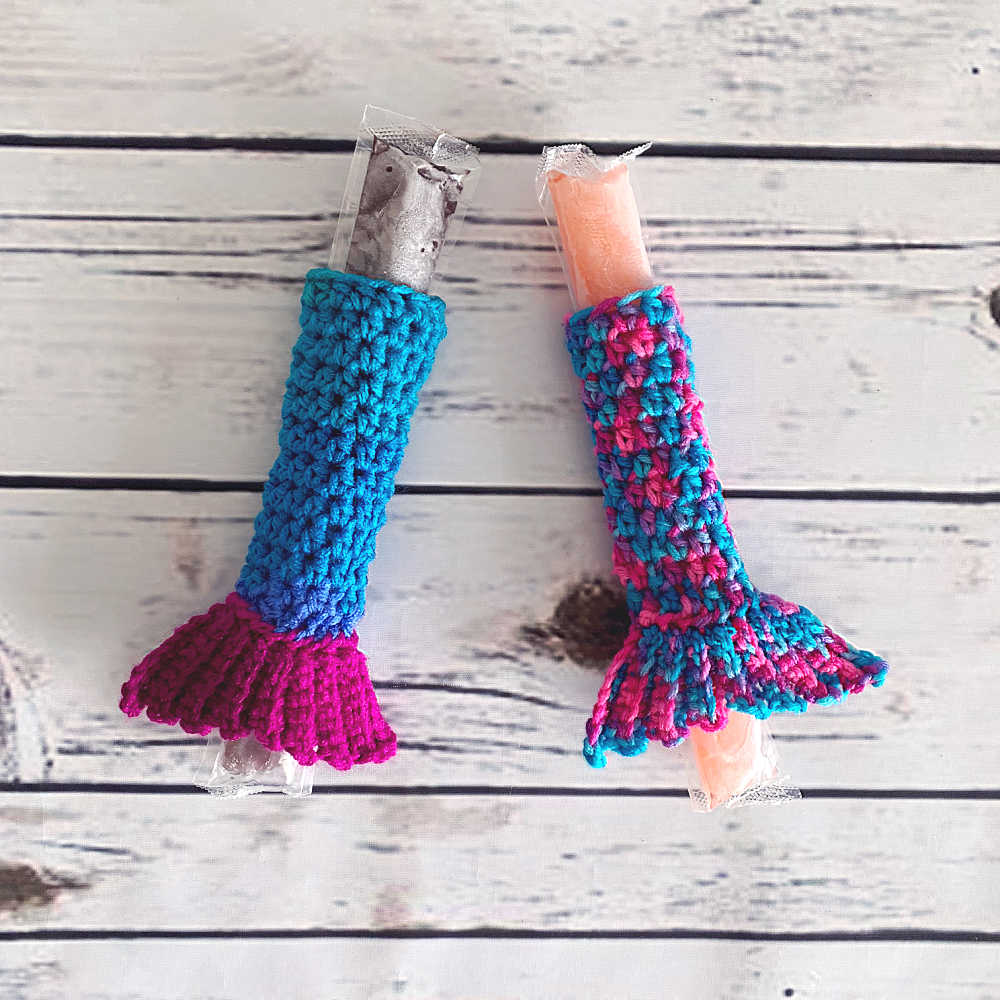
MERMAID/FISH/SHARK:
TAIL FIN: Work in BLO.
- Use WW yarn and G/6 4.0/4.25 mm hook.
Row 1: Ch 10, sc in 2nd ch from hook, sc in next 6 sts, sl st in last 2 sts, (7 sc, 2 sl st).
Row 2: Ch 1, turn, sl st in next 2 sts, sc in next 6 sts, leave last st unworked, (6 sc, 2 sl st).
Row 3: Ch 1, turn, sl st in next st, sc in next 5 sts, sl st in last 2 sts, (5 sc, 3 sl st).
Row 4: Ch 1, turn, sl st in next 2 sts, sc in next 5 sts, leave last st unworked, (5 sc, 2 sl st).
Row 5: Ch 1, turn, sl st in next st, sc in next 4 sts, sl st in last 2 sts, (4 sc, 3 sl st).
Row 6: Ch 1, turn, sl st in next 2 sts, sc in next 4 sts, leave last st unworked, (4 sc, 2 sl st).
Row 7: Ch 1, turn, sl st in next st, sc in next 3 sts, sl st in last 2 sts, (3 sc, 3 sl st).
Row 8: Ch 1, turn, sl st in next 2 sts, sc in next 3 sts, leave last st unworked, (3 sc, 2 sl st).
Row 9: Ch 2, turn, 2 sc in 1st st, sc in next 2 sts, sl st in last 2 sts, (4 sc, 2 sl st).
Row 10: Ch 1, turn, sl st in next 2 sts, sc in next 4 sts, (4 sc, 2 sl st).
Row 11: Ch 2, turn, 2 sc in 1st st, sc in next 3 sts, sl st in last 2 sts, (5 sc, 2 sl st).
Row 12: Ch 1, turn, sl st in next 2 sts, sc in next 5 sts, (5 sc, 2 sl st).
Row 13: Ch 2, turn, 2 sc in 1st st, sc in next 4 sts, sl st in last 2 sts, (6 sc, 2 sl st).
Row 14: Ch 1, turn, sl st in next 2 sts, sc in next 6 sts, (6 sc, 2 sl st).
Row 15: Ch 2, turn, 2 sc in 1st st, sc in next 5 sts, sl st in last 2 sts, (7 sc, 2 sl st).
Row 16: Ch 1, turn working along the top edge of the fin, sl st into top st of every other row (in between the ribs) a total of 7 times, last sl st should fall in 1st beg ch. FO.
Tail Fin: SHARK VARIATION:
Work all sc sts in both loops, work all sl st in BLO.
MERMAID/FISH/SHARK:
FISH SIDE FIN: (Make 2) Work in BLO.
- Use WW yarn and G/6 4.0/4.25 mm hook.
Row 1: Ch 7, sc in 2nd ch from hook, sc in next 3 sts, sl st in last 2 sts, (4 sc, 2 sl st).
Row 2: Ch 1, turn, sl st in next 2 sts, sc in next 3 sts, leave last st unworked, (3 sc, 2 sl st).
Row 3: Ch 1, turn, sl st in next st, sc in next 2 sts, sl st in last 2 sts, (2 sc, 3 sl st).
Row 4: Ch 1, turn, sl st in next 2 sts, sc in next 2 sts, leave last st unworked, (2 sc, 2 sl st).
Row 5: Ch 1, turn, sl st in next st, sc in next, sl st in last 2 sts, (1 sc, 3 sl st).
Row 6: Ch 1, turn working along the top edge of the fin, sl st into top st of Rows 3 and 1 (in between the ribs), last sl st should fall in 1st beg ch. FO.
MERMAID/FISH/SHARK:
SHARK TOP FIN: (Make 1)
- Fin is worked in continuous rounds. Use a stitch marker.
- Use WW yarn and G/6 4.0/4.25 mm hook.
Round 1: Make magic circle, ch 1, 6 sc in magic circle. Do not join. Mark 1st st, (6 sc).
Round 2: Sc in each st around, (6 sc).
Round 3: * 2 sc in next, sc in next 2 sts, * twice, (8 sc).
Round 4: * 2 sc in next, sc in next 3 sts, * twice, (10 sc).
Round 5: * 2 sc in next, sc in next 4 sts, * twice, (12 sc).
Round 6: * 2 sc in next, sc in next 5 sts, * twice, (14 sc).
Round 7: * 2 sc in next, sc in next 6 sts, * twice, (16 sc). FO leaving a long tail.
FINISHING MERMAID/FISH/SHARK:
- Sew tail to the bottom front of the holder, at Rounds 1-2.
- Sew the Side Fins to the center of the holder, on either side, near the “belly” (one edge of the holder) between Rounds 7-8. Position Fins so that the ends of the fin face the tail, and the longer edge (Row 1) is toward the top.
- Flatten the Shark Fin and use the yarn tail to whipstitch the bottom closed. Sew the Shark Fin to outer edge of the holder, at Rounds 5-8.
ADD EMBELLISHEMENTS:
DINOSAUR:
SPIKES: (Make 4).
- Spikes are worked in continuous rounds. Use a stitch marker.
- Use WW yarn and G/6 4.0/4.25 mm hook.
With Orange yarn, make a magic circle.
Round 1: Ch 1, 6 sc in magic circle. Do not join. Mark 1st st, (6 sc).
Round 2: Sc in each st around, (6 sc).
Rounds 3: * 2 sc in next, sc in next 2 sts, * twice, (8 sc).
Round 4: * 2 sc in next, sc in next 3 sts, * twice, (10 sc).
Round 5: * 2 sc in next, sc in next 4 sts, * twice, (12 sc). FO leaving a long tail.
FINISHING DINOSAUR:
- Flatten the spikes and use the yarn tail to whipstitch the bottom of each spike closed.
- Sew Spikes to outer edge of the holder, spaced along the entire edge. Place spikes at Rounds 1-3, 4-6, 7-9, and 10-12.
ADD EMBELLISHEMENTS:
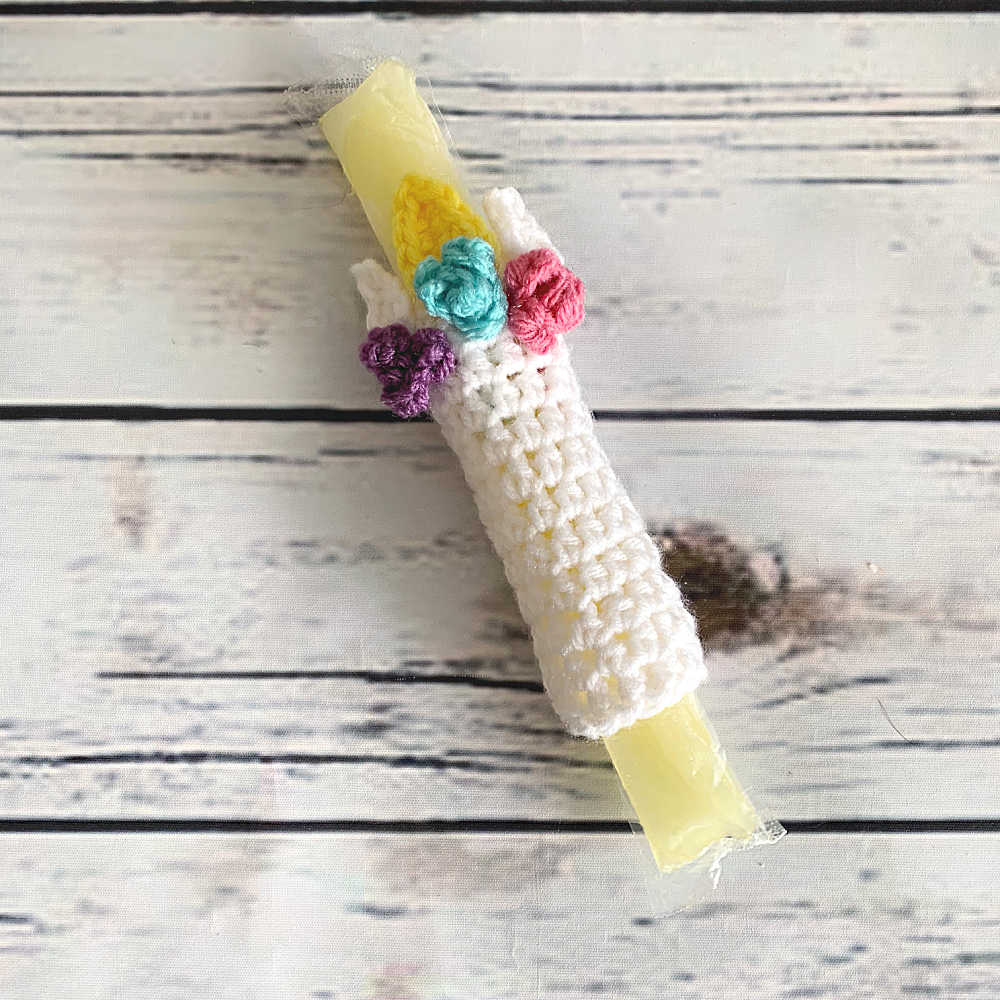
UNICORN:
EARS: (Make 2).
- Use WW yarn and G/6 4.0/4.25 mm hook.
Round 1: Make a magic circle, ch 1, 3 sc, picot, 3 sc in magic circle, sl st to join, FO, (6 sc).
HORN: (Make 1)
- Sl st counts as a stitch.
- Use 2 strands of WW yarn yarn held together and G/6 4.0/4.25 mm hook.
Round 1: Ch 6, sl st in 2nd ch from hook, sc in next 2 sts, hdc in last 2 sts, ch 1, sl st into last ch, (6 st). Ch 1 and work back up the other side of beg ch, hdc in next 2 sts, sc in next 2 sts, sl st in last st and FO without joining, (5 sts).
FLOWER: (Make 3)
- Sl st counts as a stitch.
- Use WW yarn and G/6 4.0/4.25 mm hook.
Round 1: Ch 9, sl st in 2nd ch from hook, hdc and sl st in next st, * sl st and hdc in next st, hdc and sl st in next st, * repeat between * and * two more times, FO (15 st). Roll flower around first/smallest petal and using the yarn ends and needle, secure it with a couple of stitches.
FINISHING UNICORN:
- Sew Ears to outer edges of the holder, at round 12.
- Sew the Horn to the center of the holder, at round 12.
- Sew the Flowers at round 10-12, the center flower should cover the bottom of the horn. The other 2 flowers should be sewn to the sides of the central flower.
ADD EMBELLISHEMENTS:
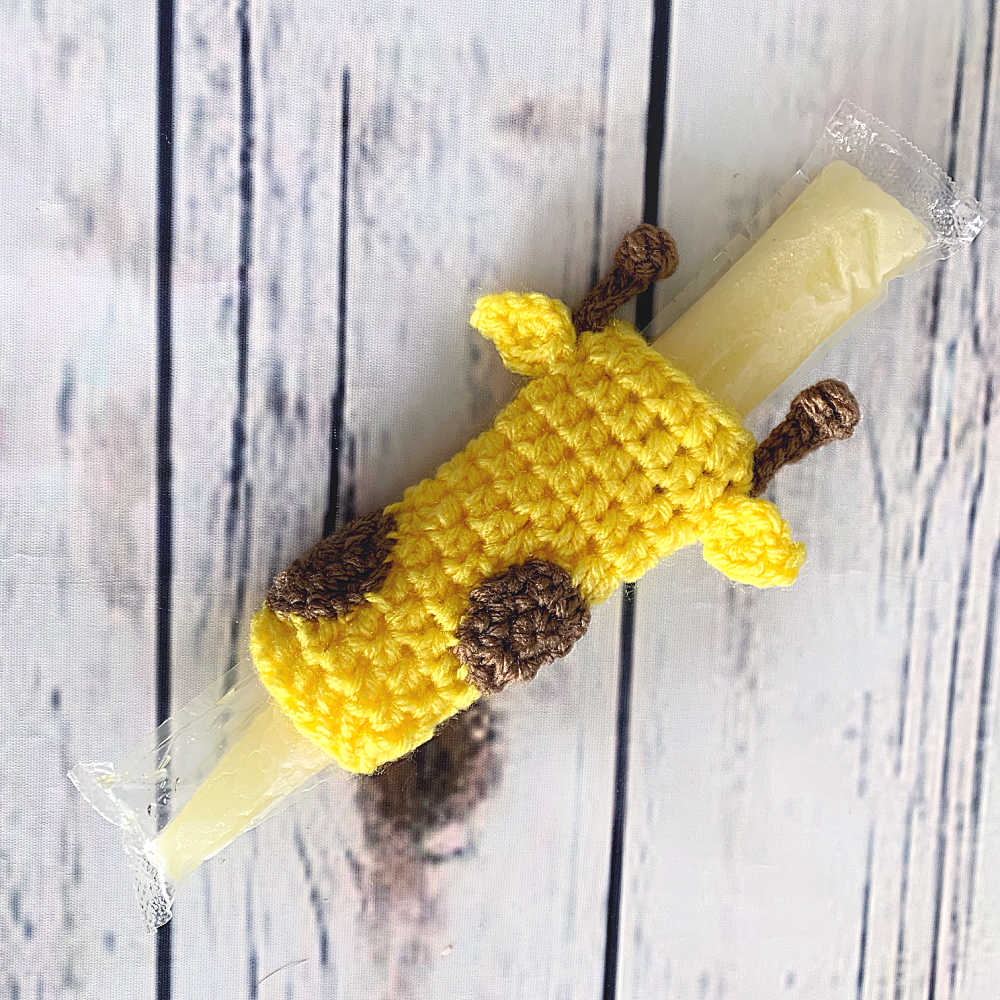
GIRAFFE:
EARS: (Make 2).
- Use WW yarn and G/6 4.0/4.25 mm hook.
Round 1: Make a magic circle, ch 1, 3 sc, picot, 3 sc in magic circle, sl st to join, FO, (6 sc).
HORNS: (Make 2)
- Use WW yarn and G 4.0/4.25 mm hook.
Ch 6, puff st in the second ch from hook, sl st in next 4 sts, ch 7, puff st in the second ch from hook, sl st in next 4 sts, leaving last ch unworked. Fasten off leaving a 6 inch tail. Use yarn end to stitch the Antennae to Round 11 of the Head. Weave in ends.
SPOTS: (Make 2)
- Use WW yarn and G 4.0/4.25 mm hook.
Round 1: Make a magic circle, ch 1, 6 sc in magic circle, do not join, (6 sc).
Round 2: (Sc, ch 1, sc,) in each st, FO (12 sc).
FINISHING GIRAFFE:
- Sew Horns to outer edges of the holder, at round 12.
- Sew the Ears to outer edges of the holder, at round 11.
- Sew spots at the bottom front, with part of the each spot wrapping around the edges. Sew one spot on the right at Rounds 4-7 and the other spot on the left at Rounds 1-4.
Please Share your FUN Freeze Pop Holder!
Please share your finished FUN Freeze Pop Holder makes on Ravelry and social media! I’d love for you to tag me in your photos so I can see what you’ve made! If you enjoyed the FUN Freeze Pop Holder Pattern and want to help support me in offering additional Free Crochet Patterns (<– like these) in the future, please share my Blog Post with your friends and subscribe to my newsletter! You can easily share using the social media buttons below the post! Thank you so much for your support! If you have any questions, feel free to contact me or leave a comment on the blog. I would love to help!
Make sure to share your pics and tag #greenfoxfarms #greenfoxfarmsdesigns @greenfoxfarms on any social media! Please share your finished creations on Ravelry too!









On the Mermaid/Fish/Shark Tail Fin instructions, it appears that this row should be [[sc in next 2 sts]] in the part I have bracketed below. At least it didn’t seem to work for me unless I did that. Thanks for a fun pattern set!
Row 7: Ch 1, turn, sl st in next 2 sts, [[sc in next 3 sts]], sl st in last 2 sts, (2 sc, 4 sl st).
Thanks for your input Cheryl! Yes, R7 on the Mermaid Tail has been amended to correct the stitches to 1 sl st at the beginning, 3 sc, and 2 sl st at the end for a total stitch count of 3 sc, 3 sl st! You caught a bit of the writing process there, where I changed the pattern but didn’t correct the written portion! Thanks for reading and glad to hear you are enjoying the pattern! 🙂
Happy Summer,
Lisa Fox of Green Fox Farms Designs
I love your pattern I would post pics of what I’ve made but my nephew has other plans for his sharks! Thanks for creating such a fun and easy pattern for popsicles.
My pleasure and thank you so much Tami!! I am so glad you enjoyed the pattern and your nephew is enjoying his sharks!!
Lisa Fox
Can’t wait to make these
Hi Abby,
Thanks so much for visiting! Hope you enjoy the pattern.
Happy Hooking!
Lisa Fox
I made a set of eight Freeze Pop Covers for a special client this summer. I used a curling iron for the shark, mermaid, unicorn, and stegasaurus. The staff member loved the unicorn design because it’s her favorite animal. This project doubles as finger puppets to entertain little ones. Great for all ages!!!