
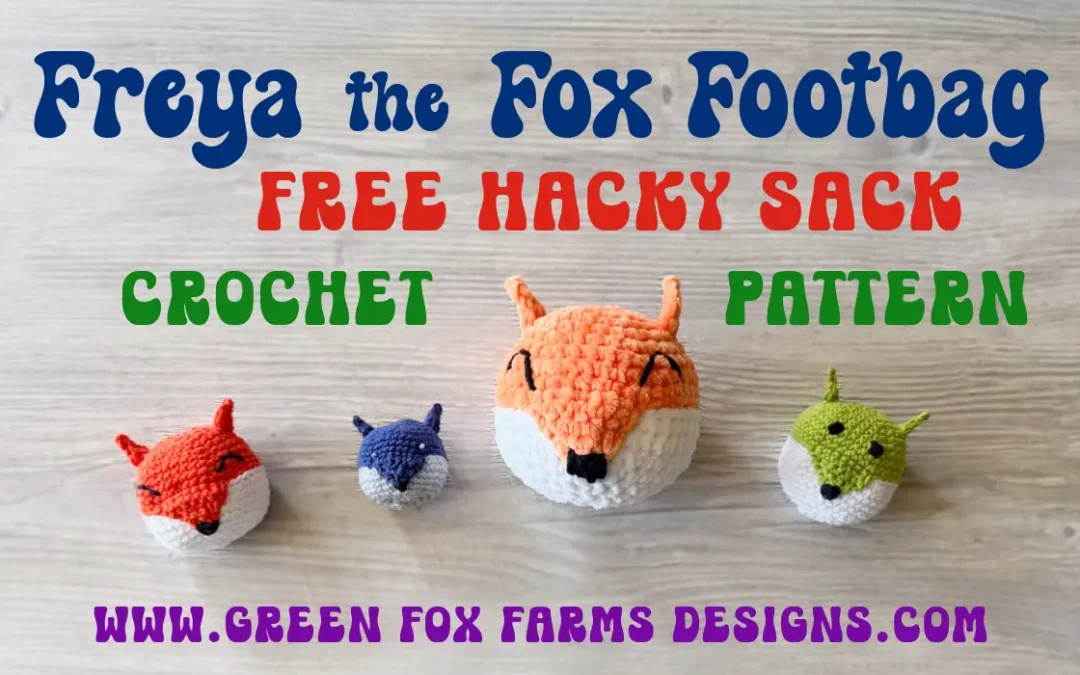
Free Freya the Fox Footbag Pattern 🦊
Y’all, the crochet hacky sack is back! The kids are kicking them around at recess again, just like we did back in the day. Let me introduce you to Freya the Fox Footbag, my new free crochet hacky sack pattern! She’s a simple amigurumi ball with sweet little fox ears and a friendly face, and you can stitch her up in a single evening. And this year, Freya is my contribution to the 2026 Toy Box Crochet Along, so she’s free right here on the blog!
Here’s my favorite part. This one little fox does more than one job. Stuff her with fiberfill and she’s a soft fox amigurumi, ready for the toy box. Fill her with dried beans instead and she’s a hacky sack, ready for school or the backyard. She can also hang on the tree as an ornament, clip to a zipper as a purse charm, or roll across the floor as a baby-safe toy ball! One pattern, five uses. If you’re here often, you know, multi-use is my kind of project!
If you’re new to amigurumi, Freya is a great place to start. The whole pattern uses basic stitches worked in the round, with no complicated shaping and barely any sewing. Confident beginners can absolutely make this simple fox stuffie, and experienced hookers can whip up a whole skulk of them in a weekend. (Yes, a group of foxes is called a skulk. You’re welcome for your new favorite word!) 💜🦊
DISCLOSURE: This post may contain affiliate links. See my Privacy Policy for more information.
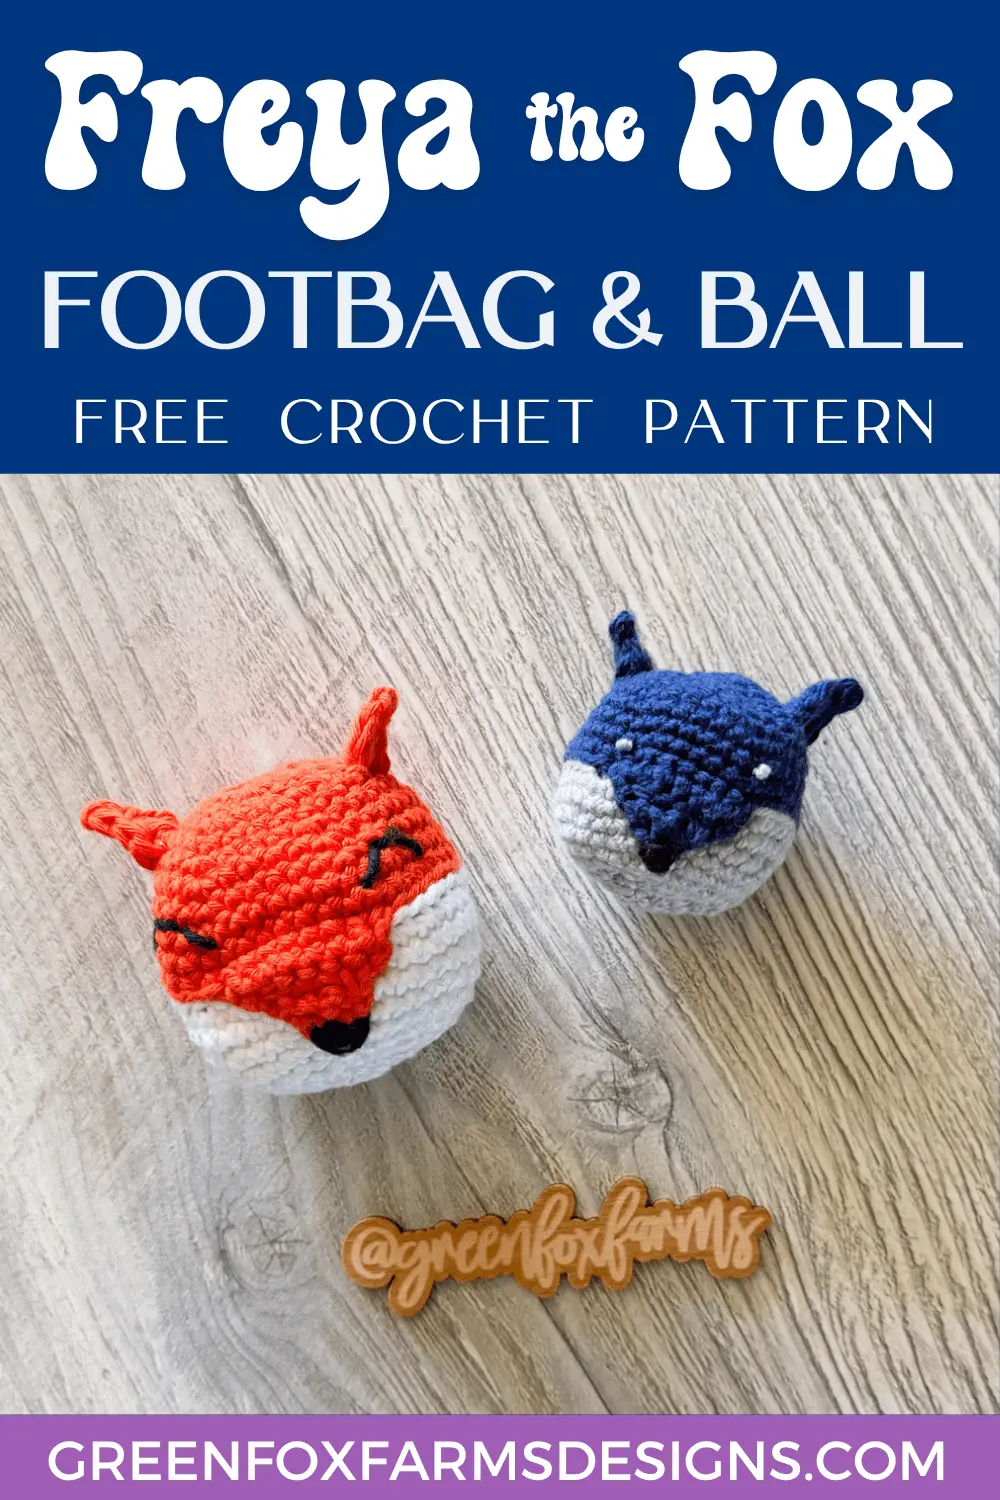
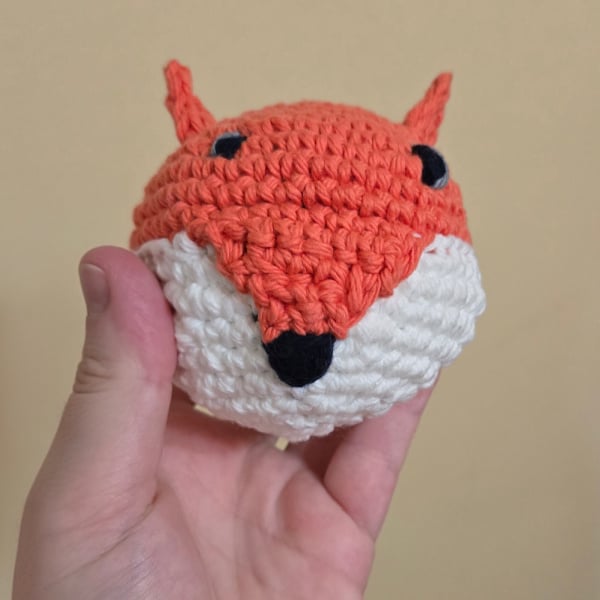
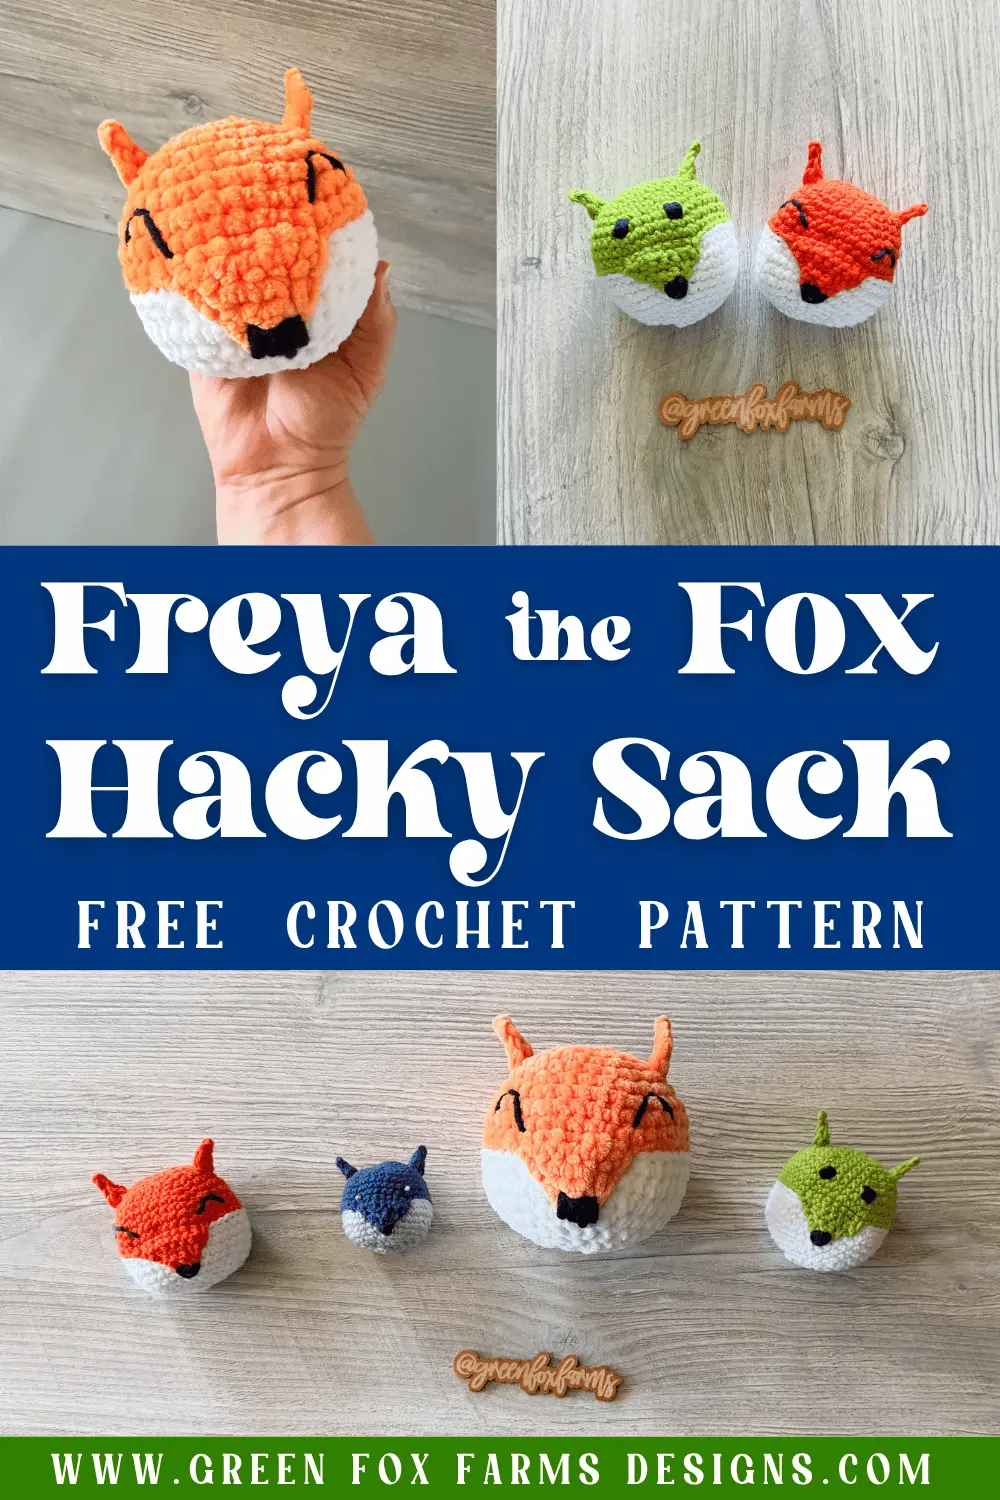
Freya the Fox Crochet Hacky Sack Toy!
In this post you’ll find the complete free Freya the Fox Footbag – crochet hacky sack pattern, including materials, written instructions, photo tutorial and pattern notes. I’ll also show you five ways to use this fox stuffie, what to fill a crochet hacky sack with so it kicks just right, and all the details on the 2026 Toy Box Crochet Along, including how to enter the giveaway.
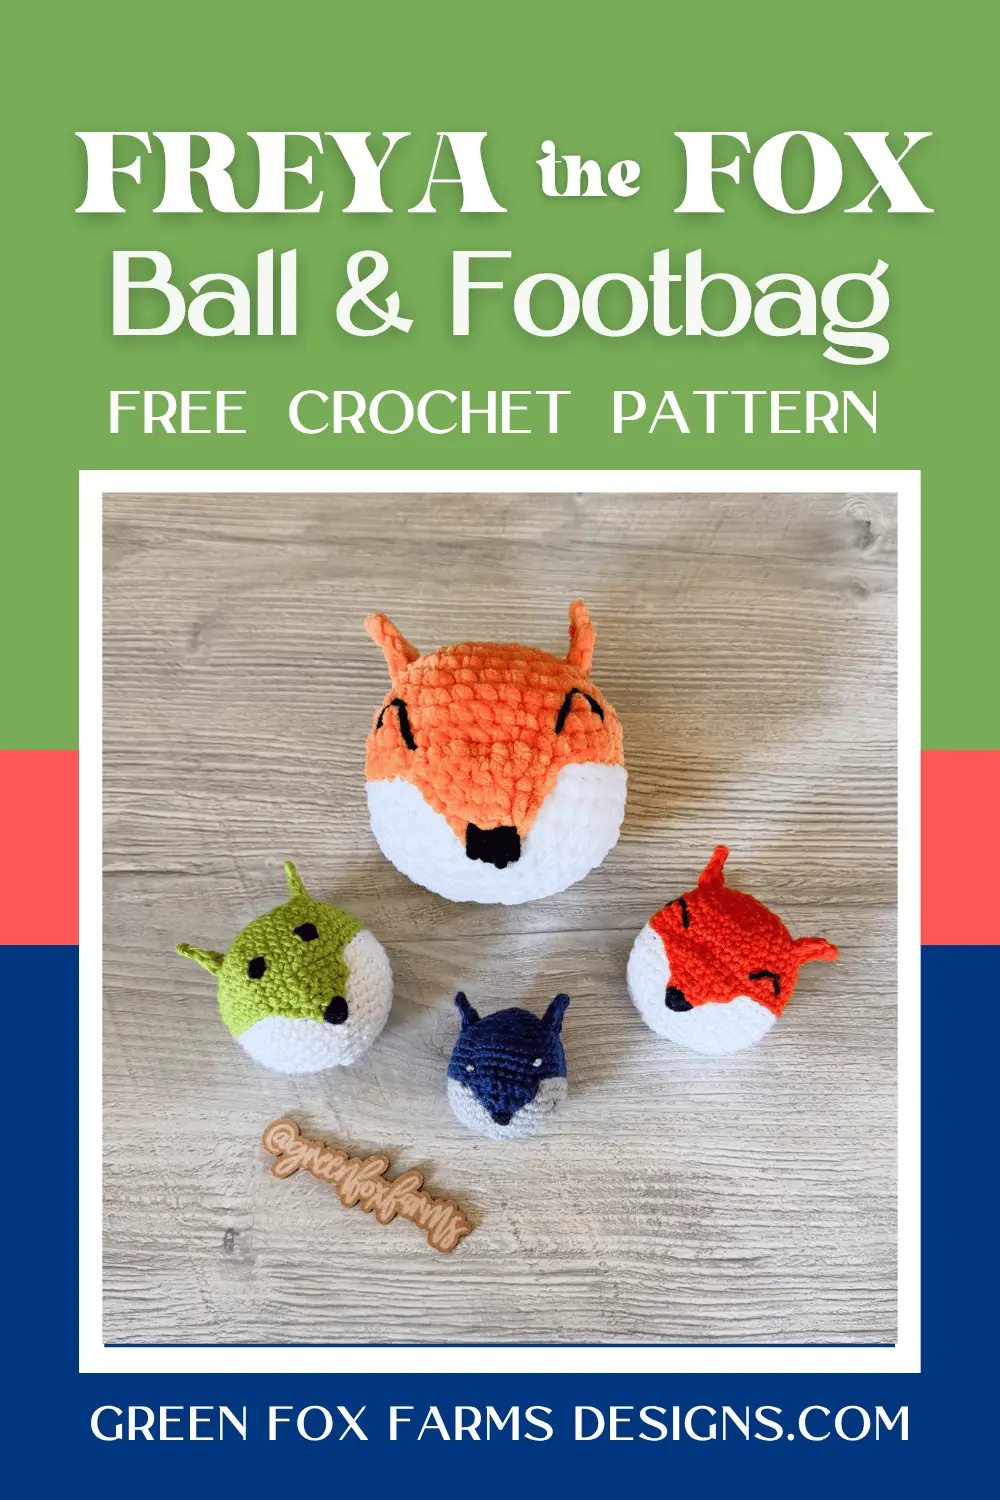
Pin it now so Freya’s easy to find when you’re ready to hook! 💜📌
Meet Freya the Fox Footbag – Free Crochet Pattern
Freya started with a simple idea: make a basic crochet ball, but make it extra fun and multi-use! I’ve made plenty of amigurumi balls before, like my free Mother Earth Amigurumi Ball, and that little globe even has its own hackysack version. So I knew the shape worked. For a woodland animal feel, my fox footbag needed ears, a face, and a name worthy of the amigurumi family she was joining, alongside friends like Hestia the Hedghog and Odin the Owl!
The design is as simple as it looks. Foxy Freya (fun working title! 😘) is worked in the round in two colors, with a colored top half and a white bottom half, plus small fold-flat ears and an easy embroidered face. No fiddly pieces, nor seaming. The two-color split means she looks finished and intentional, even though the stitching couldn’t be more relaxed. Yay!
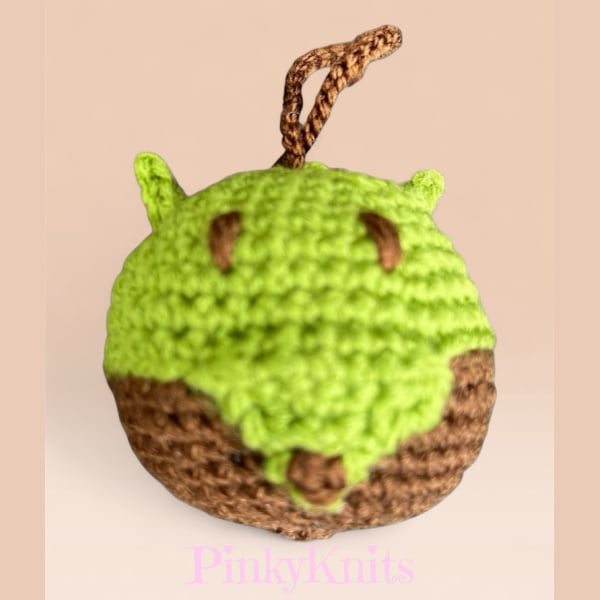
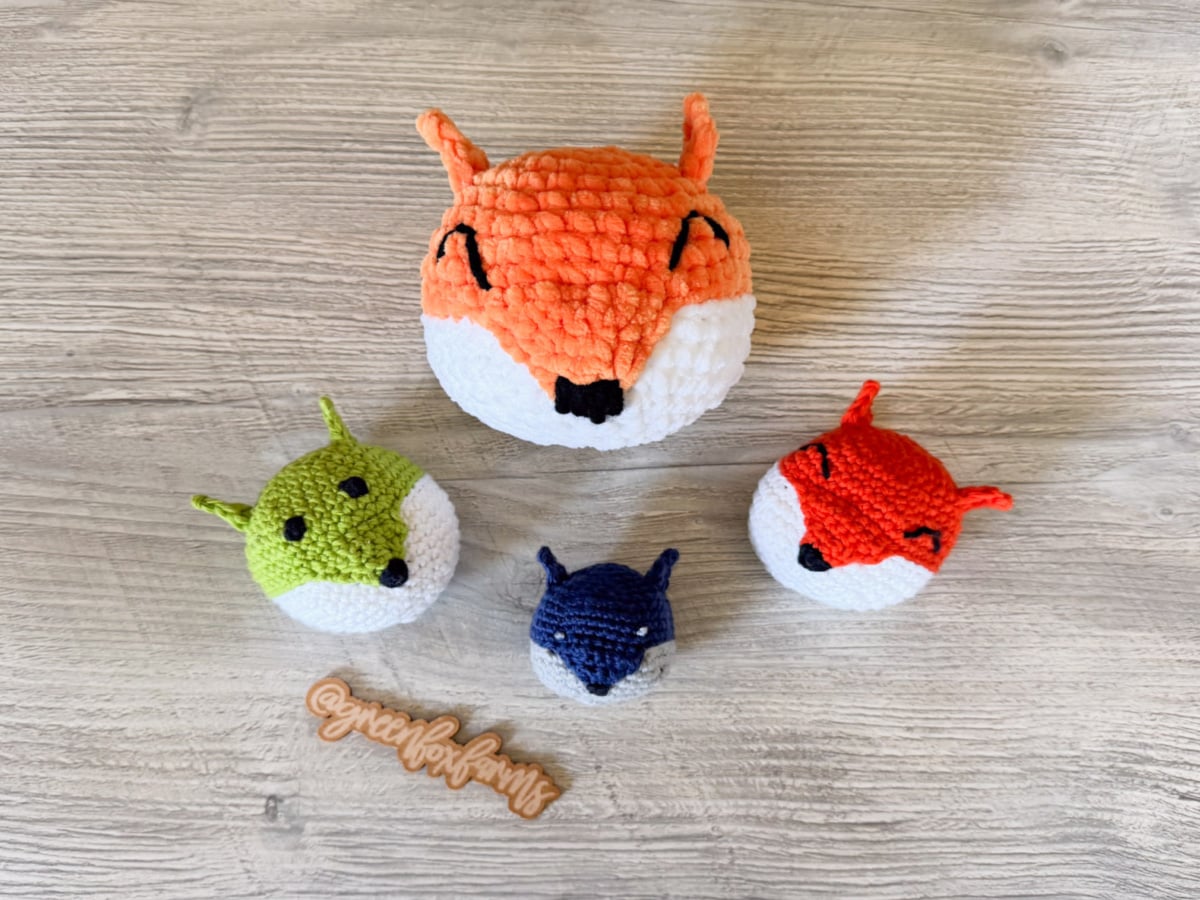
Now let’s talk colors, because you’ve got a fun choice to make. The classic version is a rusty orange fox, and you can’t go wrong there. But hear me out: make her in green. A green fox from Green Fox Farms Designs? That’s the namesake fox, friends, and I couldn’t resist. Truthfully, Freya works in any color your yarn stash offers. A gray arctic fox, a pink party fox, a rainbow fox for the kid who can’t pick a favorite. By using what’s already in your stash, the pattern doesn’t change, just her personality. 😜She even turns pretty easily into a wolf if you make the to half in gray… Y’all know I couldn’t resist making a few different versions!
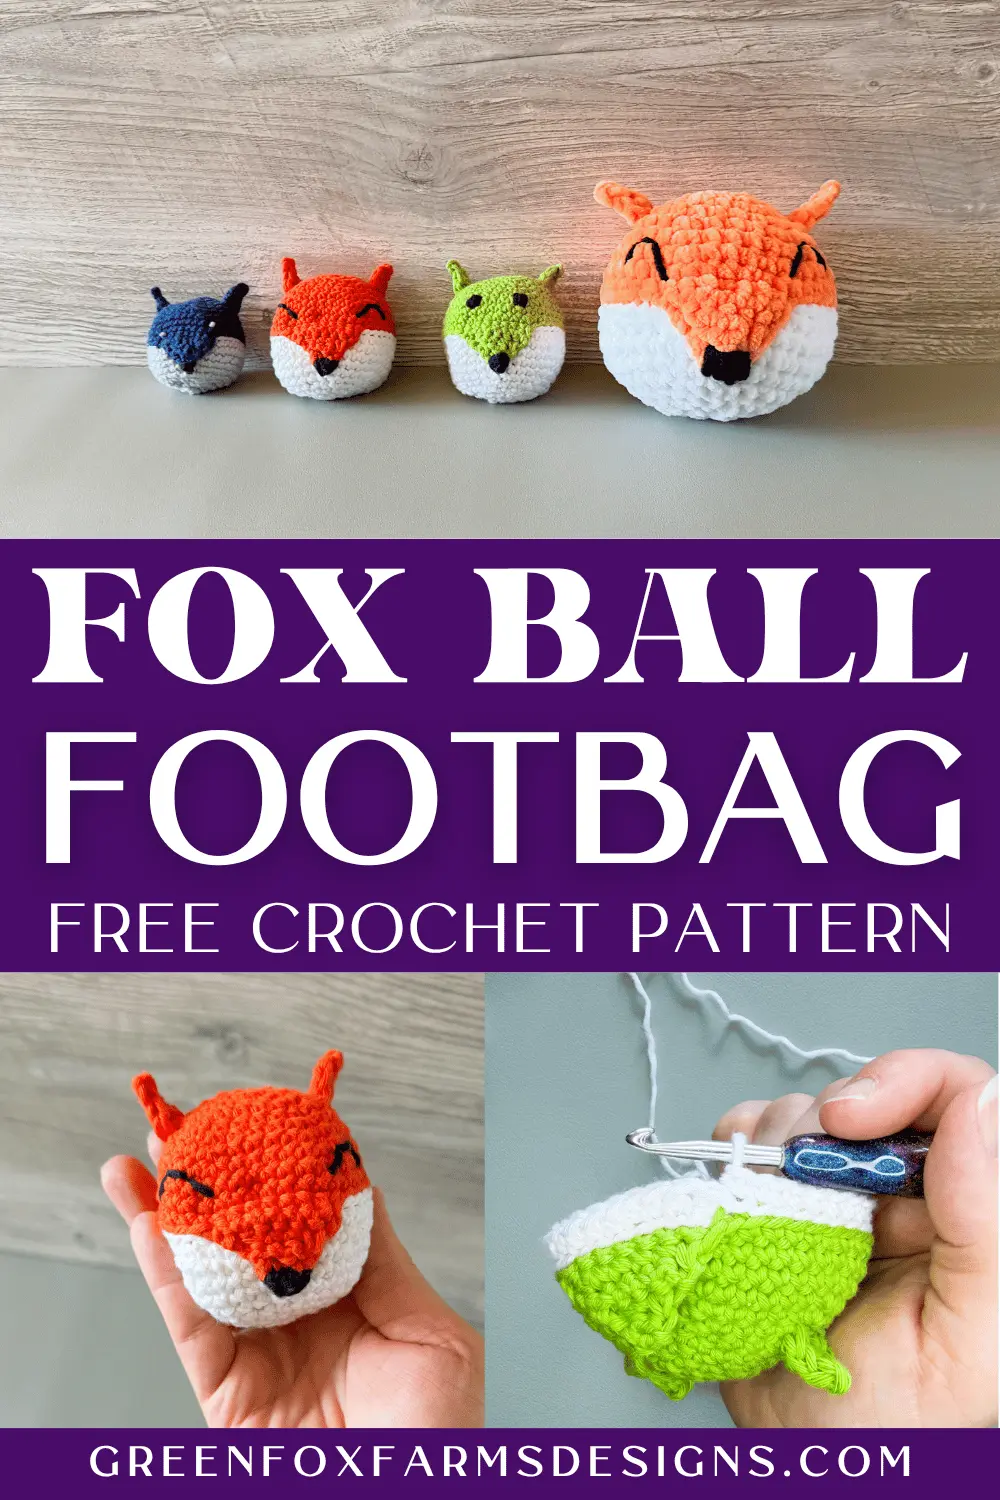
Join the 2026 Toy Box Crochet Along – Free Amigurumi CAL!
I‘m super excited to be part of – and let you know about – this wonderful Toy Box CAL hosted by Underground Crafter with CAL Central Crochet! Every Monday from June 1 to August 3, 2026, a new free toy pattern goes live on the designer’s blog. That’s 10 free crochet toy patterns from talented designers across the web, and Freya the Fox joins the lineup on Monday July 20, 2026!
I adore creating amigurumi patterns, and every time my kids try to adopt my creations immediately! In fact, at last count I’ve been asked about 7 dozen times if I’m done taking photos of these foxes because my youngest 2 kiddos can’t wait to get their hands on them. True story
All of my crochet animal patterns are Sew Cute!! 😍 My testers tell me this happens to them a lot too. How about you? If so, this Toy Box CAL is the solution to your “problem” because you’ll find a whole toy box of cute new amigurumi friends to make. You can keep them, gift them, or donate them to charity. Last year I joined in with my Calliope the No-Sew Sea Turtle, and this year Freya gets to make some new friends!
And don’t skip the giveaway, y’all. Seven prize packages are up for grabs from some favorite craft companies! Enter on the main event post by Sunday, August 9, 2026 at 11:59pm Eastern. Share your finished Freya with #CALCentralCrochet so we can all cheer you on!
How To Join the 2026 Toy Box CAL
Read all the details on the main event post from Underground Crafter!
https://undergroundcrafter.com/2026/06/01/2026-toy-box-crochet-along/

Want the Power to Pause Your Project??
Want a better way to keep track of your works in progress? Download a FREE copy of my Printable WIP Cards and never forget which hook, or yarn, or pattern you were using again!

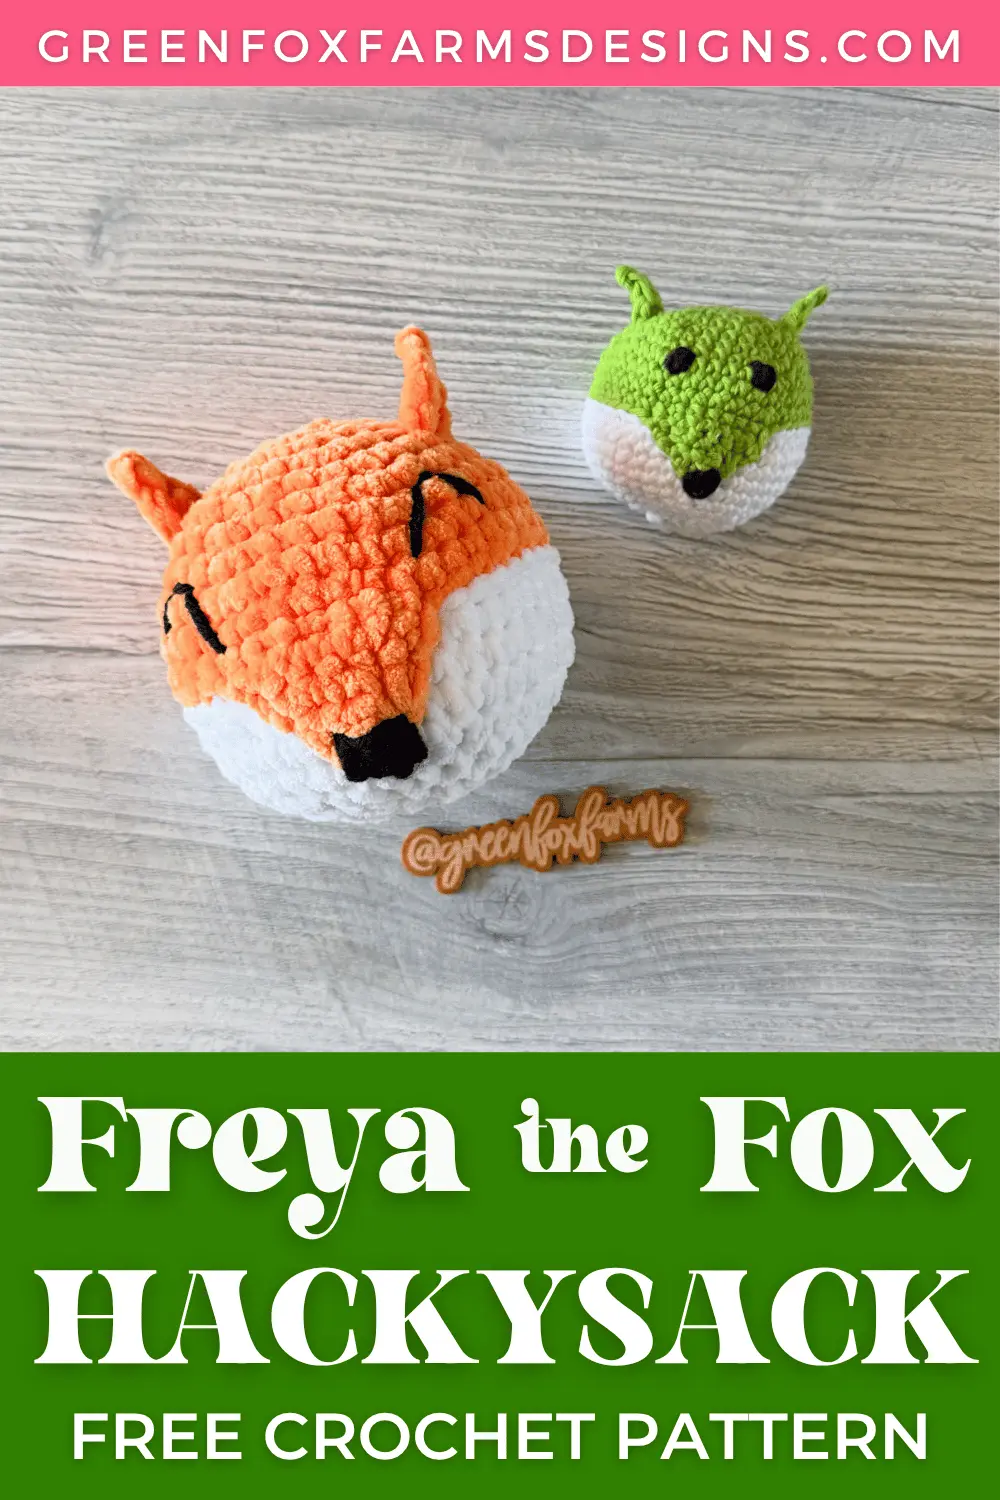
Make a low-sew crochet fox head plush with this free crochet pattern! Beginner-friendly instructions, step-by-step photos, and only a little sewing required. 🧶🦊
So many uses!
-
- A hacky sack
- A soft ball
- A squishy stuffie
- A hanging ornament
- A purse or bag charm
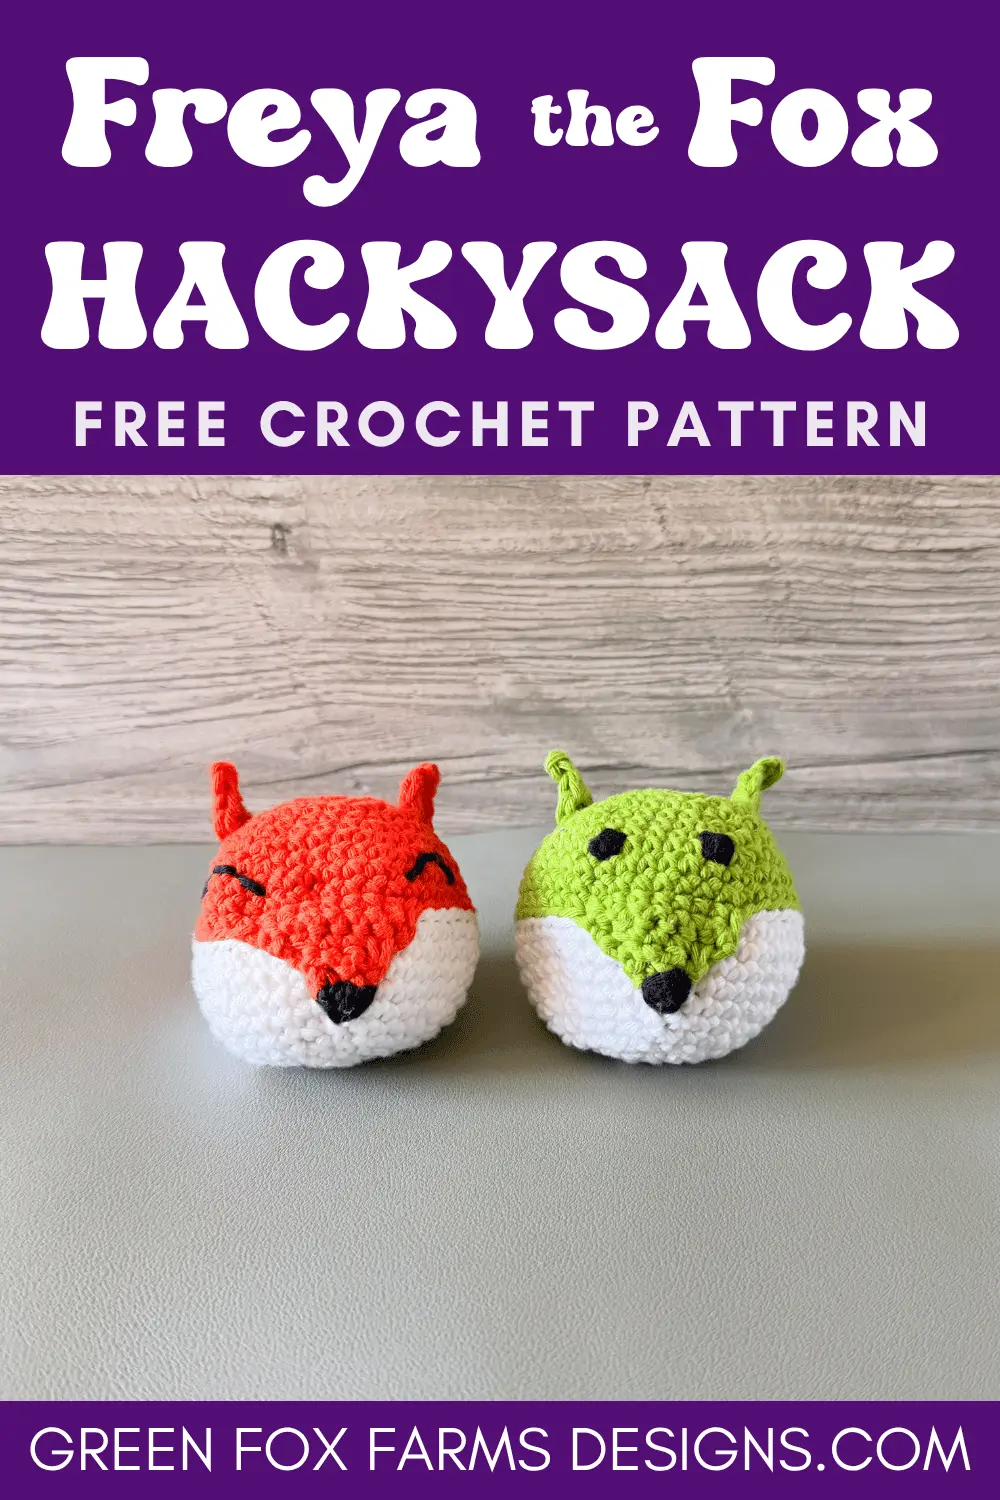
One Fox Hacky Sack, Five Ways to Use It
Freya may be a simple little fox, but she’s as versatile as many of my designs! The pattern stays exactly the same for all five versions. What changes is the filling and one or two small finishing choices. Every version is a fun little toy. Pick your favorite, or make one of each!
1. Fox Stuffie
Use a plush, chenille or blanket yarn, stuff her with fiberfill and Freya becomes a huggable little fox plush, sized just right for small hands and toy boxes. This is her official job for the 2026 Toy Box Crochet Along! After all, every toy box needs a woodland friend.
2. Crochet Hacky Sack
Use a worsted or dk cotton, fill her with dried beans or popcorn kernels and Freya turns into a crochet hacky sack with perfect weight for kicking around. A few of my testers also used poly pellets in a sock! Keep your stitches nice and tight so nothing sneaks out between them. I’ll cover fillings in more detail below, because the right filling makes all the difference in how she plays.
3. Cute Ornament
Add a simple chain loop to the top and Freya is ready to hang. An orange fox looks right at home on a fall garland, a cottagecore kitchen, or a rustic Christmas tree. Stuff this version lightly so she hangs gently instead of dragging the branch down.
4. Purse Charm
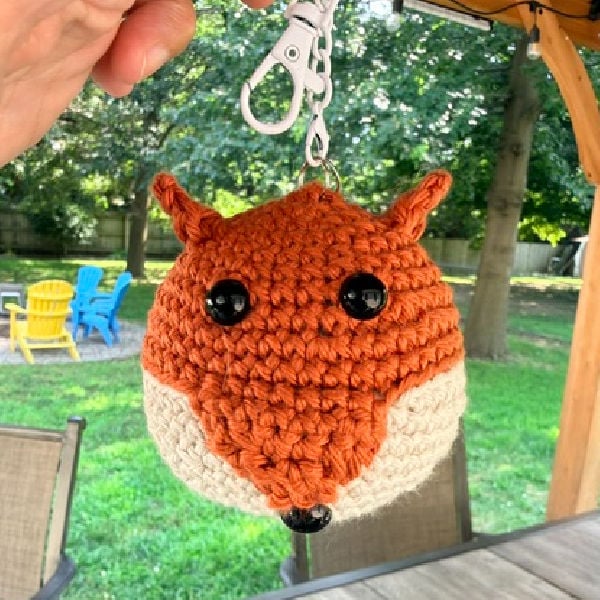
Attach a split ring or a lobster clip to that same chain loop and she hangs from a purse, backpack, or set of keys. This version makes a fun little gift for teachers, teens, and fox-loving friends, and it uses up almost nothing from your stash. Change the size by selecting a smaller or larger yarn weight!
5. Baby-Safe Toy Ball
For the littlest fox fans, make a larger version and stuff her with fiberfill only and avoid attaching anything more. That means an embroidered face instead of safety eyes, no beans, no clips, and no hanging loop. She rolls, she squishes, and with machine washable yarn she even survives the laundry! You can add a jingle ball or rattle insert inside for extra delight for babies and toddlers.
What to Fill a Crochet Hacky Sack With
Here’s the quick answer: fill a crochet hacky sack with dried beans, popcorn kernels, or plastic poly pellets. You want enough weight that she drops nicely onto a waiting foot, but enough give that she’s comfortable to kick. Somewhere around two-thirds full is the sweet spot. A packed-tight hacky sack plays like a rock, and nobody wants to kick a rock. **I stuffed my footbags fuller than this to make them look better in my photos, so mine may look a little different than yours.
I used popcorn kernels in the hackysack version of my Crochet Earth Pattern – Amigurumi Ball, and they’re still my favorite for this type of project. They’re cheap, they’re already in the pantry (because we love popcorn in my family!), and they give that classic scrunchy feel. Here’s how the common fillings compare:
- Popcorn kernels – my go-to. Light, cheap, and they mold around your foot on a catch.
- Dried beans or lentils – a little heavier than kernels. Pick beans for a slower, weightier kick and lentils for a softer feel. I usually opt for smaller beans like navy beans.
- Plastic poly pellets – the only choice if the hacky sack might meet water or the washing machine. Pantry fillings and puddles don’t mix.
- Rice – works in a pinch, but it’s fine enough to sneak through loose stitches.
Pro Tip! One trick worth stealing especially if your filling is rice or poly pellets. Pour your filling into the toe of an old pair of pantyhose or a small fabric pouch, knot it shut, and tuck that inside Freya before you close her up. Nothing escapes, even if a stitch stretches over time. If you skip the pouch, keep your stitches tight and go down a hook size if you can see daylight between them.
Baby Safe Tip! Filled-with-anything-loose is not safe for our little ones. Beans, kernels, and pellets are all choking hazards if they ever escape from the ball. For babies and toddlers, stick with the fiberfill-only toy ball from the section above and save the hacky sack for the big kids.
Like Free Patterns? Then make sure you check out my most popular Free Pattern –> DC Dice Bag & Tray! Want to see even more? You can find all of my other Free Crochet Patterns <– Right here!!
What I’m Watching & Listening To (While I Crochet)
I love to binge a series on Prime and/or book on Audible while I Crochet. I know that many of y’all do too! The simple, repetitive stitches of this little foxy footbag mean you can get into a rhythm and enjoy crocheting, while still leaving plenty of attention for that new show you’ve been dying to see. So whether you watch your fave movie on Netflix or Prime Video, or give a listen to your latest bingeable audiobook, you’ll have a blast relaxing and crocheting Plus, Freya is a quick project, so you can easily finish one in an evening or a whole skulk for your market table in a weekend!
Right now, I’m obsessed with anything dystopian and/or fantasy, as always.
Right now, I am watching Season 2 of The Boys on Prime (so good!), as well as re-watching seasons 1 & 2 of House of the Dragon so I can start watching season 3! Yes I have a type for books and shows lol! In keeping with that I am currently listening to (and loving!) The Kingdom of Copper, the second book (and equally as engrossing as the first!) in the Daevabad Trilogy by Shannon/S.A. Chakraborty. I highly recommend this excellent series and author if you like unique fantasy and world building.
I’m deep into my re-read / re-listening to the ACOTAR A Court of Thorns and Roses series by Sarah J. Maas in anticipation of the long awaited new books coming out in October and January! I’m currently on book 5 A Court of Silver Flames. Next up after this one will be starting my re-read / re-listen of the Crescent City series also by Sarah J. Maas because there are crossovers and I’ll not say anything more about that because I’m not spoiling it for anyone! I’ve read every book she’s written and they do not disappoint!
What are you watching and listening to these days? Tell me in the comments! 🧶💜
Thank You, Freya the Fox Pattern Testers!
I have such amazing and dedicated pattern testers!! A grateful thank you to my fabulous pattern testers for test crocheting the Freya the Fox Footbag pattern and offering your feedback. I couldn’t do this without you amazing hookers!
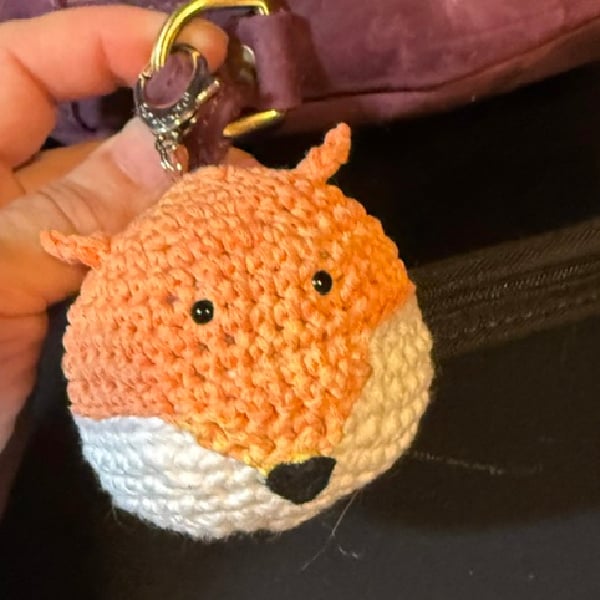
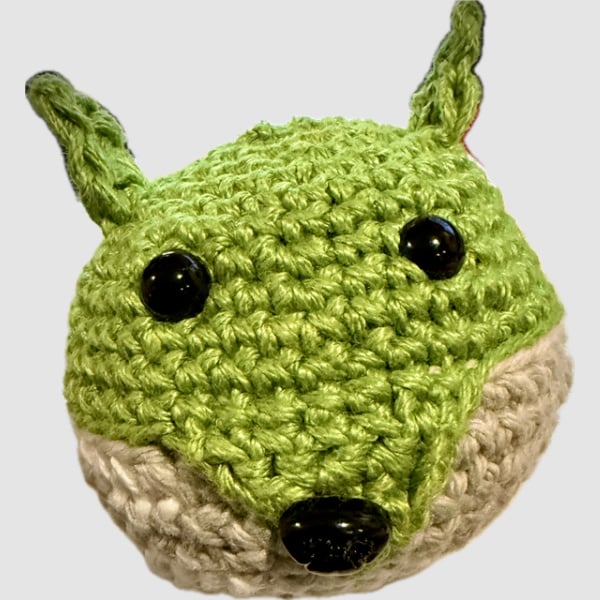
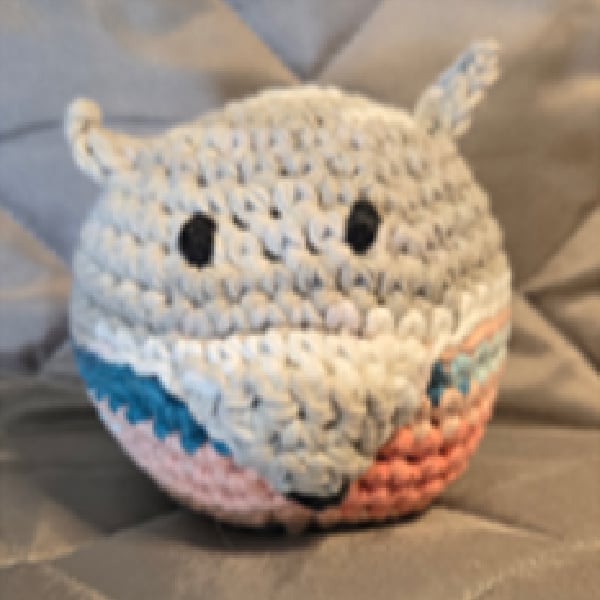
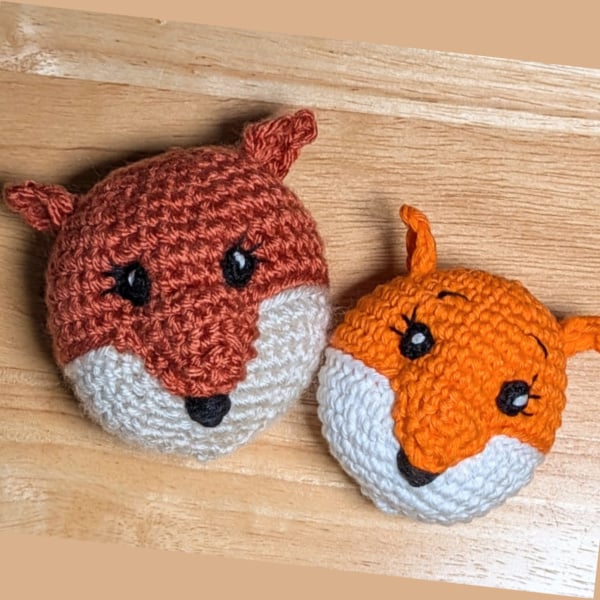
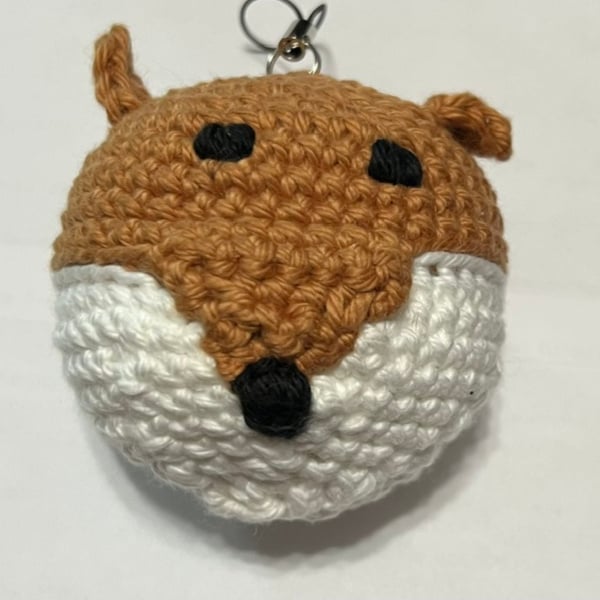
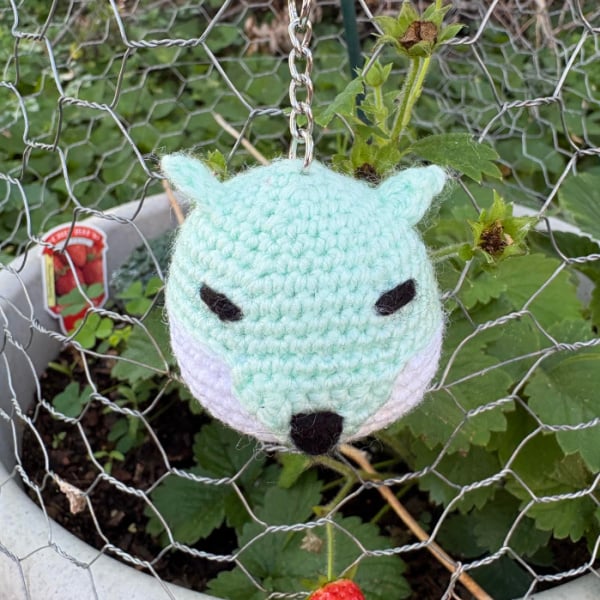
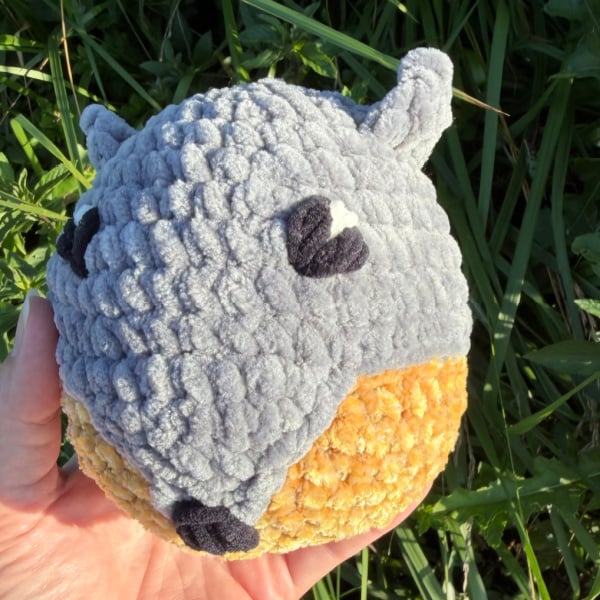
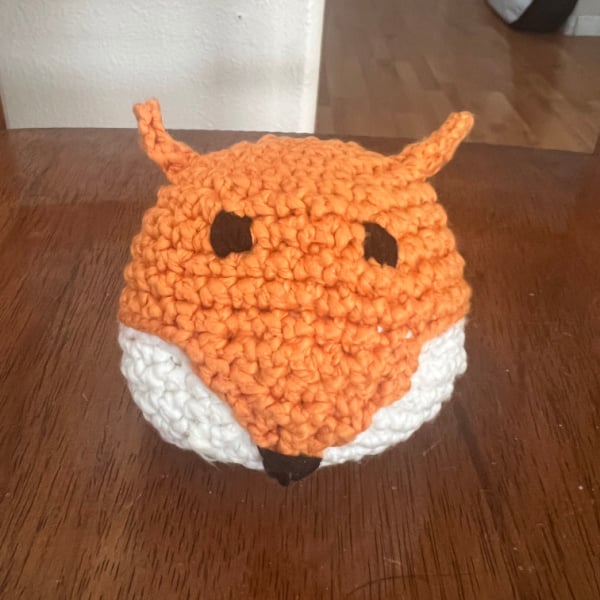
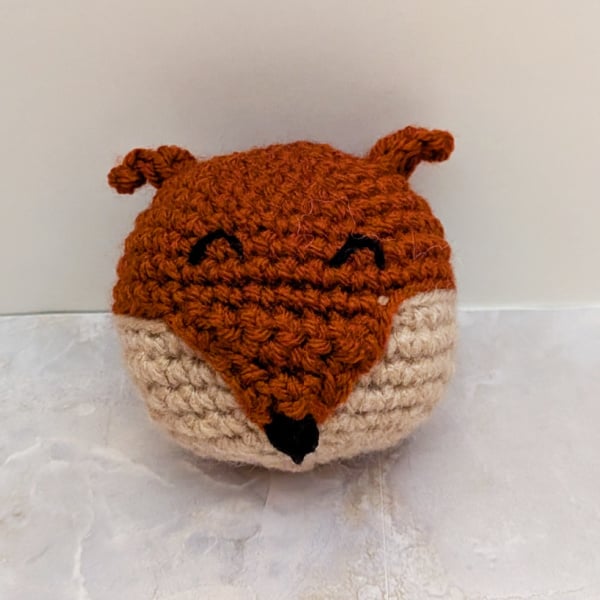
It truly makes my day getting to see the projects y’all create from my designs! My pattern testers play a very important role in bringing you the highest quality patterns that I can. Check out their gorgeous and colorful fox hacky sacks and sweet stuffies made using my pattern, below! Orange foxes, green foxes, and a few colors I never saw coming. That’s the fun of a simple pattern, every hooker makes it her own.
Thank you so much for testing the Freya the Fox Crochet Hacky Sack Pattern: Joanne Green, B Smith, Lisa Reinsch-Johnson, Marlesa Dunn, Robin Ford, Kami Jones, Tara Haines, Linda Woodthorpe, Anna Kendig, Judith Bradford, Ellamay Justus, and Cindy Wolf!


Want the Power to Pause Your Project??
Want a better way to keep track of your works in progress? Download a FREE copy of my Printable WIP Cards and never forget which hook, or yarn, or pattern you were using again!
Freya the Fox Crochet Hacky Sack Pattern is featured on the Toy Box Crochet Along!
Freya’s big moment is here! My free fox stuffie pattern is the featured Toy Box CAL pattern for the week of July 20, 2026! I’m thrilled to be part of this event with CAL Central again, because the organizers know how to celebrate everything we love about dolls, stuffies, and amigurumi. A brand new free crochet toy pattern drops every Monday from June 1 to August 3, 2026, and there are prizes from some amazing crafting companies up for grabs too!
The event lives in the CAL Central Facebook and Ravelry groups, where hookers from all over share their finished toys. Make your fox stuffie to keep, give her as a gift, or donate her to a charity that gets handmade toys into little hands. And truly, half the fun is watching everyone else’s projects roll in all summer long. 🌞
EVENT DETAILS:
Every Monday from June 1 to August 3, 2026, a designer shares a free crochet toy pattern. That adds up to 10 free patterns covering dolls, amigurumi, plushies, and more. No themed rounds this year, just a full summer of new toys. Don’t forget to enter the giveaway by Sunday, August 9!
How To Join the 2026 Toy Box CAL
Read all the details on the main event post from Underground Crafter!
https://undergroundcrafter.com/2026/06/01/2026-toy-box-crochet-along/
Join the Crochet Along Group on Facebook:
https://www.facebook.com/groups/CALCentral/
Join the Crochet Along on Ravelry:
https://www.ravelry.com/groups/cal-central-crochet
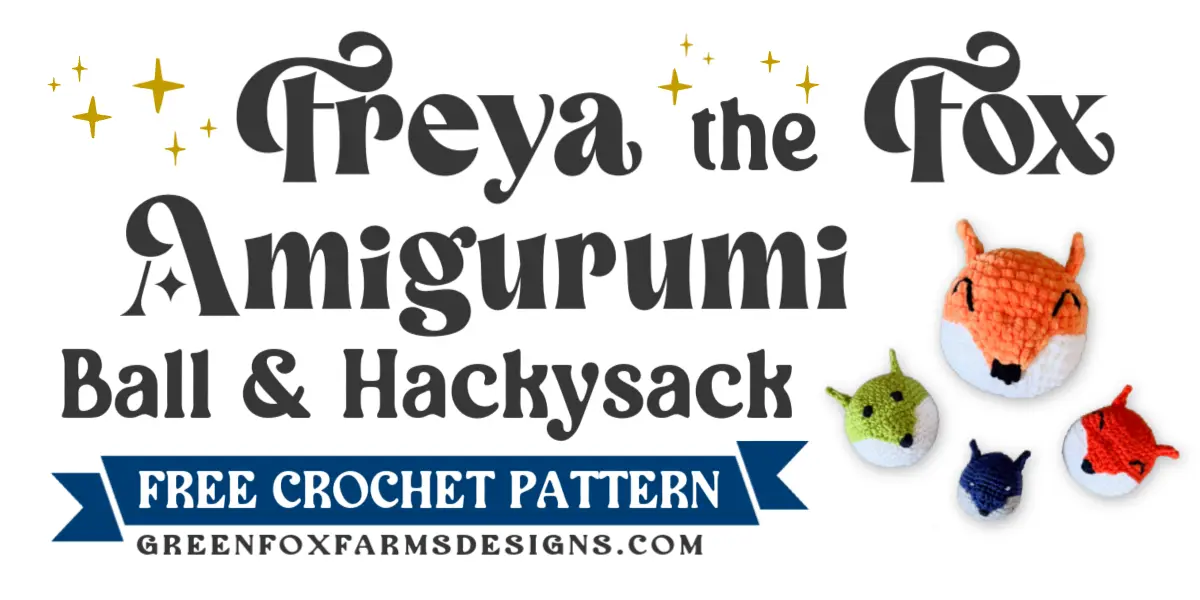
MAKE A FREE FOX FOOTBAG CROCHET PATTERN!
A really fun and easy Crochet Hacky Sack Pattern!
Materials:
** These are the materials I used for my samples. You can use the yarn and hook size of your choice. I recommend using 1-2 hook sizes down from the hook size suggested on the yarn label to get good tight stitches.
BULKY PLUSH YARN: Premier Parfait Chunky, (100% Polyester, 100 g/3.5 oz, 131 yds/120 m)
Sample Colors LARGE: 30 – 50 yds total
Top Color: Tangerine (1 skein/25 yds)
Bottom Color: White (1 skein/25 yds)
HOOK: US J-10 6.0 mm
OR
CHARM / HACKY SACK YARN: Paintbox Cotton Aran Worsted Weight 4 yarn, (100% cotton, 1.7 oz/50 g, 93 yds/85 m)
Sample Colors SMALL: 25 – 45 yds total
Top Color: Blood Orange OR Lime Green (1 skein/25 yds)
Bottom Color: Paper White (1 skein/20 yds)
HOOK: US G-6 4.0 mm – 4.25 mm
OR
DK HACKY SACK YARN: King Cole Cottonsoft DK Weight (3) Yarn, (100% Cotton, 229 yds/210 m, 3.5 oz/100 g)
Sample Colors SMALL: 20 – 40 yds total
Top Color: Midnight Blue (1 skein/20 yds)
Bottom Color: Stormy Gray (1 skein/20 yds)
HOOK: US E-4 3.5 mm
OTHER SUPPLIES:
Dry popcorn or beans for Footbag OR 1 oz stuffing for ball or charm
Scraps of embroidery floss/ yarn to embroider face
Yarn needle
Scissors
Stitch markers
OPTIONAL SUPPLIES:
Keyring + bag clip for charm
1-2 inch rattle or Jingle Ball
Finished Sizes: **Sizing is approximate, measured after stuffing from my own samples. Sizing will vary depending on the yarn weight/type and your stuffing material/
DK FOXY: 6“ around x 2” tall
WORSTED FOXY: 8“ around x 3” tall
BULKY CHENILLE FOXY: 14“ around x 5” tall
Gauge: 20 sc x 22 rows = 4” square (Gauge is not very important)
Experience Level: Advanced Beginner / Easy

Pattern Key: Written in US English Crochet Terms
st(s) – stitch(es)
sp(s) – space(s)
ch – chain
sl st – slip stitch
sc – single crochet
hdc – half double crochet
dc – double crochet
sc2tog – decrease by sc 2 sts together
inv dec – invisible decrease (see spec sts)
picot – see special stitches
ear stitch – see special stitches
BLO – back loop only
FLO – front loop only
yo – yarn over / yu – yarn under
FO – fasten off
Free Fox Crochet Hacky Sack Pattern Instructions
Special Stitches:
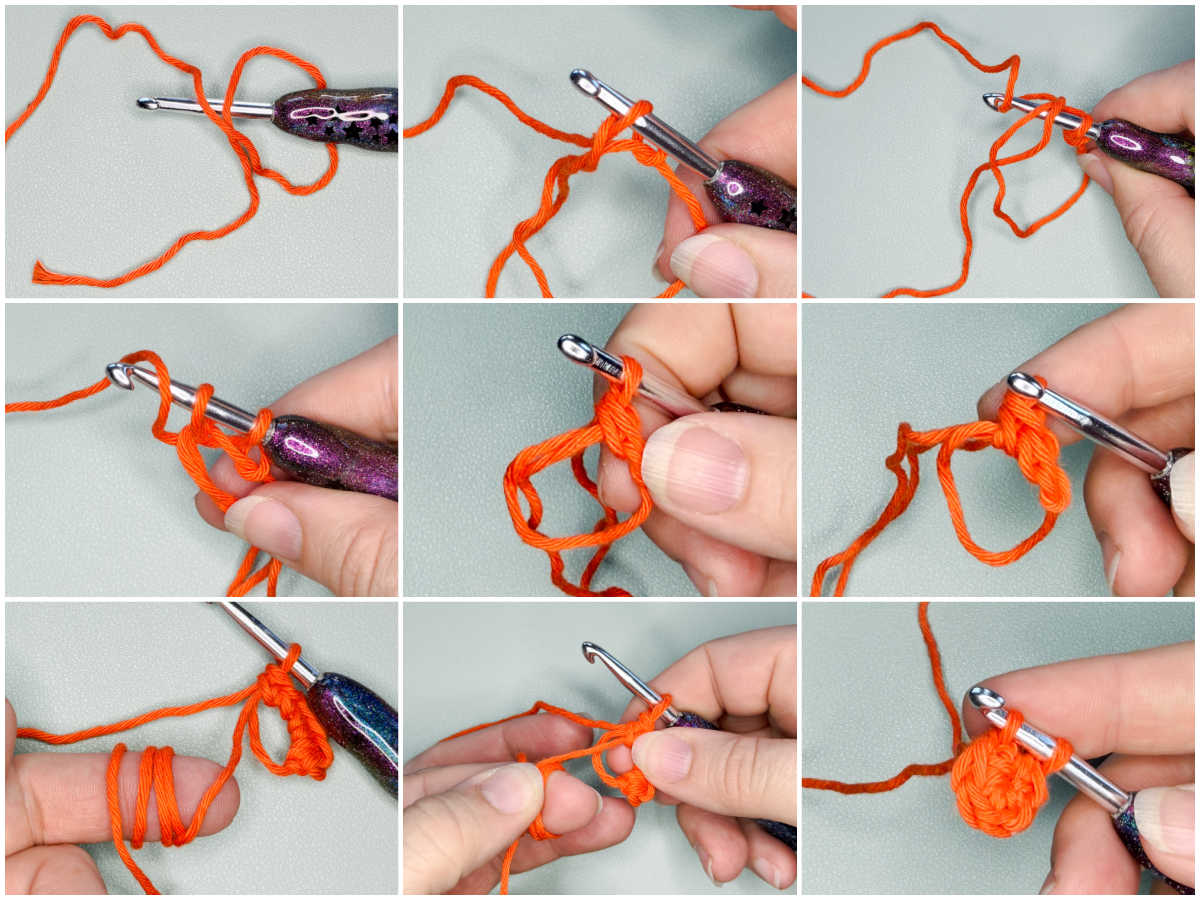
Magic Circle Tutorial:
STEP 1: Create a loop with yarn, place hook through the loop, YU and pull the yarn through the loop, keeping the loop open in a circle instead of pulling the yarn tight.
STEP 2: Ch 1, insert hook back in circle, YU and pull up a loop through the circle.
STEP 3: YU again and pull through the 2 loops on the hook, 1 sc completed! Repeat Step 2 to create additional stitches. Hold stitches with one hand, gently pull yarn end with other hand to close the circle. YU = yarn under technique used instead of yarn over for a tighter stitch
Picot Tutorial: Ch 3, sl st in 3rd ch from hook. Picot completed.

Ear Stitch: Worked all stitches in same stitch in FLO (hdc, dc, picot, dc, hdc).
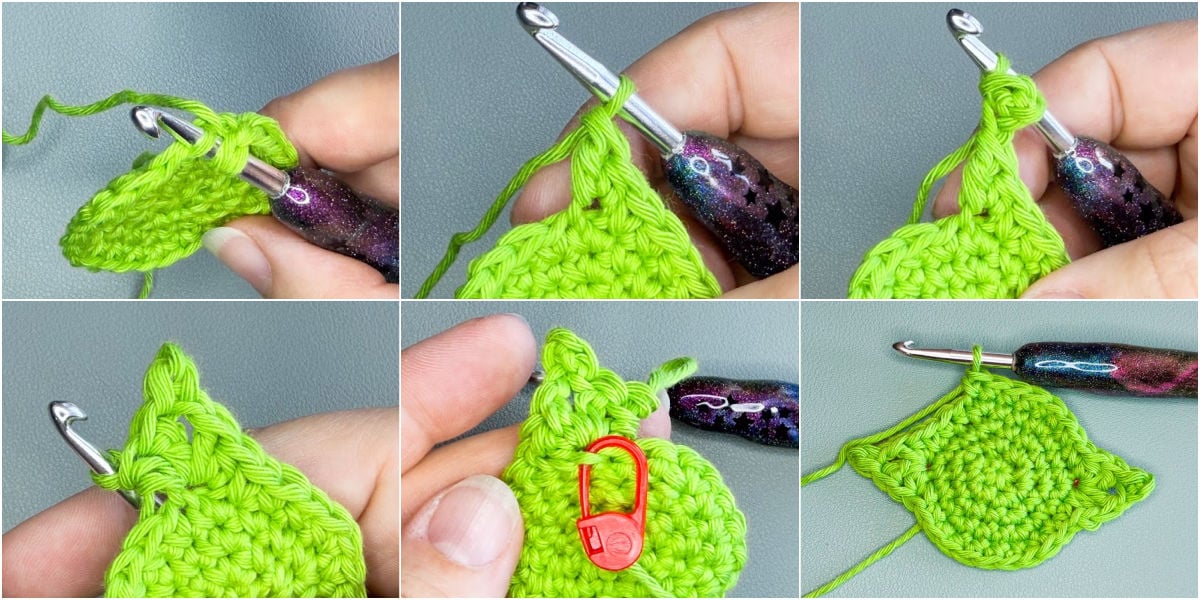
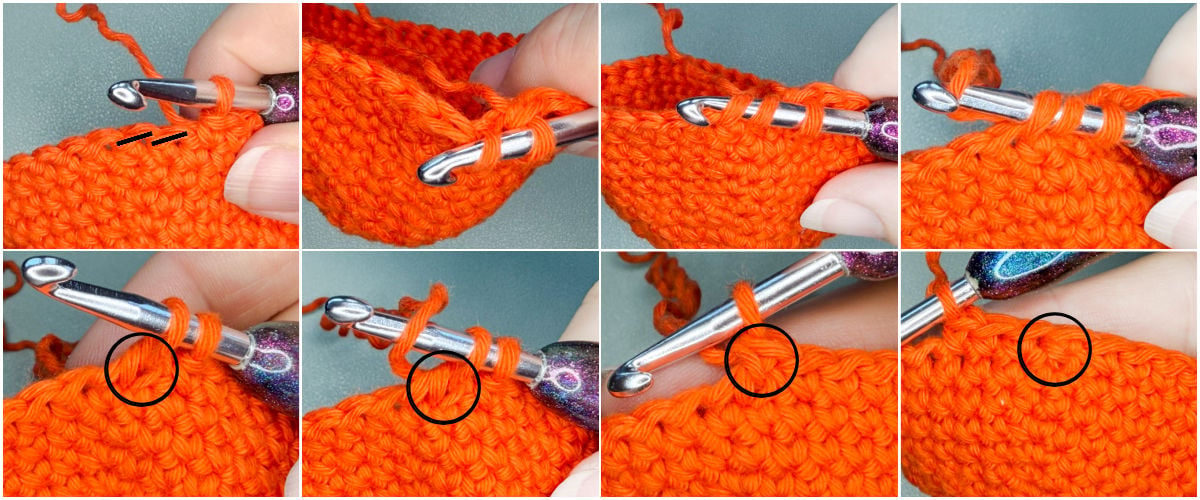
Invisible Decrease (inv dec): Insert hook in FLO next st, and FLO of next st, YU (yarn under) and pull up a loop through both loops, YU and pull through both loops on hook like a traditional single crochet. Invisible Decrease single Crochet completed.
NOTES:
- Read through the entire pattern first to familiarize yourself with the process.
- This pattern is designed to work with any yarn weight of your choice. Use a hook 1-2 sizes lower than the yarn label suggests.
- Repeat stitches between [ and ] { and } the number of times indicated. Place all stitches between ( and ) in same space.
- This pattern is worked in a single piece.
- Pattern is worked in continuous rounds (with the exception of the snout). Use a stitch marker to mark the first stitch.
- Snout is worked in rows, crocheted directly on head after Round 11, and then needs to be stitched down on both sides.
- In Round 6 for ear stitches you will fold the ear out of your way and work stitches into the marked BLO of those stitches. At the next stitch, fold it back and work the rest as usual. Do the same for Round 12 with the snout.
- This pattern is FREE, and has been thoroughly tested and tech edited. Please feel free to share any comments or ask any questions you may have! I welcome your feedback!!
- This post and all it contains including the pattern and photographs are my intellectual property and copyright protected property of GreenFoxFarms LLC © 2026. You are welcome to make as many as you like to sell, giveaway, etc. You may NOT sell, or alter and claim as your own this pattern. You may not use my photographs. This pattern is not for mass production.
- If you want to share this pattern online, you must only share a link to my blog post. You may not copy and paste my text or the pattern to another site. Thank you for respecting my work.
- By using this pattern, you are agreeing to abide by these terms.
Pattern Release Details:
Prefer a printable, ad-free PDF? This multi-use Freya the Fox Footbag crochet pattern is now available for purchase in my Ravelry and Etsy shops! If you love the pattern, will you please go and show it some love ❤️ on the platform of your choice, which not only helps YOU easily find it quickly in your faves, but it will also help my patterns to get seen by more people! Thank you so much friends!! 🙂 The links below will take you to the Fox crochet hacky sack pattern in my Ravelry or Etsy shop, so you can shop at your favorite place to buy the pattern now or save it for later!
Do you love discounts? I mean, you’re human right?? If YES then you will love my VIP List and/or Facebook Community where you can find a coupon to use on patterns in my Etsy or Ravelry shop! Also, my VIPs are the first to hear about new pattern releases, sales (some are exclusive to my VIPs only!), CALs (crochet alongs), and lots of fun crochet discussions!
Pattern Download RAVELRY
Click the Buy NOW button below to purchase a Printer Friendly, Ad-Free, FULL PDF Pattern Download version including many more detailed photo tutorials of the Freya the Fox Crochet Hacky Sack Pattern on RAVELRY!
Pattern Download ETSY
Click the Buy NOW button below to purchase a Printer Friendly, Ad-Free, FULL PDF Version Download: including many more detailed photo tutorials of the Freya the Fox Footbag Crochet Pattern on ETSY!
FREE FOX CROCHET HACKY SACK PATTERN:
Freya the Fox Pattern Directions:
TOP of FOX HEAD:
- Do not join rounds, instead work in continuous rounds using stitch marker
- Head is worked from the top down, start with orange or main color of choice.
Round 1: Make a Magic Circle with main color. Ch 1, 6 sc in magic circle, (6 sc).
Round 2: 2 sc in each st around, (12 sc).
Round 3: [Sc, (2 sc) in next st,] 6 times, (18 sc).
Round 4: [Sc in next 2 sts, (2 sc) in next st,] 6 times, (24 sc).
Round 5: Sc in next 3 sts, ear stitch in FLO next st and mark BLO, sc in next 11 st, ear stitch in FLO next st and mark BLO, sc in next 8 sts, (22 sc, 2 ear sts).
Round 6: {Sc in next 3 sts, push ear down and (2 sc) in BLO, [sc in next 3 sts, (2 sc) in next st,] 2 times,} 2 times, (30 sc).
Round 7: [Sc in next 4 sts, (2 sc) in next st,] 6 times, (36 sc).
Round 8: [Sc in next 5 sts, (2 sc) in next st,] 6 times, (42 sc).
Rounds 9-10: Sc in each st around, (42 sc, 2 rounds).
Round 11: Sc in next 34 sts, mark BLO of next st, (34 sc). Last 8 sts worked in snout
CONTINUE WITH FOX SNOUT BELOW.
FOX SNOUT:
Row 1: Sc in FLO next 8 sts, (8 sc).
Row 2: Turn, ch 1, sc2tog, sc in next 4 sts, sc2tog, (6 sc).
Row 3: Turn, ch 1, sc2tog, sc in next 2 sts, sc2tog, (4 sc).
Row 4: Turn, ch 1, sc2tog, 2 times, (2 sc).
Row 5: Turn, ch 1, sc2tog, (1 sc) FO and leave a long tail to stitch in place.
CONTINUE WITH FOX HEAD BELOW.
BOTTOM of FOX HEAD:
- Do not join rounds, instead work in continuous rounds using stitch marker
Round 12: Fold the snout out of the way toward top, join White yarn with a sl st to the 1st (marked) BLO of Round 11 under nose, loosely sl st in BLO of same st as join and each st around, (42 sl st). See tutorial p. 6
Round 13: Sc in BLO each st around, (42 sc).
Round 14: Sc in each st around, (42 sc).
Round 15: [Sc in next 5 sts, inv dec,] 6 times, (36 sc).
Round 16: Sc in each st around, (36 sc).
Round 17: [Sc in next 4 sts, inv dec,] 6 times, (30 sc).
Round 18: [Sc in next 3 sts, inv dec,] 6 times, (24 sc).
Round 19: [Sc in next 2 sts, inv dec,] 6 times, (18 sc).
STOP HERE and Stitch Down Snout before continuing. Add embroidered/ safety eyes/nose now also before stuffing the fox head. SEE BELOW.
Fill in the rest of ball with popcorn kernels or dried beans for a footbag. A funnel is helpful! Or use stuffing for a ball/charm.
Round 20: [Sc in next st, inv dec,] 6 times, (12 sc).
Round 21: Inv dec 6 times, (6 sc) FO and leave a long tail. Use the tail to close any remaining opening, weave in ends.
Finishing Foxy Ball:
STITCH DOWN SNOUT:
STEP 1: Fold the snout down over the white part of the fox head. The snout should be centered between the 2 ears. If the positioning is off for your nose, you can go back and shift the position over 1-2 of stitches in either direction to correct this.
STEP 2: Hold or pin the bottom of the snout in place. Using the yarn tail from the end of the snout, stitch along both sides of the snout triangle to attach to the ball. FO and weave in end. Continue with Eyes and nose.
ADD EYES AND NOSE:
Basic instructions are given for embroidering eyes and nose with a satin stitch. Feel free to use any skills or tools at your disposal like: fabric paint, puffy paint, makeup, felt pieces, etc. You could also use safety eyes and noses or googly eyes but I would not recommend using these for the footbag as they may break, detach, etc.
EYES AND NOSE POSITIONING:
Pro tip: Don’t be afraid to pull your stitches out and try again. I redid mine a few times before I was happy with them. Use the photos as a guide, but do your own thing!
STEP 1: Start with the nose. I used black yarn. Center the nose at the bottom of the snout. Stitch the nose using a satin stitch over tip of snout and approximately Rounds 16-17.
STEP 2: Place eyes centered above the nose at approximately Round 8, with about 4-5 sts between them. Use a satin stitch and/or french knot to create the eyes. I used a satin stitch.
FINISHING: Because the ends will be contained inside, I DO NOT weave in the ends! I tied each section off very securely with a triple square knot and trimmed the ends to about an inch.
ADD OPTIONAL CLIP/CORD:
ADDING HARDWARE TO YOUR FOXY:
- Insert a split jump ring through any of the central stitches in 1st round of head. Close the ring securely and attach to the chain or ring of your hardware. Add any additional hardware like a keyring and/or bag clip.
ADDING A CROCHET HANGING CORD TO YOUR FOXY:
- Join yarn to head with a sl st, through any of the central stitches in the first round of head. Ch 60, skip the first 45 chs, sl st in the last 15 to form a loop. FO and weave in the ends.
- Adjust the length that the charm hangs by increasing or decreasing the number chains in the cord. Change the size of the loop by adjusting the number of skipped stitches in the loop.
- To hang your charm, wrap the cord, loop end first around a strap or handle of the bag, then insert the fox head through the loop and pull tight to secure!
Freya the Fox Crochet Hacky Sack Pattern FAQs
Frequently Asked Questions
What is the difference between a hacky sack and a footbag?
Nothing, really! Footbag is the official name for the sport and the ball, while Hacky Sack started as a brand name that stuck, kind of like Kleenex. Most folks say hacky sack, so I do too. Either way, a crochet footbag like Foxy Freya plays the same game.
How long does it take to crochet a hacky sack?
Most hookers finish Freya in one relaxed evening. The ball itself works up fast since it’s all basic stitches in the round. The ears and face add a little time, but nothing you can’t handle during one movie. Your first one takes longest, and then they fly off the hook.
Can I make Freya bigger or smaller?
Yes, and you don’t change a single stitch of the pattern. Use a bulkier yarn and bigger hook for a larger fox, or a lighter yarn and smaller hook for a mini. I did the same thing with my crochet Earth ball, and it’s my favorite trick for getting more from one pattern.
How much yarn do I need to make a hacky sack?
Very little, which makes Freya a great scrap yarn project. You need a small amount of your main color, even less white for her bottom half, and scraps for the face details. If you’ve got leftovers from bigger projects hiding in your stash, this fox stuffie was born to use them.
How do I wash a crochet hacky sack?
Check your filling first. Fiberfill-stuffed foxes made with machine washable yarn can ride in the machine on gentle, then air dry. Anything filled with beans, kernels, or rice should only be spot cleaned, since pantry fillings and water lead to something gross nobody wants to deal with! Poly pellets handle full washing.
Can I sell fox footbags made from this pattern?
Yes, with one Green Fox Farms Designs house rule: you’re welcome to sell your finished foxes at in-person markets and craft fairs, but not online. The pattern itself always stays free here on the blog, so please share the link instead of copying the pattern. Note to handmade sellers, Freya moves fast at fall markets!
Is a crochet hacky sack safe for kids?
For big kids, absolutely, that’s the whole point! For babies and toddlers, skip the loose fillings and anything attached, since beans and clips are choking hazards. Make the fiberfill-only version with an embroidered face instead. When in doubt, keep bean-filled foxes with the backyard toys, not the crib toys.
Please Share your own Fox Crochet Hacky Sacks!
I hope you enjoy making this easy crochet fox pattern as much as I enjoyed designing it – just for you! I would love if you would share your sea turtle projects on social media and on Ravelry!!! I adore getting to see your finished items!! The best part about being a crochet pattern designer is getting to see the amazing creations y’all make with my patterns! It makes me smile and it’s the reason I do what I do!! (TBH: The yarn benefits are pretty sweet too! 😉)
Do you LOVE Free Crochet Patterns (<– like these) and do you want to see more of them on my blog? If so, please help me grow by sharing this blog Post with you crochet loving friends, and subscribing to my VIP newsletter! Thank so much for your support and for joining me on this journey, filled with yarn! If you have questions or need help of any kind with the pattern, don’t hesitate to contact me or leave a comment on the blog. I’m here to help!

Want the Power to Pause Your Project??
Want a better way to keep track of your works in progress? Download a FREE copy of my Printable WIP Cards and never forget which hook, or yarn, or pattern you were using again!

Never heard of an “ear stitch” in crochet & there is no “special stitch” note here.
Hi Kayla,
Thanks so much for visiting. You’re right, I completely forgot to include the ear stitch tutorial on the post when I published, sorry for the inconvenience, and thank you so much for letting me know so I could fix it!! I’ve added the tutorial for this stitch in the special stitches section.
Thanks again and happy hooking!
Lisa Fox