Easy Butterfly Crochet Pattern
I’ve had this free crochet butterfly amigurumi pattern tucked away as a paid pattern since 2022, and honestly… it was time to let her spread her wings and fly free. 🦋
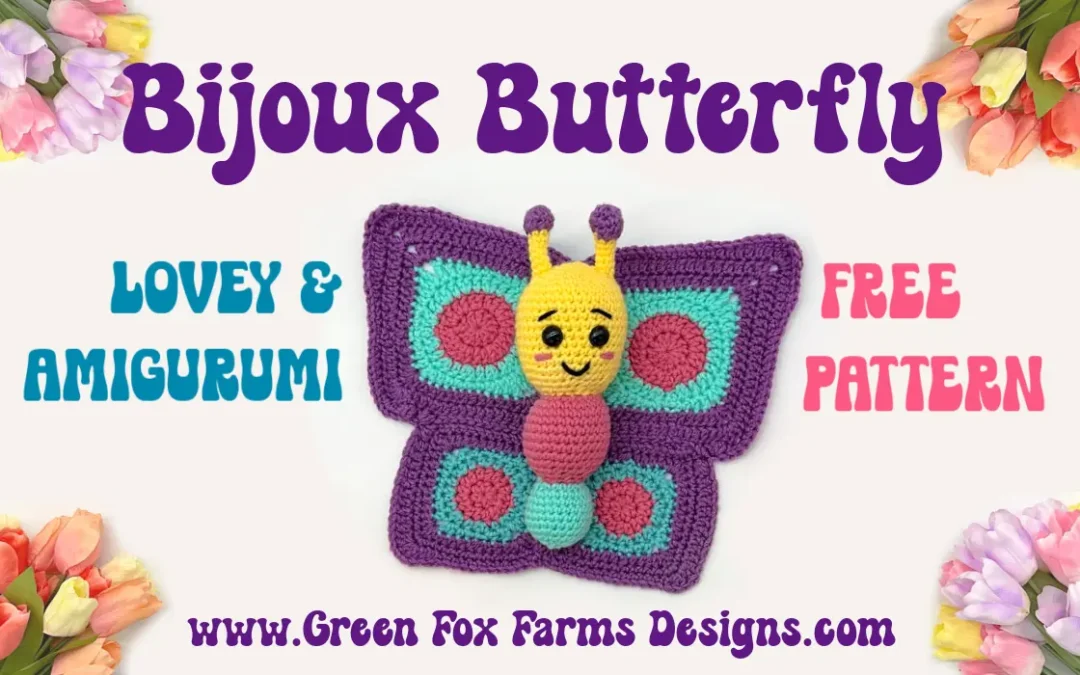
My Bijoux Butterfly stuffie has always made people smile. She’s soft, floppy and super cute, with those big fluttery wings and squishy, cuddly body that kids absolutely love. She works beautifully as a butterfly toy, a handmade gift, nursery decor, or a sweet little shelf friend for someone who just needs something bright and happy in their life.
One of my favorite summer sights is butterflies, flying around my garden and yard! My kids have always loved watching and running after them too, so it seemed only fitting to create a lovely little Butterfly Toy for my youngest daughter!
If you’ve been looking for a crochet butterfly amigurumi pattern that’s both fun to make and even better to gift, you’ll love this easy pattern. She’s the perfect project for spring crochet, baby gifts, birthdays, or honestly just because butterflies are cute and we don’t need a bigger reason than that.
Let’s make a butterfly!
Inspired by my Rainbow Caterpillar and Butterfly Rattles pattern, I wanted to create a toy with simple, friendly features to appeal to young children, and so I created the sweet and smiling Bijoux Butterfly Crochet Pattern! I hope y’all love this free pattern as much as my kids do! 🦋
DISCLOSURE: This post may contain affiliate links. See my Privacy Policy for more information.
Why You’ll Love This Butterfly Crochet Toy Pattern
I love designing amigurumi patterns, and have been making them since my kids were tiny. Once I had mastered the basic crochet stitches, I started making amigurumi and absolutely fell in love with making fun toys – for my kids (of course), but honestly I’m a kid at heart too! I especially love to design toys that encourage learning and the use of imagination.
I love multifunctional toys too, so I wanted to create a large butterfly amigurumi that was easy for little hands to hold. But this free pattern is so much more than a toy! While my (then) 3 year old immediately grabbed Bijoux Butterfly by the wings and began racing around the yard and “flying” together.
This toy is equally appropriate for babies too. The large, soft wings are made in a granny square blanket style, and they double as a lovey security blanket. So you have a sweet butterfly that can grow with your baby into toddlerhood and beyond. My own kids still loved her through their preschool years!
This amigurumi butterfly doll also makes a sweet addition to a child’s bedroom decor, nursery shelf, or reading nook. So yes, there are lots of possibilities!

Want the Power to Pause Your Project??
Want a better way to keep track of your works in progress? Download a FREE copy of my Printable WIP Cards and never forget which hook, or yarn, or pattern you were using again!


Like Free Patterns? Then make sure you check out my most popular Free Pattern –> DC Dice Bag & Tray! Want to see even more? You can find all of my other Free Crochet Patterns <– Right here!!
Crochet Butterfly Amigurumi Tutorial
Is This Butterfly Crochet Pattern Beginner Friendly?
This crochet butterfly amigurumi pattern is best suited to intermediate crocheters, or confident advanced beginners ready to try simple shaping, treble crochet, and some simple seaming! If you’ve made a few amigurumi projects before and want something a little more interesting, the free Bijoux Butterfly pattern is a great fit for you!
The free crochet butterfly amigurumi pattern below includes the full written instructions so you can make the amigurumi body, sweet butterfly face, and granny square style wings. However, if you prefer extra visual help? Then the ad-free PDF includes photo tutorials for making and assembling the butterfly face and wings. With the PDF version, by the time you finish, you’ll feel confident making a butterfly lovey, butterfly toy, and a beautiful butterfly baby blanket style comfort toy all in one.
↓
↓
↓
Need some help with the stitches? Check out my Learn to Crochet Series and my fun Crochet Tutorials! You can also reach out at any time! I am more than happy to help you with any questions you may have!
Best Yarn for This Butterfly Crochet Pattern
Here’s what you need to get started
200-250 yards of Red Heart Super Saver or your choice of worsted/aran weight 4 yarn in 4 different colors for the body and wings. You could definitely use some larger balls of scrap yarn and it’s a great way to give new life to the ends of skeins you have lying around.
You will need a US G/6 4.0 mm hook for the body and a H/8 5.0 mm hook for the wings ← I highly recommend these easy to use ergonomic hooks! I have really been enjoying using the Clover Amour hooks for creating amigurumi these days. And I loved using mine to create this adorable amigurumi butterfly pattern!
You will also need 15 mm safety eyes, felt eyes, or yarn to embroider the eyes, and about 3 ounces of your stuffing of choice – you can’t go wrong with my fave poly-fil! Which gives a nice soft finish.
Below are the yarns I used to create my samples. For this project I used RHSS in Light Raspberry, Medium Purple, Bright Yellow, and Aruba Sea. I absolutely love how bright and happy she turned out. 😍 I think you will have a LOT of fun choosing your colors for this project. Go for colors to match a nursery theme, pick neutrals with a pop of color, or use shades inspired by a favorite butterfly. You’ll end up with a crochet butterfly amigurumi project that feels special either way.


What You Need to Make a Free Crochet Butterfly Amigurumi
Materials:
YARN: Red Heart Super Saver Weight 4 yarn, (100% Acrylic, 7 oz/198 g, 370 yds/338 m)
YARDAGE: 200 – 250 yds total
Sample Colors:
HOOKS: US H-8 5.0 mm for WINGS – AND – US G-6 4.0 – 4.25 mm for BODY
OTHER SUPPLIES: 3 oz stuffing, Yarn needle, Scissors, Stitch markers
Size: (Sizing is approximate)
WINGS: 10” tall x 9 – 12.5” wide
BODY: 8” long x 6 – 10” around (10” long including antennae)
Gauge: 16 sc x 16 rows = 4” square
Gauge is not very important for this pattern
Experience Level: Intermediate

Pattern Key: Written in US English Crochet Terms
st(s) – stitch(es)
sp(s) – space(s)
sl st – slip stitch
ch(s) – chain(s)
sc – single crochet
hdc – half double crochet
dc – double crochet
tr – treble crochet
sc2tog – decrease by sc 2 sts together
hdc3tog – decrease by hdc 3 sts together
yo – yarn over
FO – fasten off
Special Stitches:
Magic Circle:
STEP 1: Create a loop with yarn, place hook through the loop, yo and pull the yarn through the loop, keeping the loop open in a circle instead of pulling the yarn tight.
STEP 2: Ch 1, insert hook back in circle, yo and pull up a loop through the circle.
STEP 3: Yo again and pull through the 2 loops on the hook, 1 sc completed! Repeat Step 2 to create additional stitches. Hold stitches with one hand, gently pull yarn end with other hand to close the circle.

NOTES:
- Read through the entire pattern first.
- Butterfly head and body sections are worked in the round from the top down in one continuous piece.
- Antennae are worked in the round and stitched to the head.
- For the body, rounds are worked continuously with no joining. Use a stitch marker to keep track of the first stitch.
- Wings are worked in the round, in 4 diamond shaped sections, then seamed together.
- You will carry the non-working yarn throughout the design, both versions. You can work around the yarn every stitch, or every few stitches.
- Repeat stitches between [ and ] the number of times indicated.
- Place all stitches between ( and ) in the same space.
- This pattern is FREE to view and read on my website ONLY, and has been thoroughly tested and tech edited. Please feel free to share any comments or ask any questions you may have! I welcome your feedback!!
- If you would like a downloadable, ad-free PDF of the pattern, you may purchase from one of my shops linked in this post for a small fee.
- This post and all it contains including the pattern and photographs are my intellectual property and copyright protected property of GreenFoxFarms LLC © 2022 and 2026. You are welcome to make as many bags as you like to sell, giveaway, etc. You may NOT sell, copy, or alter and claim as your own this pattern. You may not use my photographs. This pattern is not for mass production.
- If you want to share this pattern online, you must only share a link to my blog post. You may not copy and paste my text or the pattern to another site. Thank you for respecting my work.
- By using this pattern, you are agreeing to abide by these terms.

Large Butterfly Crochet Pattern Details
Bijoux Butterfly is a large crochet butterfly toy with a soft amigurumi body and wide granny square style wings. She has enough size to feel like a proper handmade toy, but she’s still soft and easy for little hands to carry around.
The granny square style wings give this pattern a bit of a lovey feel too, which makes it extra lovable for babies and toddlers. You can make her in bright rainbow colors, soft nursery shades, or scraps from your yarn stash, and each crochet butterfly will have her own sweet little personality to love.
The Best Pattern Testers!
I’m so lucky to have such amazing and dedicated pattern testers! Thank you so much to each and every one of my fabulous testers for helping bring this crochet butterfly amigurumi pattern to life. From test crocheting the pattern to sharing feedback and creating the sweetest butterfly toys, I truly couldn’t do this without y’all.
One of my favorite parts of releasing a new pattern is getting to see all the different versions come to life. Every crocheter brings their own color choices, style, and personality to the design, and it’s always so fun to see.
My talented testers play such an important role in helping me create the best quality patterns possible, and I’m so grateful for them. Take a look at the beautiful butterfly amigurumi projects they made with this pattern below!
Thank you so much for testing the Bijoux Butterfly Crochet Pattern: Robin Quade, Wendy King, Melyssa Weiner, Karine Carriere, Annette Thompson, Stephanie Ragland, and Leslie Boldt!


Want the Power to Pause Your Project??
Want a better way to keep track of your works in progress? Download a FREE copy of my Printable WIP Cards and never forget which hook, or yarn, or pattern you were using again!

Prefer the Ad-Free Printable PDF?
The full Bijoux Butterfly crochet pattern is now available for free right here on the blog! If you prefer to crochet from a clean, printer-friendly copy, you can still grab the ad-free PDF in my Etsy or Ravelry shop.
The PDF includes the full written pattern, plus extra photo tutorials for making and assembling the butterfly face and wings. It’s handy if you like to print your patterns, save them to your device, or keep everything organized in your pattern library. Thank you so much for supporting my designs, it helps me keep sharing free crochet patterns here on the blog!
Do you love discounts? I mean, you’re human right?? If YES then you will love my VIP List and/or Facebook Community where you can find a coupon to use on patterns in my Etsy or Ravelry shop! Also, my VIPs are the first to hear about new pattern releases, sales (some are exclusive to my VIPs only!), CALs (crochet alongs) ← (There’s a NEW one starting in April!) and lots of fun crochet discussions!
Pattern Download RAVELRY
Click the Buy NOW button below to purchase a Printer Friendly, Ad-Free, PDF Download version of the Amigurumi Butterfly Lovey Crochet Pattern on RAVELRY!
Pattern Download ETSY
Click the Buy NOW button below to purchase a Printer Friendly, Ad-Free, PDF Download version of the Amigurumi Butterfly Lovey Crochet Pattern on ETSY!

Free Crochet Butterfly Amigurumi Pattern
Now for the part you came for, the free crochet butterfly amigurumi pattern!
Below you’ll find the full written pattern for Bijoux Butterfly, including the amigurumi body, face, and granny square style wings. This free pattern is written in US crochet terms and is best for intermediate crocheters, or advanced beginners who are comfortable with basic amigurumi, shaping, treble crochet, and simple seaming.
Take your time with each section, and don’t be afraid to check out my crochet tutorials if you need help with a stitch or technique. You’ve got this!

Bijoux Crochet Butterfly Amigurumi Pattern
FREE PATTERN DIRECTIONS:
BUTTERFLY BODY:
- Work in continuous rounds. Mark the 1st stitch of each round with a stitch marker.
Butterfly Head:
Round 1: Make a Magic Circle with color C. Ch 1, 6 sc into magic circle, (6 sc).
Round 2: 2 sc in each st around, (12 sc).
Round 3: [Sc, 2 sc in next st,] 6 times,
(18 sc).
Round 4: [Sc in next 2 sts, 2 sc in next st,]
6 times, (24 sc).
Round 5: [Sc in next 3 sts, 2 sc in next st,]
6 times, (30 sc).
Round 6: [Sc in next 4 sts, 2 sc in next st,]
6 times, (36 sc).
Rounds 7-16: Sc in each st around, (36 sc, 10 rounds).
Round 17: [Sc in next 4 sts, sc2tog,]
6 times, (30 sc).
Round 18: [Sc in next 3 sts, sc2tog,]
6 times, (24 sc).
STOP HERE and complete the face before continuing.
Round 19: [Sc in next 2 sts, sc2tog,]
6 times, (18 sc).
Round 20: [Sc in next st, sc2tog,] 6 times, (12 sc). FO color C. Stuff, then continue with Body Section 1 below.
Butterfly Face:
Add 15 mm safety eyes at Rounds 12-13 of head, placed with 4 stitches between them. With a scrap of Black yarn, embroider eyebrows at Rounds 9-10 and a mouth at Rounds 15-16: Use Color B yarn to embroider cheeks just below the eyes between Rounds 14-15.
BUTTERFLY BODY:
- Work in continuous rounds. Mark the 1st stitch of each round with a stitch marker.
Butterfly Body Section 1:
Round 1: Join color B. 2 sc in each st around, (24 sc).
Round 2: [Sc in next 3 sts, 2 sc in next st,]
6 times, (30 sc).
Rounds 3-8: Sc in each st around, (30 sc,
6 rounds).
Round 9: [Sc in next 3 sts, sc2tog,]
6 times, (24 sc).
Round 10: [Sc in next 2 sts, sc2tog,] 6 times, (18 sc).
Round 11: [Sc in next st, sc2tog,] 6 times, (12 sc).
Round 12: [Sc in next 4 sts, sc2tog,] twice, (10 sc). FO color B. Stuff, then continue with Body Section 2.
BUTTERFLY BODY:
- Work in continuous rounds. Mark the 1st stitch of each round with a stitch marker.
Butterfly Body Section 2:
Round 1: Join color D. 2 sc in each st around, (20 sc).
Round 2: [Sc in next 4 sts, 2 sc in next st,]
4 times, (24 sc).
Rounds 3-7: Sc in each st around, (24 sc,
5 rounds).
Round 8: [Sc in next 2 sts, sc2tog,] 6 times, (18 sc).
Round 9: [Sc in next st, sc2tog,] 6 times, (12 sc). Stop and Stuff the section here.
Round 10: Sc2tog 6 times, (6 sc). FO and leave a long tail. Use the yarn end to close up the opening and weave in the ends. Then continue the Antennae.
Antennae: (Make 2)
Round 1: Make a Magic Circle with color A. Ch 1, 6 sc into magic circle, (6 sc).
Round 2: 2 sc in each st around, (12 sc).
Round 3: Sc in each st around, (12 sc).
Round 4: Sc2tog 6 times, (6 sc). FO color A. Lightly stuff the antenna top.
Round 5: Join color C. Sc in each st around, (6 sc).
Rounds 6-10: Sc in each st around, (6 sc, 5 rounds). FO and leave a long tail. Do not stuff the stem of the antenne. Stitch both antennae to the head at Rounds 3-5, on either side of the head, slightly toward the front of the head. Position each antenna in line with one of the eyes.

BUTTERFLY WINGS:
- Join new color in last st of round.
Top Wings (Make 2):
- Diagonal Corner to Corner 6.5” x 7.5”
Round 1: Make a Magic Circle with color B. Ch 3 (counts as 1st dc here and throughout), 11 dc into magic circle, sl st to top of ch-3 to join, (12 dc).
Round 2: Ch 3, 2 dc in next st and each st around, 1 dc in join st, sl st to top of ch-3 to join, (24 dc). Join color D yarn. FO color B.
Round 3: Ch 3, 2 dc in next st, [dc, 2 dc in next st,] 11 times, sl st to top of ch-3 to join, (36 dc).
Round 4: Ch 1, [sc in next 2 sts, 2 sc in next st, hdc, dc, (dc, tr) in next st, ch 2, tr, dc, (dc, hdc) in next st, sc in next 2 sts, 2 sc in next st, sc, hdc, 2 hdc in next st, ch 1, hdc in next 2 sts, (hdc, sc) in next st,] twice, sl st to join, (2 ch-1 sps, 2 ch-2 sps, 48 sts, 20 sc, 16 hdc, 8 dc, 4 tr). Join color A yarn. FO color D.
Round 5: Ch 3 (counts as 1st dc), dc in next 7 sts, (2 dc, ch 2, 2 dc) in ch 2 sp, dc in next 12 sts, (2 dc, ch 1, 2 dc) in ch 1 sp, dc in next 12 sts, (2 dc, ch 2, 2 dc), dc in next 12 sts, (2 dc, ch 1, 2 dc) in ch 1 sp, dc in last 4 sts, sl st to join, (2 ch-1 sps, 2 ch-2 sps, 64 dc).
Round 6: Ch 3, dc in next 9 sts, (2 dc, ch 2, 2 dc) in ch 2 sp, dc in next 16 sts, (2 dc, ch 1, 2 dc) in ch 1 sp, dc in next 16 sts (2 dc, ch 2, 2 dc) in ch 2 sp, dc in next 16 sts, (2 dc, ch 1, 2 dc) in ch 1 sp, dc in last 6 sts, sl st to join, (2 ch-1 sps, 2 ch-2 sps, 80 dc). FO and continue with Wing Assembly directions below.
BUTTERFLY WINGS:
- Join new color in last st of round.
Bottom Wings (Make 2):
- Diagonal Corner to Corner 3.75” x 5”
Round 1: Make a Magic Circle with color B. Ch 1, 8 hdc into magic circle, sl st to join, (8 hdc).
Round 2: Ch 1, 2 hdc in each st around, sl st to join, (16 hdc). Join color D yarn. FO color B.
Round 3: Ch 1, [hdc in next st, 2 hdc in next st,] 8 times, sl st to join, (24 hdc).
Round 4: Ch 1, [sc in next 2 sts, (hdc, dc) in next st, ch 2, dc, hdc, 2 sc in next st, sc in next 2 sts, 2 hdc in next st, ch 1, hdc in next 2 sts, 2 sc in next st,] twice, sl st to join, (2 ch-1 sps, 2 ch-2 sps, 32 sts, 16 sc, 12 hdc, 4 dc). Join color A yarn. FO color D.
Round 5: Ch 1, hdc in next 4 sts, (2 hdc, ch 2, 2 hdc) in ch 2 sp, hdc in next 8 sts, (2 hdc, ch 1, 2 hdc) in ch 1 sp, hdc in next 8 sts, (2 hdc, ch 2, 2 hdc), hdc in next 8 sts, (2 hdc, ch 1, 2 hdc) in ch 1 sp, hdc in last 4 sts, sl st to join, (2 ch-1 sps, 2 ch-2 sps, 40 hdc).
Round 6: Ch 1, sc in next 6 sts, (sc, ch 2, sc) in ch 2 sp, sc in next 12 sts, (sc, ch 1, sc) in ch 1 sp, sc in next 12 sts (sc, ch 2, sc) in ch 2 sp, sc in next 12 sts, (sc, ch 1, sc) in ch 1 sp, sc in last 6 sts, sl st to join, (2 ch-1 sps, 2 ch-2 sps, 56 sc). FO and continue with Wing Assembly directions below.

Wing Assembly:
Step 1: Lay wings out with the larger top wings above the smaller bottom wings. The more pointed corners should be to the center and up and out on the top wings, and to the center and down and out on the bottom wings. See diagram below.
Step 2: Stitch the 4 wing panels together along the center lines as indicated in the diagram. I recommend using a mattress or whipstitch.
Step 3: Work a final round around the edges of the assembled wings to give them shape. Attach yarn to the center seam at the bottom as indicated in the diagram. If your stitch count does not match up exactly due to differences in how the wing panels were seamed, just add or skip a stitch as needed to make it fit your wings! Ch 1, sc in same st and next 11 sts, hdc, 2 dc in next 2 sts (lower right corner), dc in next 10 sts, hdc3tog 3 times (corner where top and bottom wings meet), sc, 2 sc in ch-2 sp, sc in next 13 sts, hdc in next 3 sts, dc in next 4 sts, 4 tr in ch-2 sp (upper right corner), dc in next 4 sts, hdc in next 3 sts, sc in next 13 sts, sc in next 2 ch-1 sps (in the top center corners of both top wings), sc in next 13 sts, hdc in next 3 sts, dc in next 4 sts, 4 tr in ch-2 sp (upper left corner), dc in next 4 sts, hdc in next 3 sts, sc in next 13 sts, 2 sc in ch-1 sp, sc, hdc3tog 3 times (corner where top and bottom wings meet), dc in next 10 sts, 2 dc in next 2 sts (lower left corner), hdc, sc in last 12 sts, sl st to join, (84 sc, 20 hdc, 44 dc, 8 tr). FO and weave in the ends. Continue to attach body below.
ATTACH BODY TO WINGS:
Step 1: Lay wings out flat with the top wings pointing away from you. Lay body out on top of the wings so that the head is just below the top of the wings, and the bottom of the body should come down to around 2 inches above the bottom of the wings.
Step 2: Hold or pin the wings in position over the body. Take a long length of yarn and carefully stitch from the back of the wings through the body, working straight down the center. Stitch down the length of the head and both sections of the body, stitching the wings securely to the body. Weave in the ends and give your new friend to a favorite person!
How Big is the Finished Butterfly?
The finished Bijoux Butterfly measures approximately:
Wings: 10” tall x 9 – 12.5” wide
Body: 8” long x 6 – 10” around, or 10” long including antennae
These measurements are based on worsted weight yarn and the recommended hook sizes.
She’s designed to be a larger butterfly amigurumi, which makes her easier for babies, toddlers, and young children to hold. The wide wings also give her that soft, snuggly feel, without needing blanket yarn or chenille yarn.
As always, your finished size may change a little depending on your yarn, hook size, and personal tension. If you use thinner yarn, your butterfly will turn out smaller. If you use thicker yarn, she’ll grow a bit bigger. That’s one of the fun parts of amigurumi, right?
Tips for Customizing Your Butterfly Crochet Toy
One of the best things about this crochet butterfly toy pattern is how easy it is to make her your own. The wing colors can completely change her look, so this is a great pattern for using your favorite shades or raiding your stash for those half-used skeins.
Try making the wings in soft pastels for a baby gift, bright rainbow colors for a kid who loves bold toys, or earthy shades for a butterfly inspired by one you’ve seen in your own garden. You can also switch up the eye style depending on who you’re making it for. Safety eyes work well for older children, while embroidered eyes or felt eyes are a better choice for babies.
You can also play with the body and wing contrast. A darker body with bright wings gives a bold butterfly look, while a lighter body makes the whole toy feel soft and gentle. There’s really no wrong answer here. Butterflies are already full of color, so have fun with her!

More Free Amigurumi Crochet Patterns
If you enjoyed making this free crochet butterfly amigurumi pattern, you might love some of my other free amigurumi patterns too! I’ve gathered a few favorites below so you can find your next cute toy, gift, or stash-busting project without digging through the whole blog.
Free Crochet Sea Turtle Pattern: Easy No-Sew Amigurumi for Beginners
This free sea turtle amigurumi pattern is a cute no-sew project and a great pick for ocean-loving kids. It’s a fun one to make for summer gifts, baby showers, or anyone who loves sea creatures.
No-Sew Hedgehog Amigurumi Crochet Pattern: Quick, Cute and Free!
This free hedgehog crochet pattern is small, cute, and quick to finish. It’s a great little amigurumi project for gifts, market prep, or using up soft yarn from your stash.
Free Crochet Earth Pattern: Mother Earth Amigurumi Globe Ball
This free crochet Earth amigurumi pattern makes a fun learning toy for kids. It’s a cute project for Earth Day, homeschool themes, classroom gifts, or science-loving families.
Free Crochet Ice Cream Cone Amigurumi: Easy Pattern!
This free ice cream cone amigurumi pattern is a sweet little project for summer crochet. It makes a fun toy, pretend play food, or cute handmade gift for kids.
Free Crochet Gnome Pattern: Jul Tomten Christmas Amigurumi
This free crochet gnome pattern is a sweet Christmas amigurumi project with a Scandinavian feel. Make one for holiday decor, handmade gifts, or a cute winter shelf sitter.
Free Fall Gourd, Squash & Pumpkin Crochet Pattern Trio
This free pumpkin crochet pattern set includes fall gourds and squash for seasonal decorating. They’re great stash busters and can stay out from early fall right through Thanksgiving.
Odin the Owl Softie Amigurumi: Free Crochet Pattern
Odin the Owl is a free owl amigurumi pattern with big eyes and a sweet softie shape. He makes a lovely handmade toy, nursery friend, or woodland crochet gift.
Tiny Bunny Amigurumi: Free Crochet Pattern
This tiny bunny amigurumi is a sweet free crochet pattern for Easter baskets, spring gifts, and small handmade toys. It’s also a nice project when you want something cute that doesn’t take forever.
Tiny Dinosaur Amigurumi: Free Pattern
This free tiny dinosaur amigurumi pattern is a fun pick for dino-loving kids. Make one as a small toy, keychain, party favor, or quick handmade gift.
Novelty Taco Food Keychain: Free Crochet Pattern
This free taco crochet pattern makes a cute little food amigurumi keychain. It’s a fun scrap yarn project and a silly handmade gift for anyone who loves novelty crochet.
Rainbow Caterpillar + Butterfly: Free Baby Rattle Crochet Patterns
This free baby rattle crochet pattern set includes a rainbow caterpillar and butterfly. It’s another amigurumi butterfly-inspired baby gift idea!
Please Share your Crocheted Butterflies!
I hope you enjoy making this adorable crochet butterfly amigurumi pattern as much as I enjoyed designing it just for you! I would love if you would share your Bijoux Butterfly Crochet Projects on social media and on Ravelry!!! I love getting to see your finished crochet patterns!! The absolute best part of being a crochet pattern designer is getting to see the amazing creations y’all make with my patterns! It makes me smile and it’s the reason I do what I do!! (TBH: The yarn benefits also rock! 😉)
Do you LOVE Free Crochet Patterns (<– like these) and do you want to see more of them on my blog? If so, please help me grow by sharing this blog post with you crochet loving friends, and subscribing to my VIP newsletter! Thank so much for your support and for joining me on this journey, filled with yarn! If you have questions or need help of any kind with the pattern, don’t hesitate to contact me or leave a comment on the blog. I’m here to help!

Want the Power to Pause Your Project??
Want a better way to keep track of your works in progress? Download a FREE copy of my Printable WIP Cards and never forget which hook, or yarn, or pattern you were using again!


Trackbacks/Pingbacks