Free Mini Autumn Amigurumi Pattern
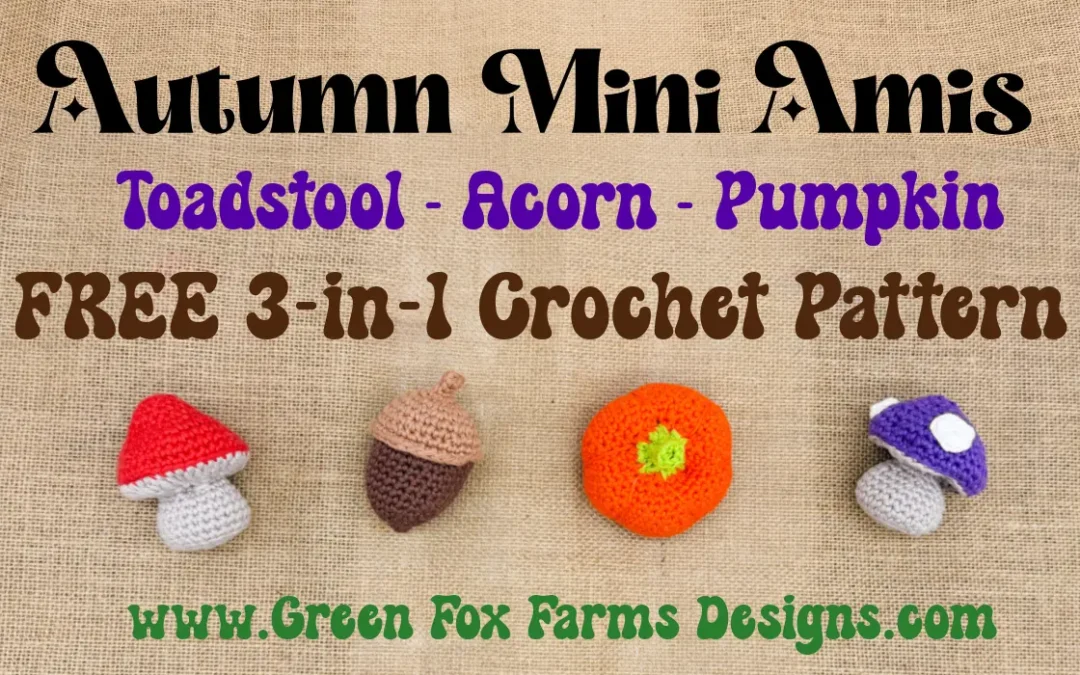
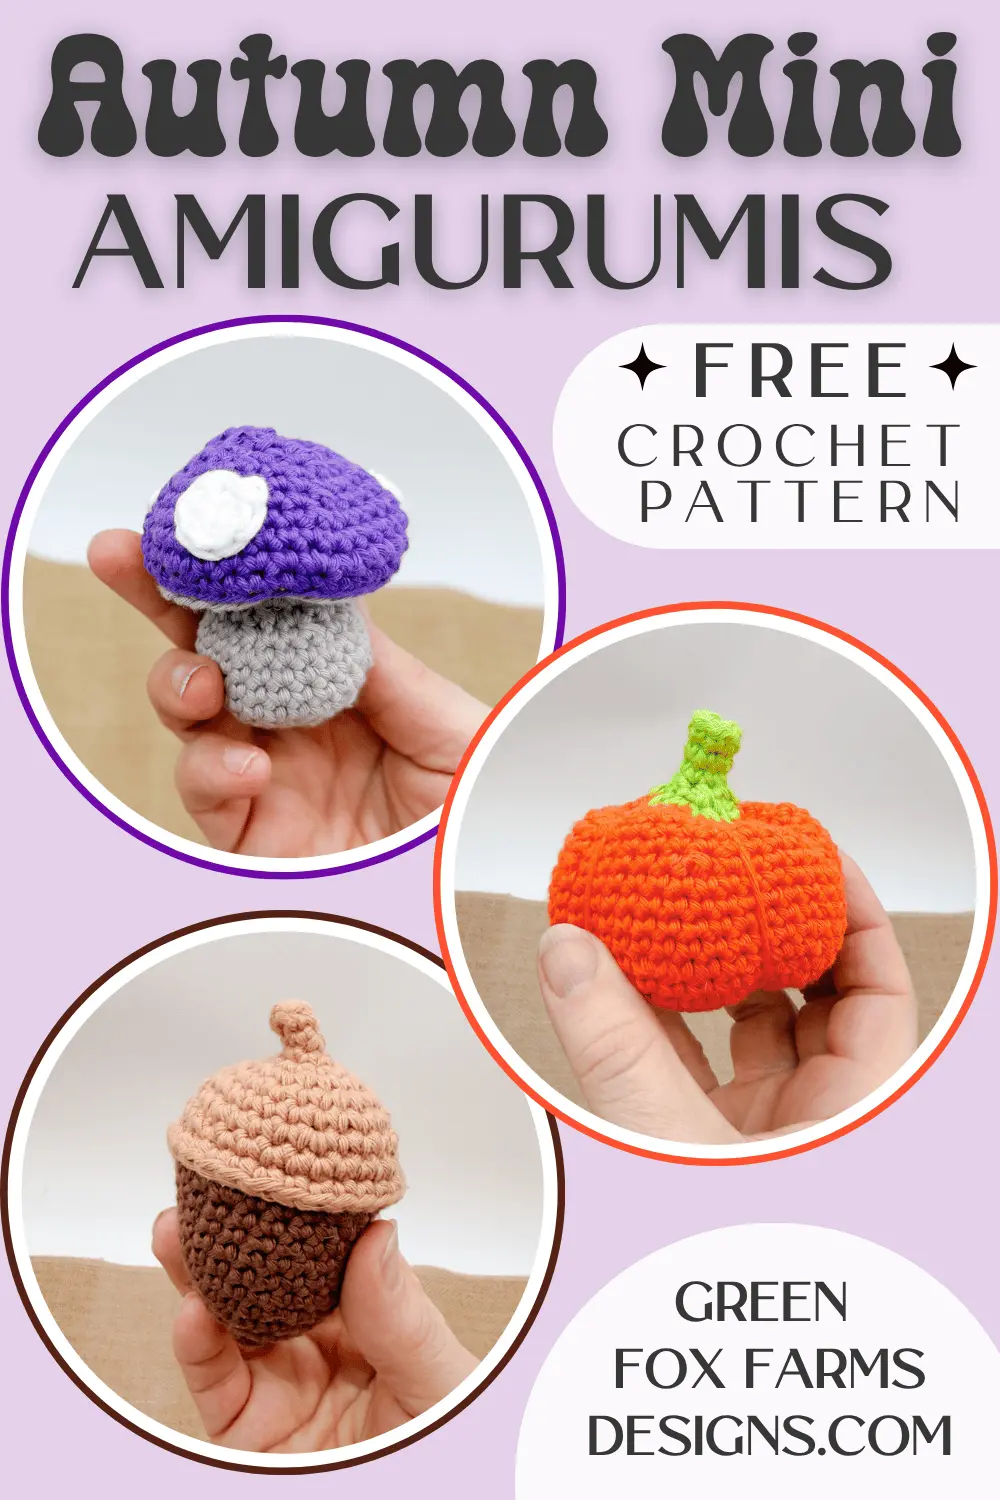
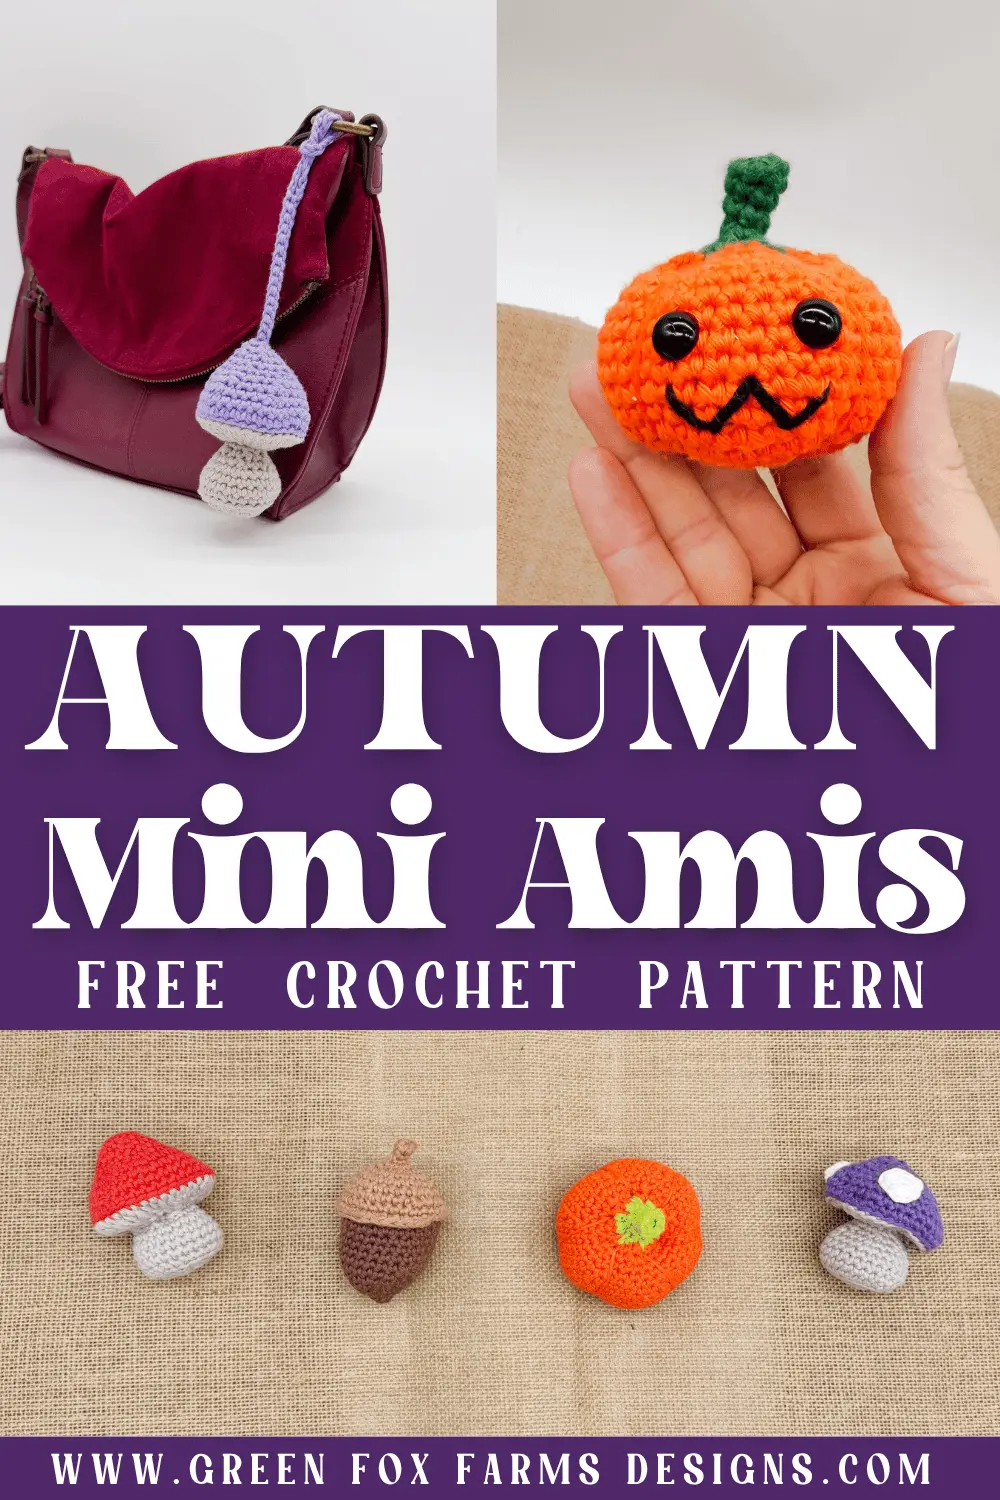
I’m not ready to pack fall away yet. Are you? So I made three little friends to keep things going until the snow flies. These mini fall crochet patterns are for anyone who wants a quick, low-sew make that’s fun to hook. Meet the Autumn Minis: Autumn Acorn, Pixie Pumpkin and Twilight Toadstool! Each one can be a keychain, a bookmark, a bag charm, an ornament or a tiny plush! Y’all know I’m all about multi-purpose crochet projects! These minis are my pattern for the final day of the Enchanted Autumn Blog Hop, October 25, so all 3 are free right here on the blog!
💜🍄🎃🌰✨
DISCLOSURE: This post may contain affiliate links. See my Privacy Policy for more information.
3 Free Mini Autumn Crochet Patterns!
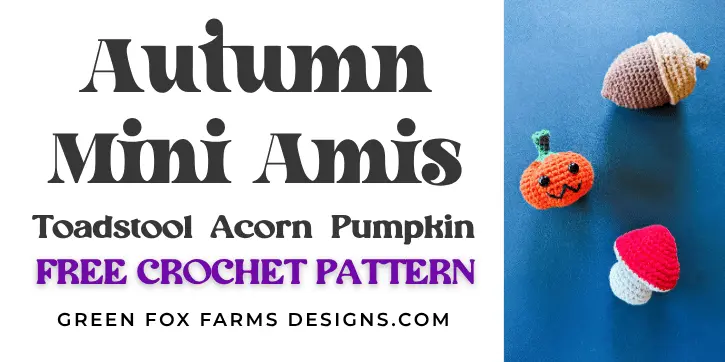
The Autumn Minis are 3 mini fall crochet patterns, free on the blog, and each one works up in an hour or two. They use basic stitches in the round, and only the acorn needs a little sewing to bring the cap and nut together. Every mini can be finished as a plush, ornament, keychain, bag charm or bookmark, and the pumpkin face is optional. Each one takes only a little yarn, so dig into your fall-colored scraps.
Pin it now so these quick little scrapbusters are easy to find when you’re ready to hook! 💜📌
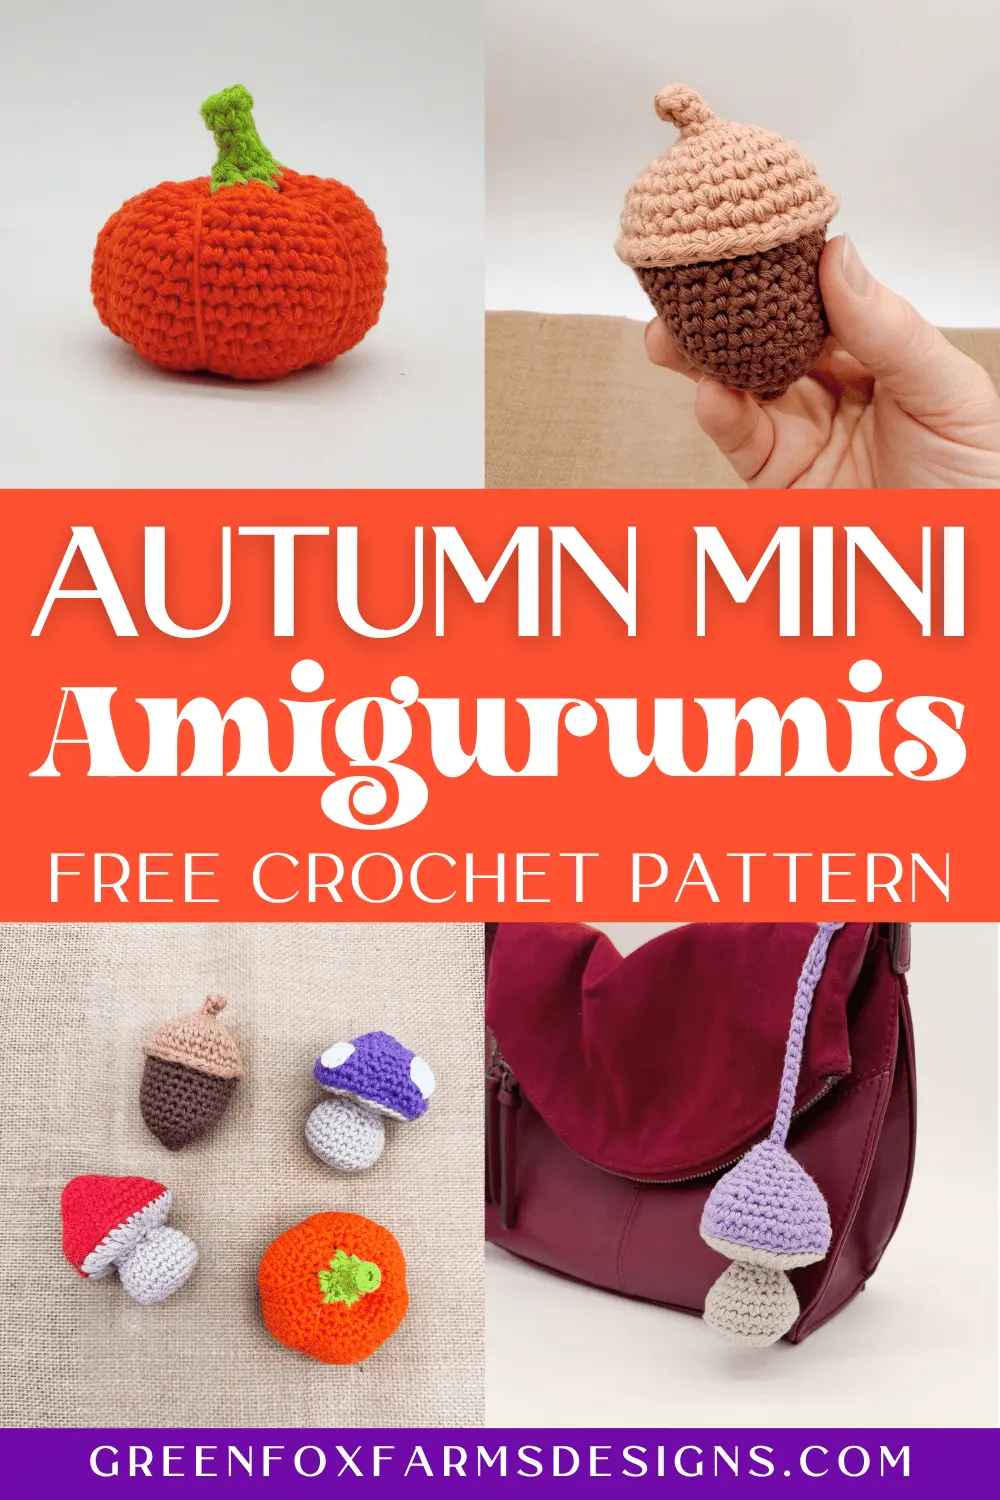
Meet the Autumn Minis – Free Mini Fall Amigurumi Patterns
Last month my two youngest fought over who got to hang the Halloween eyeball mini on their backpack. That told me something. Little multi-use minis get used. So I decided to create a set that could stay out longer than one holiday.
An acorn, a pumpkin and a mushroom felt just right for an autumn make. They give all the fall vibes without necessarily screaming Halloween or Thanksgiving. So they can be gifted, hang on keys, bags and books from September right through November, or wait until the snow is really coming down.
I’ve made plenty of multi-functional patterns before. You might be interested to visit one of these next:
Mini Mushroom Dice Bags and Earbud Pouch
Calliope Earbud Pouch and Gift Card Holder
Calliope Drawstring Pouch and/or Crossbody Bag
Make 3 different low-sew or no-sew mini autumn amigurmi with this free crochet pattern! Beginner-friendly instructions, step-by-step photos, and only a little sewing required. 🧶✨
So many uses!
- A cute mini plush
- A bookmark
- A keychain
- A hanging ornament
- A purse or bag charm

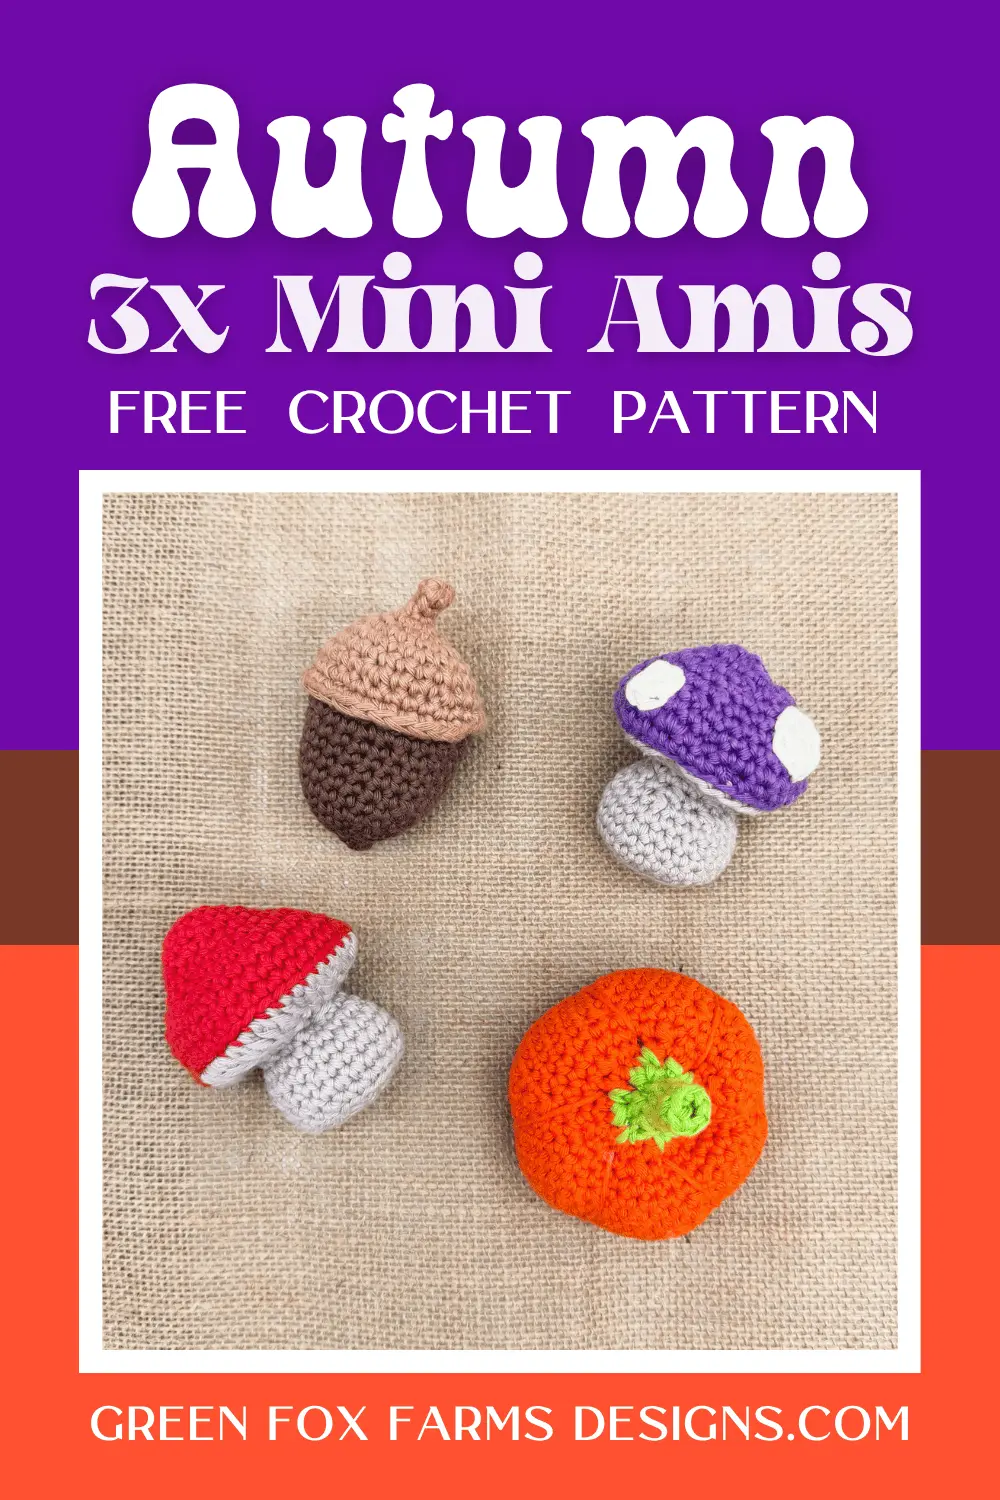
What’s in the Autumn Minis Pattern?
Low-sew Autumn Acorn is a classic fall acorn with a cap in a second color. It’s the only mini in the set with any sewing, and you just attach the cap. If you’ve been hunting for a quick and easy crochet acorn pattern, here it is!
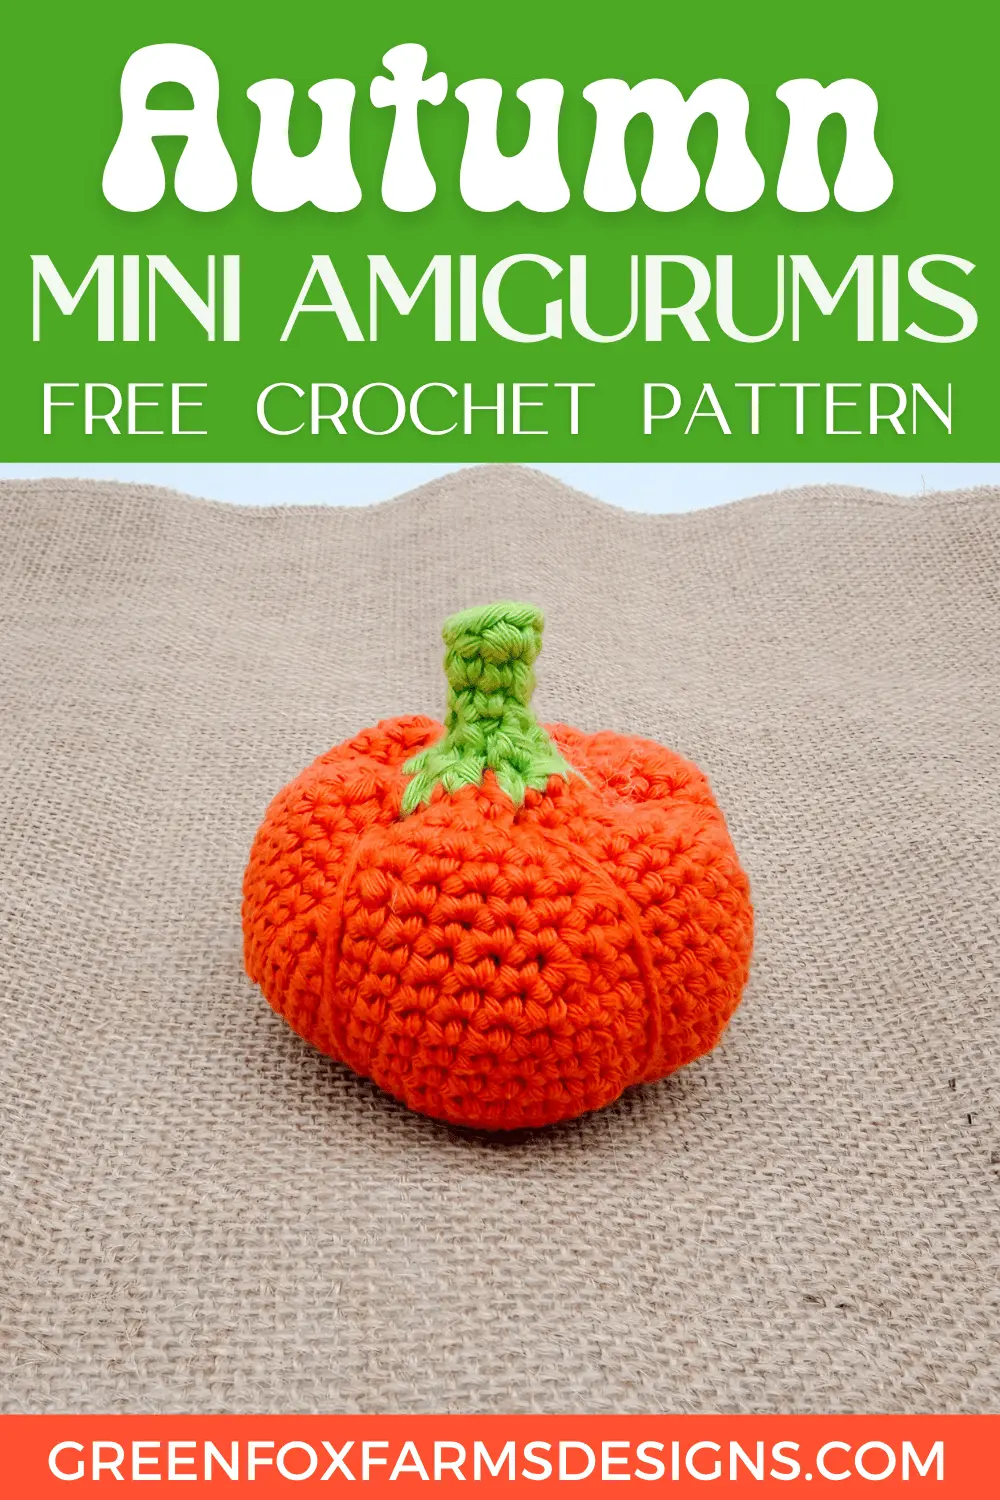
Round and happy, No-sew Pixie Pumpkin comes with a little green stem and an optional face. Leave the face on for October. Skip it and your pumpkin is ready for the Thanksgiving table.
Last up is No-sew Twilight Toadstool, with a red or purple cap and a cream stem. Add spots if you like, or leave them off. Try out a few cap colors and make a whole little mushroom patch!
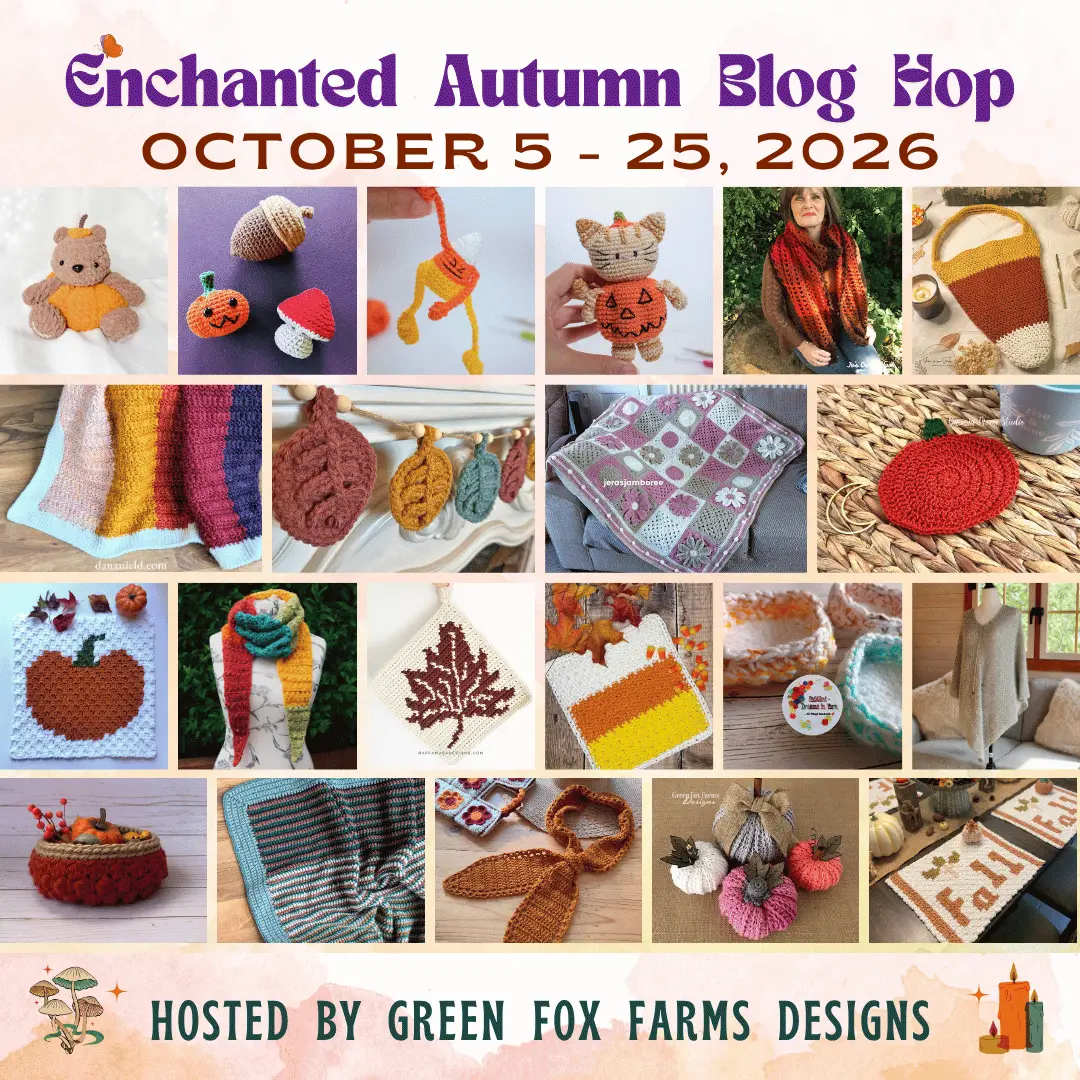
Enchanted Autumn Blog Hop – Free Fall Pattern Event
The Autumn Minis are the Day 21 pattern on the Enchanted Autumn Blog Hop! That’s the final day, Sunday, October 25, 2026. This is our second annual event. This year it’s 21 days of free crochet patterns from some very talented designers. You’ll find pumpkins, scarves, blankets, baskets, amis and more.
Each pattern is a free PDF for 24 hours only. Missed a day? Each pattern is still totally worth a look on the designer’s blog. Many are free to view on the blog too!
How to Get the Free Autumn Minis PDF
- 🍂 On Sunday, October 25, 2026 only, you can grab the Autumn Minis PDF for free.
- 🍂 The free window runs from noon CDT on October 25 to noon CDT on October 26.
- 🍂 The pattern will be available as a download from my website (on another page).
- 🍂 Keep scrolling down to find the download button below.
- 🍂 Then hop back to the Enchanted Autumn Blog Hop to see all 21 patterns.
Want the Power to Pause Your Project??
Want a better way to keep track of your works in progress? Download a FREE copy of my Printable WIP Cards and never forget which hook, or yarn, or pattern you were using again!

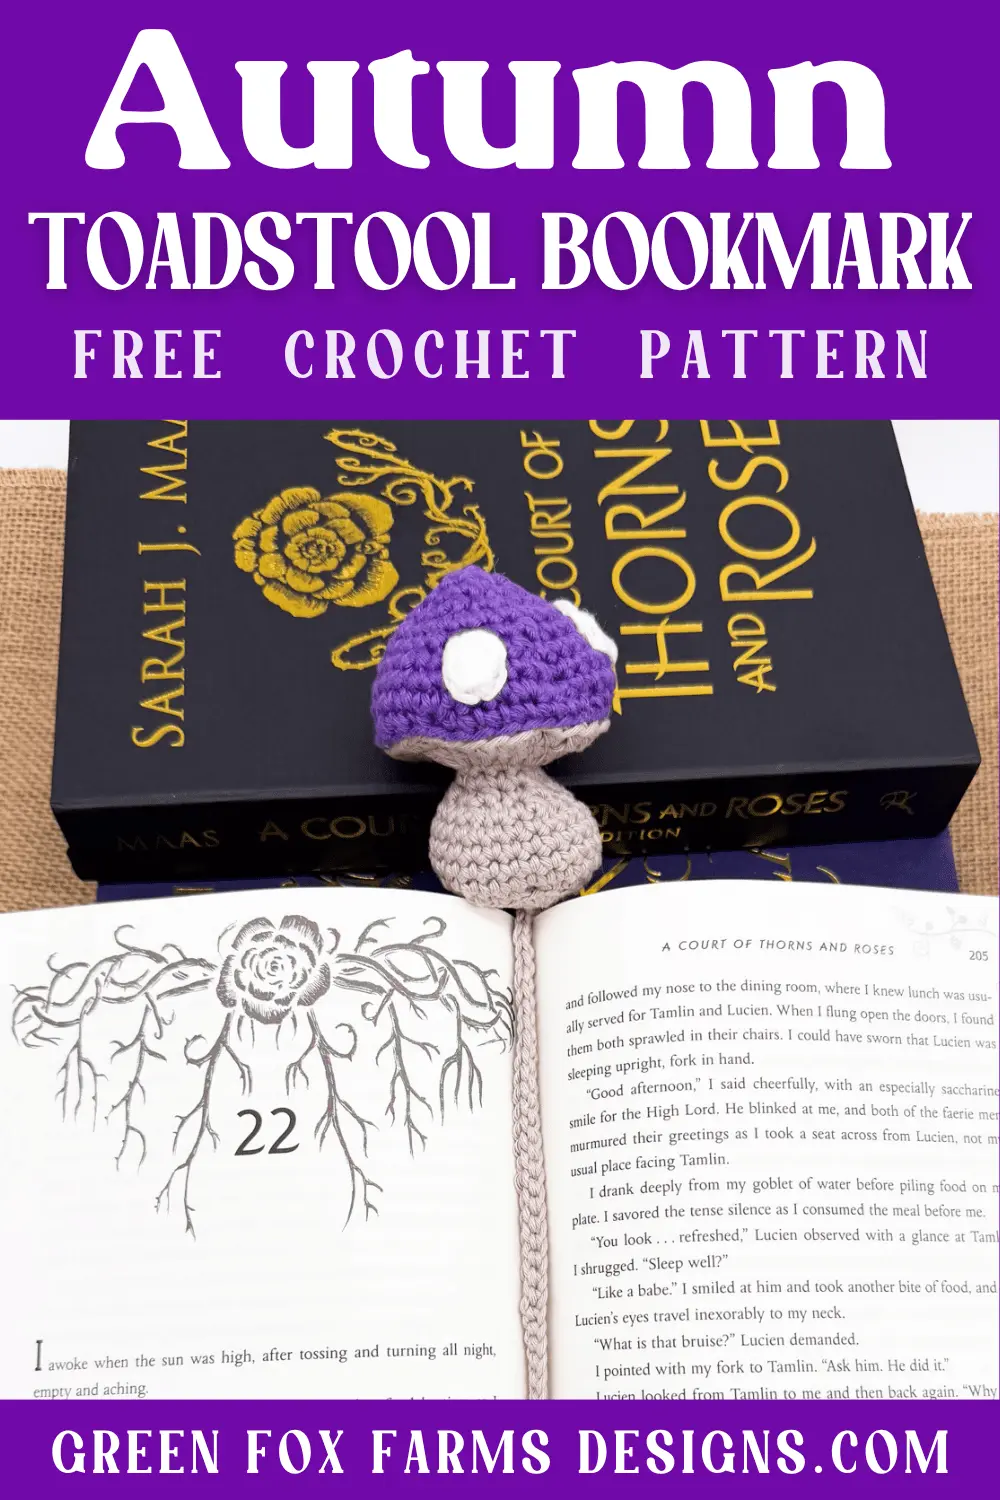
One Pattern, 3 Mini Fall Amigurumi, 5 Ways to Use Them
These minis may be small, but they work hard. The pattern stays the same for every version. What changes is your yarn weight, your colors and one small finishing step. Pick a favorite, or make all five!
1. Mini Fall Plush
Use a thicker plush, chenille or blanket yarn, and stuff your mini firmly with fiberfill. Now you’ve got a pocket-sized plush for little hands or a bookshelf. A pumpkin, acorn and mushroom make a sweet fall trio for a kid’s nightstand or a nature table. For babies and toddlers, embroider the pumpkin face instead of using safety eyes.
2. Cute Crochet Fall Ornaments
Add a chain loop to the top and hang it up. Line a few along a mantel or a branch for a mini fall garland. Stuff these ones lightly so they hang straight.
3. Fall Bag Charm
Make a chain with a loop at the end. Slip it around a purse or backpack strap, then pull the mini through the loop. It stays put all season. Use a lighter yarn if you want a smaller one.
4. Crochet Pumpkin Keychain (and Acorn and Mushroom Too!)
Attach a split ring or a lobster clip and you’ve got a keychain. The pumpkin keychain makes a great teacher gift. Each one uses so little yarn it barely dents your stash.
5. Fall Crochet Bookmark
Use DK or sport weight yarn for a smaller mini, then add the long chain from the pattern. The mini sits on top of the book while the chain marks your page. The mushroom looks extra cute peeking out of a spooky fall read!
How to Choose the Right Mini for Each Person
Not sure which mini to make for who? Start with how they’ll use it.
- Little kids: a mini plush, with an embroidered face
- Teens: a bag charm in their favorite colors
- Teachers and coworkers: a keychain. It’s small, useful and easy to tuck in a card.
- Book lovers: a bookmark in a lighter yarn
- Your own home: ornaments. Leave the face off the pumpkin so they can stay out into December.
Yarn weight determines the size. Worsted makes a keychain-sized mini. DK or sport makes a smaller one for bookmarks. Bulky or chenille gives you a squishy plush.
Like Free Patterns? Then make sure you check out my most popular Free Pattern –> DC Dice Bag & Tray! Want to see even more? You can find all of my other Free Crochet Patterns <– Right here!!
Best Mini Fall Amigurumi to Batch Make
With 5 kids, I’ve learned to make gifts in batches. Teacher gifts? Party favors? Small, fast projects are the only way I keep up! These minis are made for it. Work all of one mini at once, one color at a time. You’ll get into a rhythm and fill a basket faster than you think.
Here are a few easy ways to wrap them up:
- Pumpkin keychain + a bag of pumpkin spice coffee
- Acorn bookmark + a new paperback or a bookstore gift card
- Mushroom bag charm + a canvas tote or a mushroom field guide
- A set of 3 ornaments + a fall-scented candle
- Mini plush + a caramel apple or a gourmet hot cocoa
- Any keychain + a coffee shop gift card for a teacher thank-you
What I’m Watching & Listening To (While I Crochet)
Do YOU love to binge a series on Prime and/or book on Audible while you Crochet? It’s a best combo of 2 of my fave things! The simple, repetitive stitches of these Mini Fall Crochet Patterns mean you can get into a rhythm and enjoy crocheting, while still leaving plenty of attention for that new show you’ve been dying to see. So whether you watch your fave movie on Netflix or Prime Video, or give a listen to your latest bingeable audiobook, you’ll have a blast relaxing and crocheting Plus, the Autumn Mini Amis are a quick project, so you can easily finish one in an evening or a whole basket full for your market table in a weekend!
Right now, I’m obsessed with anything dystopian and/or fantasy, as always.
Right now, I am watching the long anticipated Season 4 of Ted Lasso on Prime (so hilarious!), as well as re-watching A Discovery of Witches (the Discovery of Witches book series is not to be missed either!)! Yes I have a type for books and shows lol! In keeping with that I am currently listening to (and loving!) Only Spell Deep by Ava Morgyn. I highly recommend this book and author if you like unique witchy tales, with a gothic feel, set in modern times. This is my third book I’ve read and loved from this author!
I’m deep into my re-read / re-listening to the Crescent City series by Sarah J. Maas in anticipation of the long awaited new books coming out in October and January! I’m currently on book 2 of Crescent City – House of Sky and Breath. I’m so excited to see where these series continue because there are crossovers and I’ll not say anything more about that because I’m not spoiling it for anyone! I’ve read every book she’s written and they do not disappoint!
What are you watching and listening to these days? Tell me in the comments! 🧶💜


Want the Power to Pause Your Project??
Want a better way to keep track of your works in progress? Download a FREE copy of my Printable WIP Cards and never forget which hook, or yarn, or pattern you were using again!
MAKE A MINI HALLOWEEN CROCHET PATTERN!
A really fun and easy Halloween Amigurumi Minis Pattern!
Halloween Crochet Plush Materials:
** These are the materials I used for my samples. You can use the yarn and hook size of your choice. I recommend using 1 hook size down from the hook size suggested on the yarn label to get good tight stitches.
MINI AMI / CHARM / KEYCHAIN YARN: Paintbox Cotton Aran Worsted Weight 4 yarn, (100% cotton, 1.7 oz/50 g, 93 yds/85 m)
YARDAGE: 20 – 50 yds per Mini
SAMPLE COLORS: Blood Orange, Jet Black, Pansy Purple, Stormy Gray, Lime Green, Paper White, Lipstick Pink
HOOK: US F-5 3.75 mm
OR
BOOKMARK YARN: Paintbox Cotton DK 3 yarn, (100% cotton, 1.7 oz/50 g, 137 yds/125 m)
YARDAGE: 20 – 50 yds per Mini
HOOK: US E-4 3.5 mm
OTHER SUPPLIES:
1 oz stuffing
Scraps of embroidery floss/ yarn to embroider face
Yarn needle
Scissors
Stitch markers
OPTIONAL SUPPLIES:
Keyring + bag clip for charm
Finished Sizes: **Sizing is approximate, measured after stuffing from my own samples. Sizing will vary depending on the yarn weight/type and your stuffing material/
Size will vary based on yarn, hook, and stuffing!
TOADSTOOL: 3-7“ around x 3.5” long
ACORN: 6“ around x 3” tall (not counting stem)
PUMPKIN: 9“ around x 3-5” tall (not counting stem, depending on your stuffing and shaping)
Gauge: 22 sc x 22 rows = 4” square (Gauge is not very important)
Experience Level: Advanced Beginner / Easy

How to Make Easy Mini Fall Crochet Patterns
Pattern Key: Written in US English Crochet Terms
st(s) – stitch(es)
sp(s) – space(s)
ch – chain
sl st – slip stitch
sc – single crochet
hdc – half double crochet
dc – double crochet
inv dec – invisible decrease (see special stitches)
sp st – spike stitch (see special stitches)
ear stitch – see special stitches
BLO – back loop only
FLO – front loop only
yo – yarn over / yu – yarn under
FO – fasten off
Quick Halloween Crochet Patterns Instructions
Special Stitches:
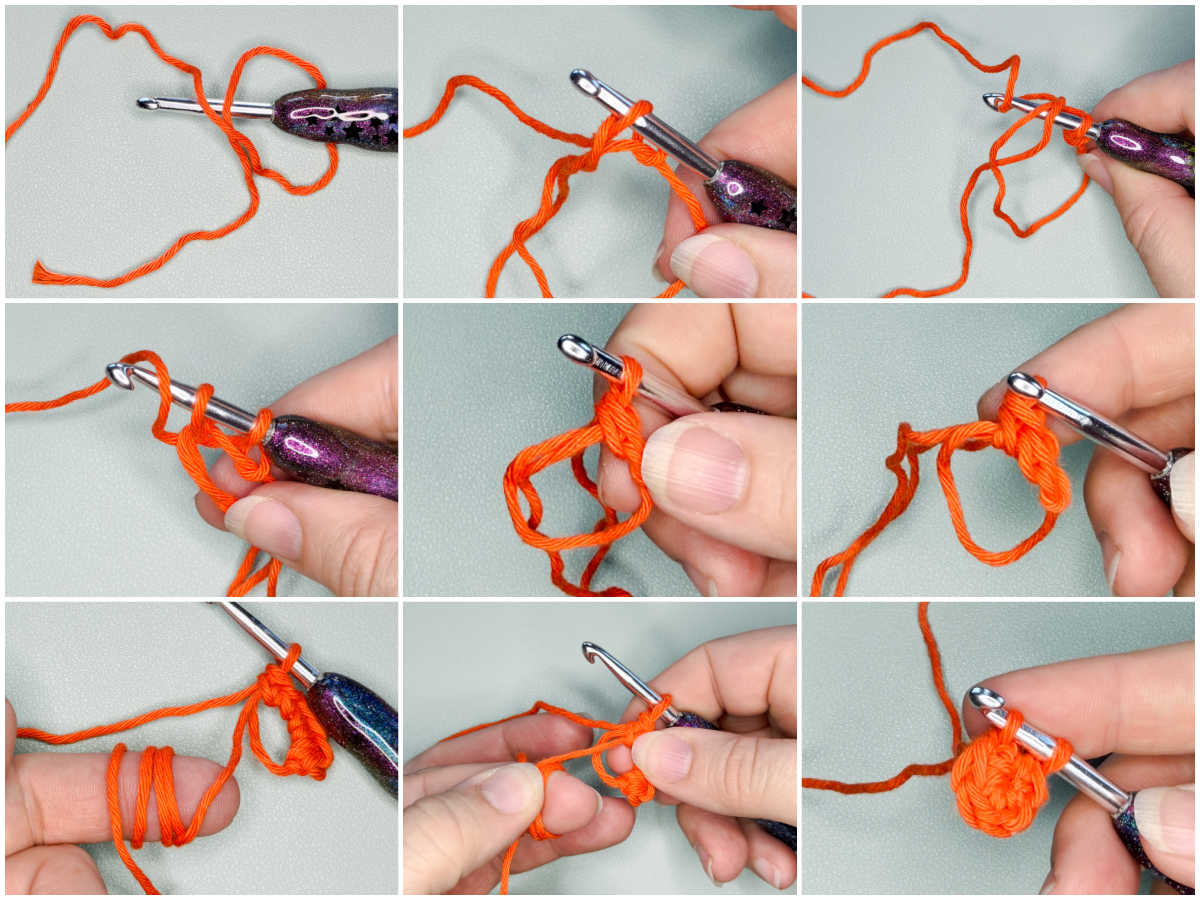
Magic Circle Tutorial:
STEP 1: Create a loop with yarn, place hook through the loop, YU and pull the yarn through the loop, keeping the loop open in a circle instead of pulling the yarn tight.
STEP 2: Ch 1, insert hook back in circle, YU and pull up a loop through the circle.
STEP 3: YU again and pull through the 2 loops on the hook, 1 sc completed! Repeat Step 2 to create additional stitches. Hold stitches with one hand, gently pull yarn end with other hand to close the circle. YU = yarn under technique used instead of yarn over for a tighter stitch
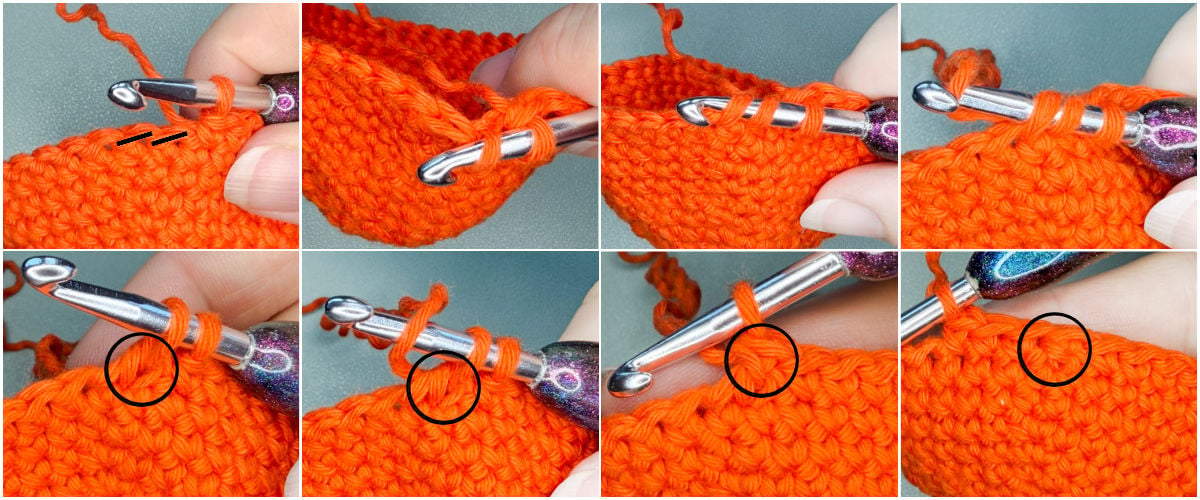
Spike Stitch (spk st):
Instead of working in the next st (black arrow), you will work into the same stitch, in the previous round – one round down (purple arrow). Insert hook in stitch one round below, yo and pull up loop, yo and pull through both loops. Spike Stitch completed.

Invisible Decrease (inv dec): Insert hook in FLO next st, and FLO of next st, YU (yarn under) and pull up a loop through both loops, YU and pull through both loops on hook like a traditional single crochet. Invisible Decrease single Crochet completed.
NOTES:
- Read through the entire pattern first to familiarize yourself with the process.
- Repeat stitches between [ and ] { and } the number of times indicated. Place all stitches between ( and ) in same space.
- Beginning chain does not count as a stitch. First stitch of each round should be placed in same stitch as chain.
- Pattern is worked in continuous rounds unless otherwise noted. Use a stitch marker to mark the first stitch.
- Pattern includes 3 minis that can also be made into bookmarks, keychains, and ornaments or bag charms.
- If you make your minis as ami plush, you can add a weight to the bottom of the ami before stuffing to help them stay in place.
- Toadstool and Pumpkin are worked in a single piece. Acorn is worked in 2 pieces and sewn together at the end. Pumpkin is shaped at the end with external stitching.
- This pattern is FREE, and has been thoroughly tested and tech edited. Please feel free to share any comments or ask any questions you may have! I welcome your feedback!!
- This post and all it contains including the pattern and photographs are my intellectual property and copyright protected property of GreenFoxFarms LLC © 2026. You are welcome to make as many as you like to sell, giveaway, etc. You may NOT sell, or alter and claim as your own this pattern. You may not use my photographs. This pattern is not for mass production.
- If you want to share this pattern online, you must only share a link to my blog post. You may not copy and paste my text or the pattern to another site. Thank you for respecting my work.
- By using this pattern, you are agreeing to abide by these terms.
Pattern Release Details:
Prefer a printable, ad-free PDF? This multi-use Mini Fall crochet patterns is now available for purchase in my Ravelry and Etsy shops! If you love the pattern, will you please go and show it some love ❤️ on the platform of your choice, which not only helps YOU easily find it quickly in your faves, but it will also help my patterns to get seen by more people! Thank you so much friends!! 🙂 The links below will take you to the Quick crochet Halloween pattern in my Ravelry or Etsy shop, so you can shop at your favorite place to buy the pattern now or save it for later!
Do you love discounts? I mean, you’re human right?? If YES then you will love my VIP List and/or Facebook Community where you can find a coupon to use on patterns in my Etsy or Ravelry shop! Also, my VIPs are the first to hear about new pattern releases, sales (some are exclusive to my VIPs only!), CALs (crochet alongs), and lots of fun crochet discussions!
Pattern Download RAVELRY
Click the Buy NOW button below to purchase a Printer Friendly, Ad-Free, FULL PDF Pattern Download version including many more detailed photo tutorials of the 3 Mini Amigurumi Autumn Crochet Pattern on RAVELRY!
Pattern Download ETSY
Click the Buy NOW button below to purchase a Printer Friendly, Ad-Free, FULL PDF Version Download: including many more detailed photo tutorials of the 3x Autumn Mini Crochet Pattern on ETSY!
Autumn Mini Amis Pattern on Enchanted Autumn Hop!!
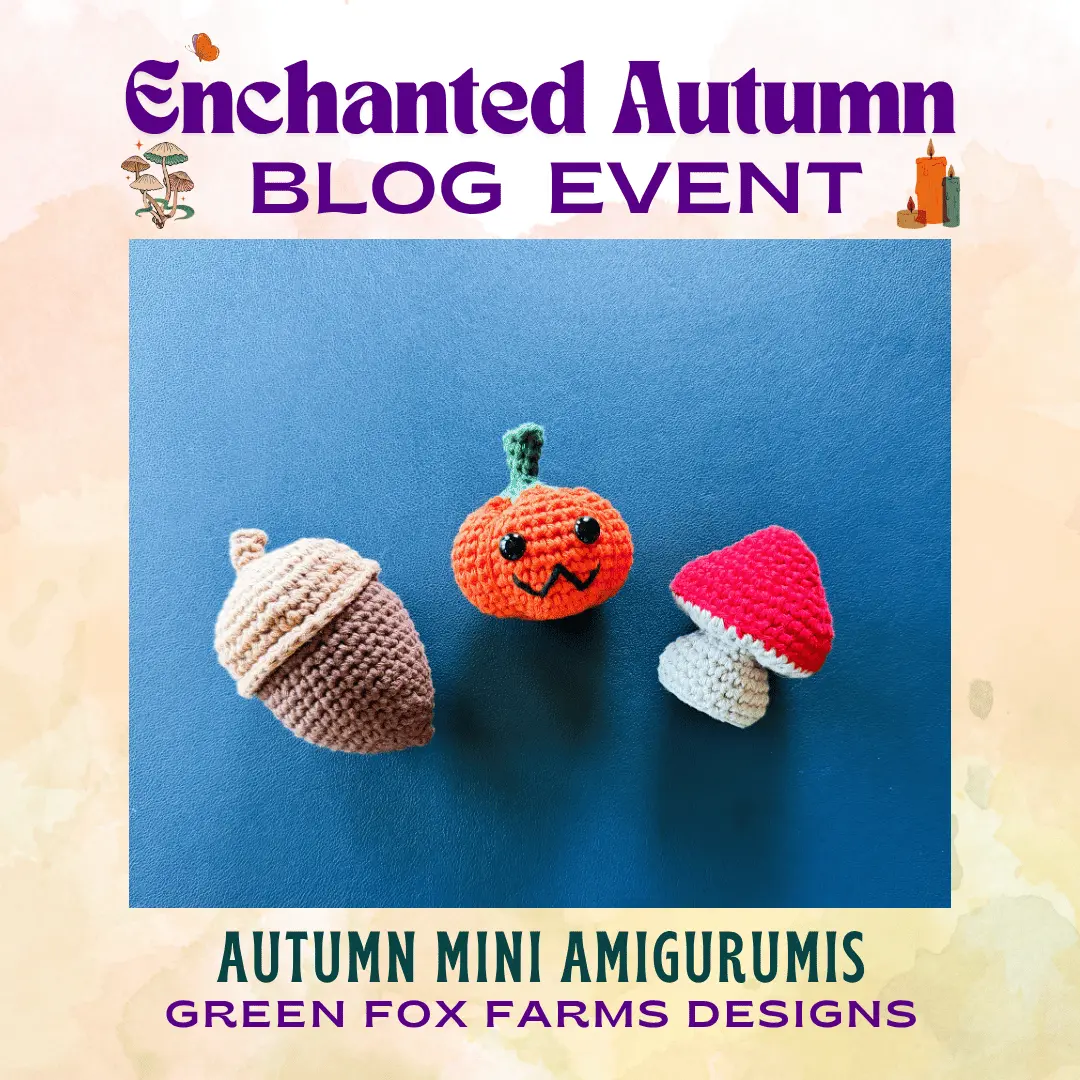
I’m so excited to share that my cute and fun 3-in-1 Mini Autumn Amis Crochet Pattern is being featured in Enchanted Autumn Blog Hop!! The blog hop invites crocheters to create fun fall crochet projects with autumn themed patterns that are FREE to download each day of the event! The Enchanted Autumn Blog Hop is hosted by Lisa of Green Fox Farms Designs! (oh Hi 👋 that’s me!)! Come join the Fall Fun!
Each Day from October 5 – 25, 2026 you’ll find a new FREE Pattern to download! From charming home decor, to cozy wraps and blankets, to adorable amigumi, you’ll find something perfect to hook up this fall! Enjoy 21 days of FREE Crochet patterns on the Enchanted Autumn Blog Hop!
HOW TO GET YOUR FREE MINI AMIS PATTERN DOWNLOAD:
I’m so excited to share that my Unicorn Coffee Cozy Crochet Pattern is featured TODAY on the Enchanted Autumn Blog Hop hosted by Lisa of Green Fox Farms Designs! (oh Hi 👋 that’s me!)
🎃 TODAY SUN OCT 25, 2026 ONLY you can download a FREE PDF!
🎃 You have 24 hours to grab your FREE copy of the Autumn Minis Pattern.
🎃 NO CODE IS NEEDED FOR THIS DOWNLOAD!!
🎃 Click the Download button below and you will be taken to another page on the blog where the download file is located.
🎃 Scroll down that page and find the PURPLE BOX and click the button to get your FREE Crochet Autumn Minis Pattern Download! 👇
🎃 Enjoy and Happy Hooking friends! Make sure to check back to the Enchanted Autumn Hop each day through 10/25/26 to get a new FREE Crochet Pattern to make and donate!
JUST CLICK THE DOWNLOAD BUTTON BELOW TO GET THE FREE PATTERN!

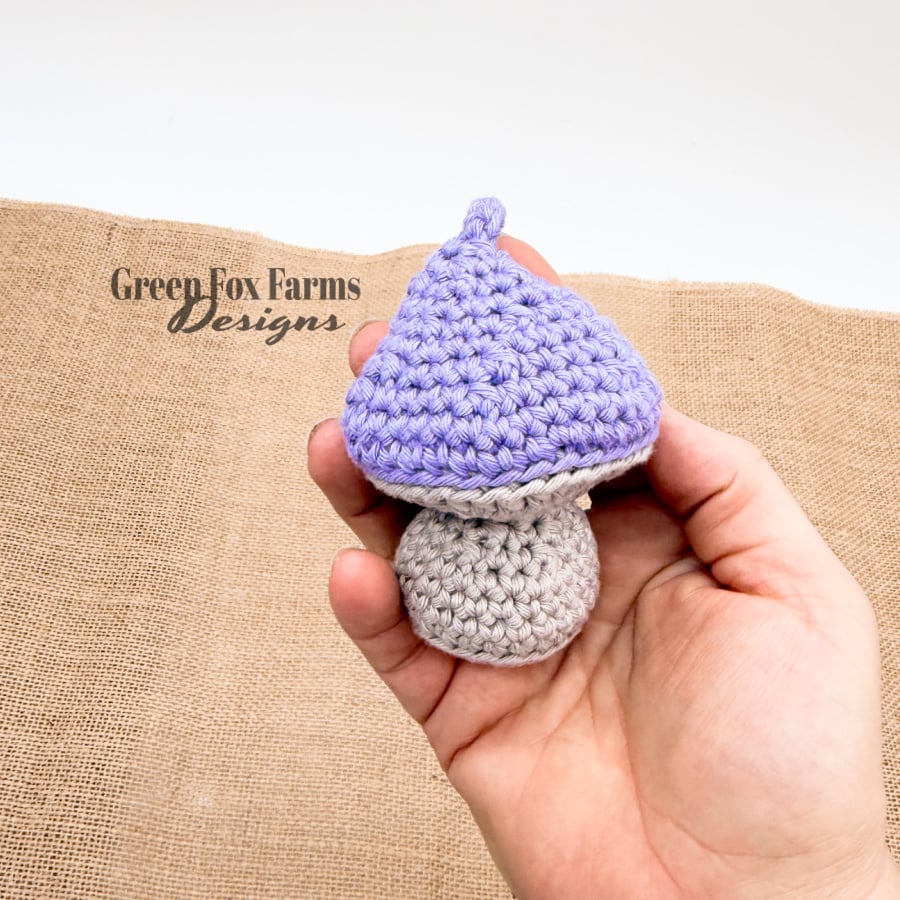
FREE MINI FALL CROCHET PATTERNS:
3x Mini Autumn Amigurumi Charms Pattern Directions:
MINI TWILIGHT TOADSTOOL:
- Unless otherwise indicated in the pattern, do not join. Work in continuous rounds using a stitch marker to mark the 1st st.
- Toadstool is worked from bottom to top.
TWILIGHT TOADSTOOL STEM:
Round 1: Make a Magic Circle with stem color, ch 1, 6 sc in magic circle, (6 sc).
Round 2: 2 sc in each st around, (12 sc).
Round 3: [Sc, 2 sc in next st] 6 times, (18 sc).
Round 4: [Sc in next 2 sts, (2 sc) in next st] 6 times, (24 sc).
Round 5: Work in BLO this round only. Sl st in next st, ch 1, sc in BLO same st and each st around, do not join, (24 sc).
Rounds 6-8: Sc in each st around, (24 sc, 3 rounds).
Round 9: [Sc in next 2 sts, inv dec] 6 times, (18 sc).
Round 10: [Sc in next st, inv dec] 6 times, (12 sc).
Rounds 11-12: Sc in each st around, (12 sc). Sl st in same sp as last st to join.
Stop here and stuff the stem.
TWILIGHT TOADSTOOL GILLS:
Round 13: Work in FLO this round only. Ch 2, (2 dc) in FLO each st around, sl st to join, (24 dc).
Round 14: Ch 1, [hdc in next 3 st, (2 dc) in next st] 6 times, sl st to join, (30 dc).
FO, Continue with Toadstool Cap.
TWILIGHT TOADSTOOL CAP:
Round 15: Work in BLO this round. Join cap color yarn with a sl st to the 1st BLO of Round 14, loosely sl st in BLO of same st as join and each st around, (30 sl st).
Round 16: Work in BLO this round. Ch 1, sc in BLO of each st, do NOT join, (30 sc).
Round 17: [Sc in next 4 sts, (2 sc) in next st] 6 times, (36 sc).
Round 18: Sc in each st around, (36 sc).
Round 19: [Sc in next 4 sts, inv dec] 6 times, (30 sc).
Round 20: [Sc in next 3 sts, inv dec] 6 times, (24 sc).
Round 21: Sc in each st around, (24 sc).
Round 22: [Sc in next 2 sts, inv dec] 6 times, (18 sc).
Round 23: Sc in each st around, (18 sc).
Round 24: [Sc in next st, inv dec] 6 times, (12 sc).
Round 23: Sc in each st around, (12 sc).
Stop here and lightly stuff the cap.
Round 26: [Sc in next st, inv dec] 4 times, (8 sc). Continue with finishing your mini.
TWILIGHT TOADSTOOL SPOTS:
A suggested number range is given per size. Make as many or few spots as you’d like using the stem color or an accent color.
SMALL SPOTS: (Make 3-5)
Round 1: Make a Magic Circle, ch 1, 6 sc in magic circle, sl st to join, (6 sc). FO and leave a long tail to stitch to cap.
MEDIUM SPOTS: (Make 1-2)
Round 1: Make a Magic Circle, ch 1, 8 hdc in magic circle, sl st to join, (8 hdc). FO and leave a long tail to stitch to cap.
FINISHING TWILIGHT TOADSTOOL MINI:
SIMPLE MINI: FO and use yarn tail to close any opening in the last round, weave in ends.
KEYCHAIN: FO and use the yarn tail to close any opening in the last round, weave in ends. Insert a split jump ring through any 1-2 sts of the last round of the cap. Close ring securely and attach to chain or ring of your hardware. Add any additional hardware like a keyring and/or bag clip or charms for fun.
BAG CHARM / ORNAMENT: Ch 45, skip the first 30 chs, sl st in the last 15 to form a loop. FO and weave in the ends. (Adjust the length that the charm hangs by increasing or decreasing the number of chains in the cord. Change the size of the loop by adjusting the number of skipped stitches in the loop.)
BOOKMARK: Use the yarn tail to close any opening in the last round, weave in ends. Join yarn to the mini with a sl st, through any of the central stitches in the first round or where you’d like bookmark cord to originate from. Ch 56, sl st in 2nd ch from hook and each ch, (55 sl st). FO and use the yarn tail to close any remaining opening in the last round, weave in ends.
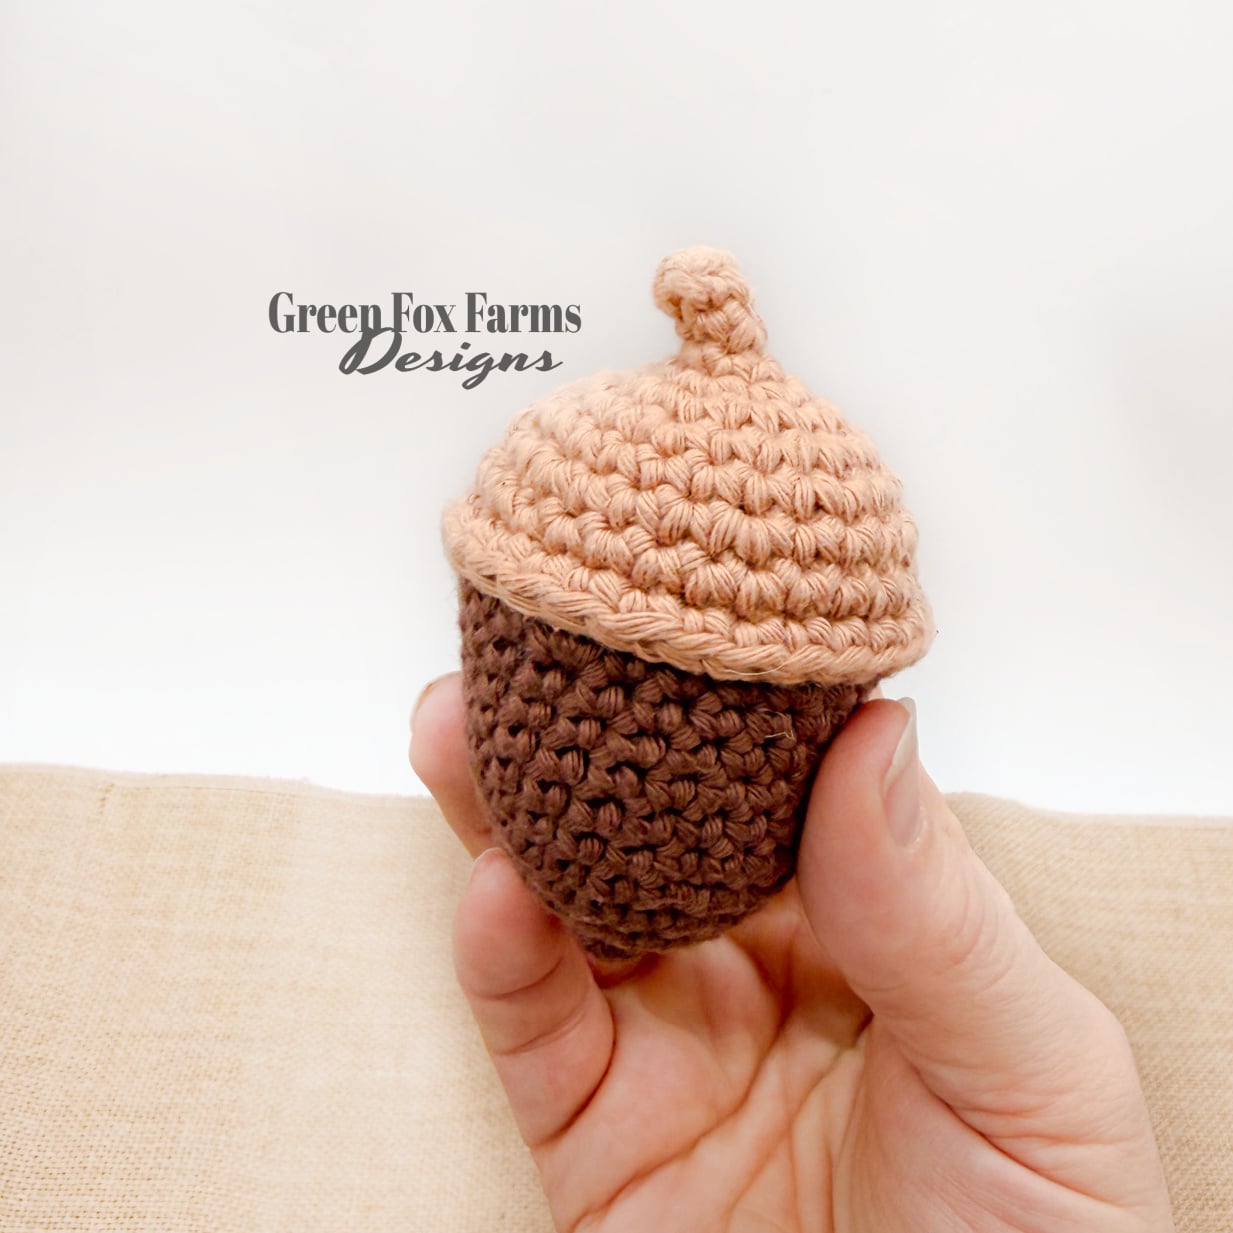
AUTUMN ACORN:
- Do not join. Work in continuous rounds using a stitch marker to mark the 1st st.
- Worked in 2 pieces. Cap is worked top down, nut is worked bottom up.
AUTUMN ACORN CAP:
Round 1: With Light Brown make a magic circle, ch 1, 4 sc in magic circle, sl st to join, (4 sc).
Round 2: Work in BLO this round only. Ch 1, sc in BLO each st around, do not join, (4 sc).
Round 3: [Sc, (2 sc) in next st] 2 times, (6 sc).
Round 4: [Sc in next 2 sts, (2 sc) in next st] 2 times, (8 sc).
Round 5: [Sc, (2 sc) in next st,] 4 times, (12 sc).
Round 6: [Sc, (2 sc) in next st,] 6 times, (18 sc).
Round 7: [(2 sc) in next st, Sc in next 2 sts] 6 times, (24 sc).
Round 8: Sc in each st around, (24 sc).
Round 9: [Sc in next 3 sts, (2 sc) in next st,] 6 times, (30 sc).
Round 10: Sc in each st around, (30 sc).
Round 11: Work in FLO this round only. Sc in FLO each st around, sl st to join, (30 sc) FO leaving a long tail for sewing. Continue with the acorn nut.
AUTUMN ACORN NUT:
- Do not join rounds, instead work in continuous rounds using stitch marker
Round 1: Make a Magic Circle with dark brown. Ch 1, 4 sc in magic circle, (4 sc). TIP: Pull the yarn end out the bottom to help shape the point at the bottom.
Round 2: [Sc in next st, (2 sc) in next st] 2 times, (6 sc).
Round 3: (2 sc) in each st around, (12 sc).
Round 4: [Sc in next st, (2 sc) in next st] 6 times, (18 sc).
Round 5: Sc in each st around, (18 sc).
Round 6: [Sc in next 2 sts, (2 sc) in next st] 6 times, (24 sc).
Rounds 7-11: Sc in each st around, (24 sc, 6 rounds).
Round 12: [Sc in next 3 sts, (2 sc) in next st] 6 times, (30 sc). FO. Stitch your acorn together (see directions p. 7) first. Then continue with finishing of your choice.
STITCH AUTUMN ACORN TOGETHER:
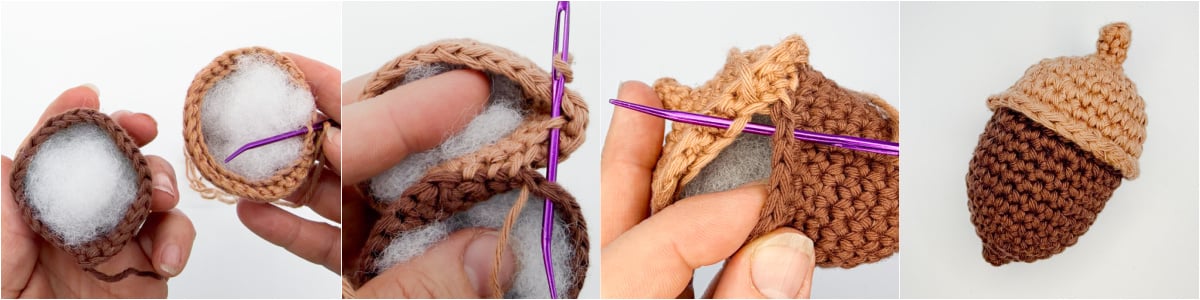
STEP 1: Stuff both sides of the acorn lightly. Match openings of acorn cap with acorn nut. Whipstitch cap and nut together, all the way around using yarn tail from cap.
STEP 2: Stitch in BLO of Round 11 of acorn cap, stitch in both loops of final Round 12 of acorn nut. When you have about 1” opening left, add any additional stuffing. Finish sewing the cap and nut together. Weave in ends.
FINISHING AUTUMN ACORN MINI:
SIMPLE MINI: You’re done!
KEYCHAIN: Insert a split jump ring through any 1-2 stitches of the first round of the acorn cap. Close the ring securely and attach to the chain or ring of your hardware. Add any additional hardware like a keyring and/or bag clip or charms for fun.
BOOKMARK: Join yarn to the mini with a sl st, through any of the central stitches in the first round of the nut. Ch 56, sl st in 2nd ch from hook and each ch, (55 sl st). FO and use the yarn tail to close any remaining opening in the last round, weave in ends.
BAG CHARM / ORNAMENT: Join yarn to the mini with a sl st, through any of the central stitches in the first round of cap, or where you’d like bag charm cord to originate from. Ch 45, skip the first 30 chs, sl st in the last 15 to form a loop. FO and weave in the ends. (Adjust the length that the charm hangs by increasing or decreasing the number chains in the cord. Change the size of the loop by adjusting the number of skipped stitches in the loop.
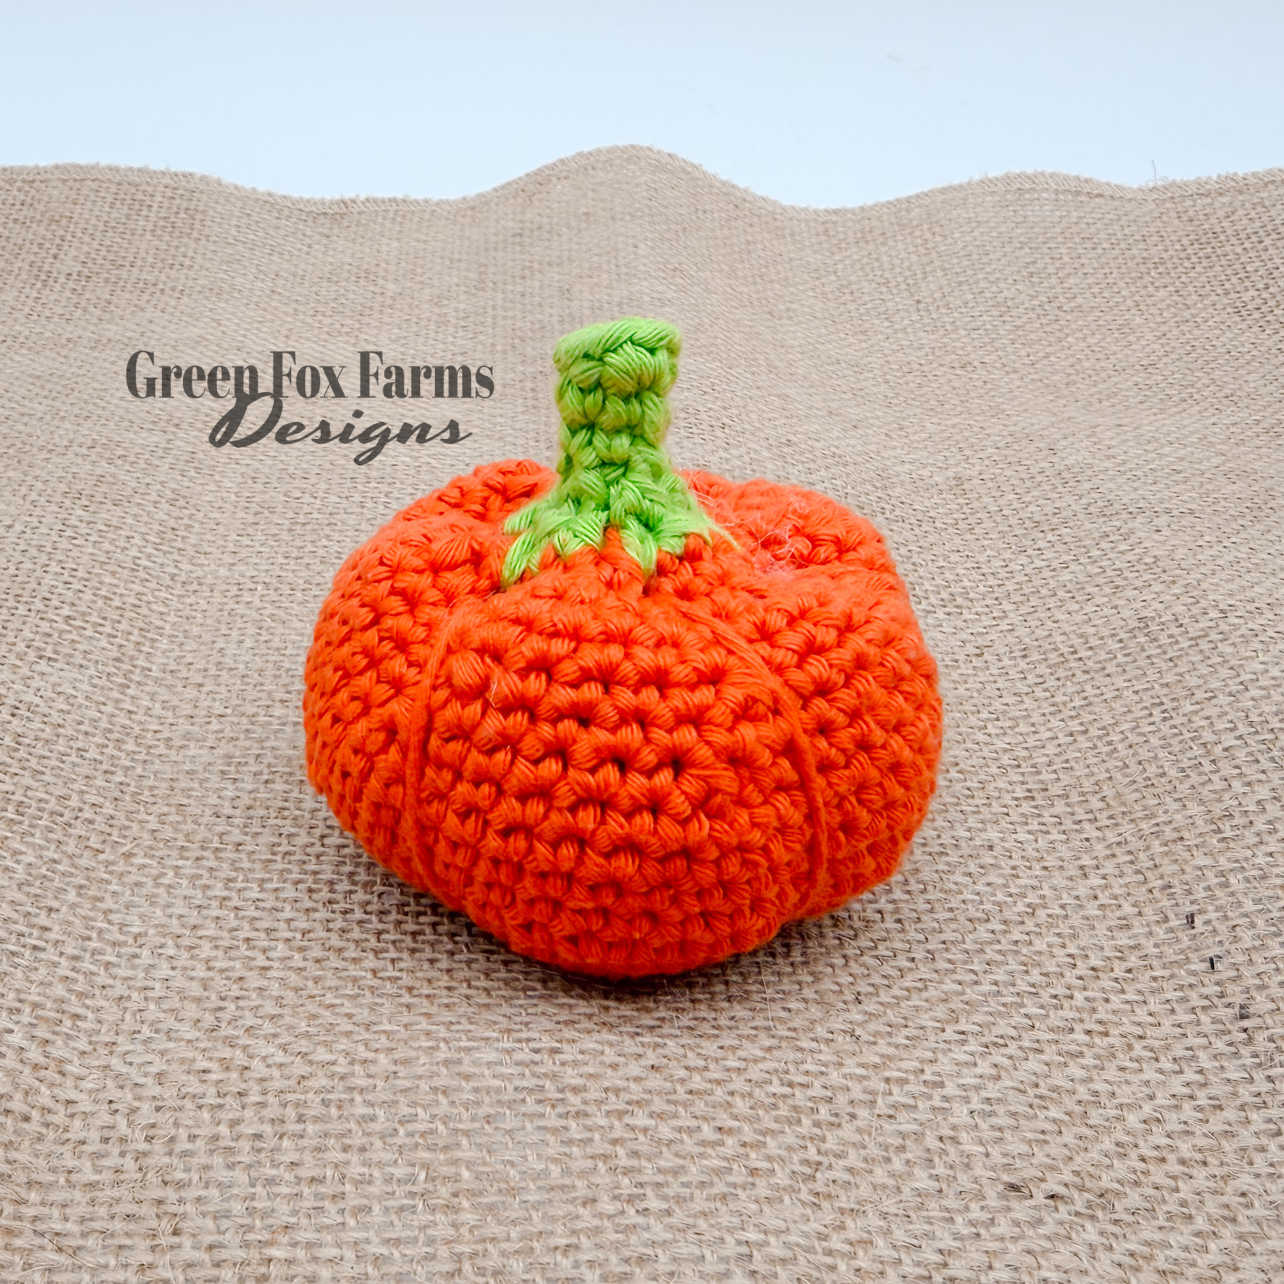
PIXIE PUMPKIN:
- Do not join rounds, instead work in continuous rounds using a stitch marker
- Pumpkin is worked from bottom to top.
Round 1: Make a Magic Circle with orange yarn. Ch 1, 6 sc in magic circle, (6 sc).
Round 2: 2 sc in each st around, (12 sc).
Round 3: [Sc, (2 sc) in next st] 6 times, (18 sc).
Round 4: [Sc in next 2 sts, (2 sc) in next st] 6 times, (24 sc).
Round 5: Sc in each st around, (24 sc).
Round 6: [Sc in next 3 sts, (2 sc) in next st]
6 times, (30 sc).
Round 7: Sc in each st around, (30 sc).
Round 8: [Sc in next 4 sts, (2 sc) in next st]
6 times, (36 sc).
Round 9: Sc in each st around, (36 sc).
Round 10: [Sc in next 5 sts, (2 sc) in next st]
6 times, (42 sc).
Rounds 11-14: Sc in each st around, (42 sc, 4 rounds).
Round 15: [Sc in next 5 sts, inv dec,] 6 times, (36 sc).
Round 16: Sc in each st around, (36 sc).
Round 17: [Sc in next 4 sts, inv dec,] 6 times, (30 sc).
Round 18: Sc in each st around, (30 sc).
STOP HERE and add eyes and mouth. Add Eyes at Round 12-13 centered, 4 sts apart, I used 10mm safety eyes. Add Mouth at Round 9-10 centered below eyes. Have fun with the shape of the mouth! See photos for inspiration.
Round 19: [Sc in next 3 sts, inv dec,] 6 times, (24 sc).
Round 20: [Sc in next 2 sts, inv dec,] 6 times, (18 sc). FO orange yarn.
Round 21: Join green yarn to any st with a sl st. [Spk st in next st, inv dec,] 6 times, sl st to join, (6 sc/inv dec, 6 spk st).
Stuff the pumpkin before continuing.
Round 22: Inv dec 6 times, (6 sc).
Rounds 23-24: Sc in each st around, (6 sc).
Round 24: [Sc in next 2 sts, (2 sc) in next st]
2 times, sl st to join, (8 sc). Shape your pumpkin first. Then continue with finishing of your choice.
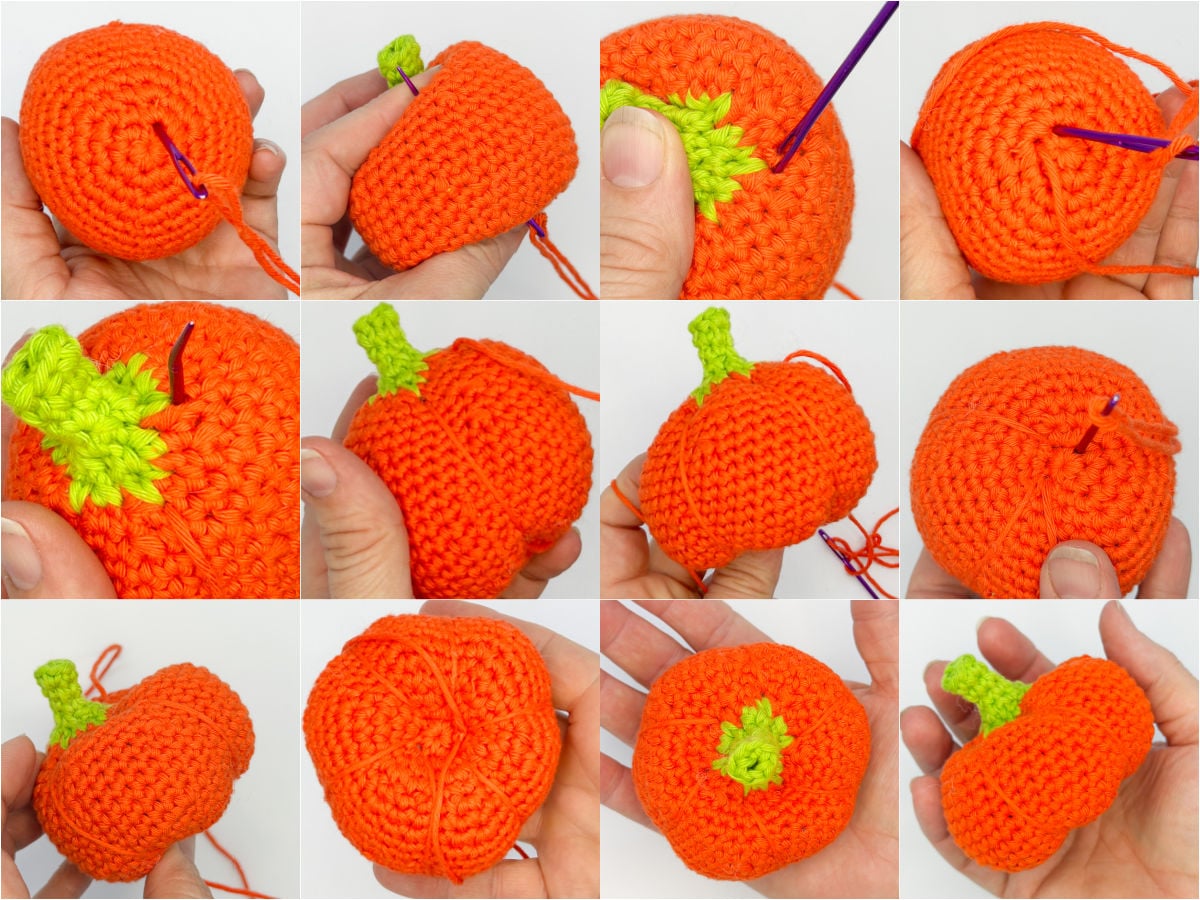
SHAPING PIXIE PUMPKIN:
Keep yarn taut throughout this process for best results!
You will be creating 6 lines around the pumpkin. Stitching in the spaces between/around the first 6 sts of round 1, up to each spike stitch from round 21.
STEP 1: Cut a new length of yarn (2-3 feet long). Thread and use needle to pull yarn through through one of the spaces/stitches of round 1 up through the spike stitch above it in round 21, working from bottom to top, leaving a long tail at the bottom. (I left half the length of yarn and worked the second half of my stitch lines with this end.)
STEP 2: Bring the yarn down and around one side, then pull needle back up through the the next stitch/space of round 1 up to the next spike stitch, from bottom to top again. Pull tight to create 1st line. Bring the yarn down the opposite side then pull yarn back up through round 1 up to spike stitch at round 21, from bottom to top again (keeping taut) to create 2nd line.
STEP 3: Continue this process, creating a total of 6 lines around the pumpkin, working through each stitch of round 1 and spike stitch of round 21. Keeping the yarn tight will help to shape the pumpkin and give more definition to the lines.
STEP 4: Bring both yarn end to bottom, tighten any of the lines to give more definition to the center if desired. Secure both yarn ends by tying a knot at the bottom, stitch each yarn end back into the bottom to hide the knot, then secure by weaving in ends and trim excess yarn.
FINISHING PIXIE PUMPKIN MINI:
SIMPLE MINI: FO, weave in ends. You’re done!
KEYCHAIN: FO, weave in ends. Insert a split jump ring through any 1-2 stitches of the last round of the stem. Close the ring securely and attach to the chain or ring of your hardware. Add any additional hardware like a keyring and/or bag clip or charms for fun.
BOOKMARK: FO, weave in ends. Join yarn to the mini with a sl st, through any of the central stitches in the first round or where you’d like bookmark cord to originate from. Ch 56, sl st in 2nd ch from hook and each ch, (55 sl st).
BAG CHARM: Ch 55, skip the first 40 chs, sl st in the last 15 to form a loop. FO and weave in the ends. (Adjust the length that the charm hangs by increasing or decreasing the number chains in the cord. Change the size of the loop by adjusting the number of skipped stitches in the loop.)
Tips for Making Mini Fall Amigurumi
- Go down one hook size from the yarn label. Tighter stitches keep the stuffing from peeking through.
- Pick cotton for keychains and bag charms. It holds its shape and handles daily wear.
- Stuff ornaments and bookmarks lightly so they hang well. Stuff plush versions firmly.
- Fall colors aren’t a rule. Try a teal pumpkin or a purple mushroom to match a friend’s fave colors.
- When you’re waiting at the doctors or kids sport, have your WIP bag with you!
- Keep a zip bag of finished minis on hand. Last-minute gifts, sorted.
- Gifting for teachers or Thanksgiving hosts? Start a few weeks early so you have time to complete them.
Mini Autumn Amigurumi Pattern FAQs
Frequently Asked Questions
What is included in the Mini Autumn Crochet Pattern?
This one pattern includes 3 designs: A cute jack-o-lantern pumpkin, mushroom and acorn. Each mini can be finished as a plush, an ornament, a keychain, a bag charm, or a bookmark, so you get 15 possible projects from a single pattern.
How long does it take to crochet a small amigurumi?
A small amigurumi like these minis takes about [TIME], so most crocheters finish one in an evening. Beginners may need a little longer while they get used to working in the round. The acorn takes a few extra minutes to sew on the cap. A full set of all three is an easy weekend project.
Is this fall crochet pattern good for beginners?
Yes! Small amigurumi is one of the best first projects. You only need a few basic stitches, and you finish fast. These minis have simple shaping, and only the acorn needs any sewing. If you can work in a spiral and count your stitches, you’re ready to start.
How much yarn do you need for these small amigurumi?
Each mini only takes 20–50 yards of yarn, so they’re great for using up scraps. Worsted weight cotton works well for keychains, bag charms and ornaments. Use DK or sport weight for a smaller bookmark version. Pick a bulky or chenille yarn if you want a soft, squishy plush.
Is it easy to turn this crochet pattern into a keychain or bag charm?
Yes, it sure is! Add a split ring or a lobster clip through a stitch at the top of your finished mini. That’s it! This pattern also has finishing steps for a bag charm, bookmark and ornament. You make the mini the same way every time, so you get to pick how to finish it at the end.
What is the best yarn for amigurumi keychains?
Cotton or a cotton blend is a great pick. It holds its shape, shows your stitches clearly and handles daily wear on keys and bags. Worsted weight makes a mini about 5″, while DK or sport makes a smaller one. Use a hook one size smaller than the yarn label suggests.
Please Share Your Autumn Minis!
Pin this post now, and it’ll be ready when fall comes back around next year. These mini patterns are just as handy in September as they are in late November. Come back when you need a quick teacher gift, a stocking stuffer, or a way to use up those fall-colored scraps.
l’d love to see your Autumn Minis! Share them on Ravelry!!! I totally love getting to see your finished items!! The best part about being a crochet pattern designer is getting to see the amazing creations y’all make with my patterns! It makes me smile and it’s the reason I do what I do!! (TBH: The yarn benefits are pretty sweet too! 😉)
Do you LOVE Free Crochet Patterns (<– like these) and do you want to see more of them on my blog? If so, please help me grow by sharing this blog Post with you crochet loving friends, and subscribing to my VIP newsletter! Thank so much for your support and for joining me on this journey, filled with yarn! If you have questions or need help of any kind with the pattern, don’t hesitate to contact me or leave a comment on the blog. I’m here to help!

Want the Power to Pause Your Project??
Want a better way to keep track of your works in progress? Download a FREE copy of my Printable WIP Cards and never forget which hook, or yarn, or pattern you were using again!