
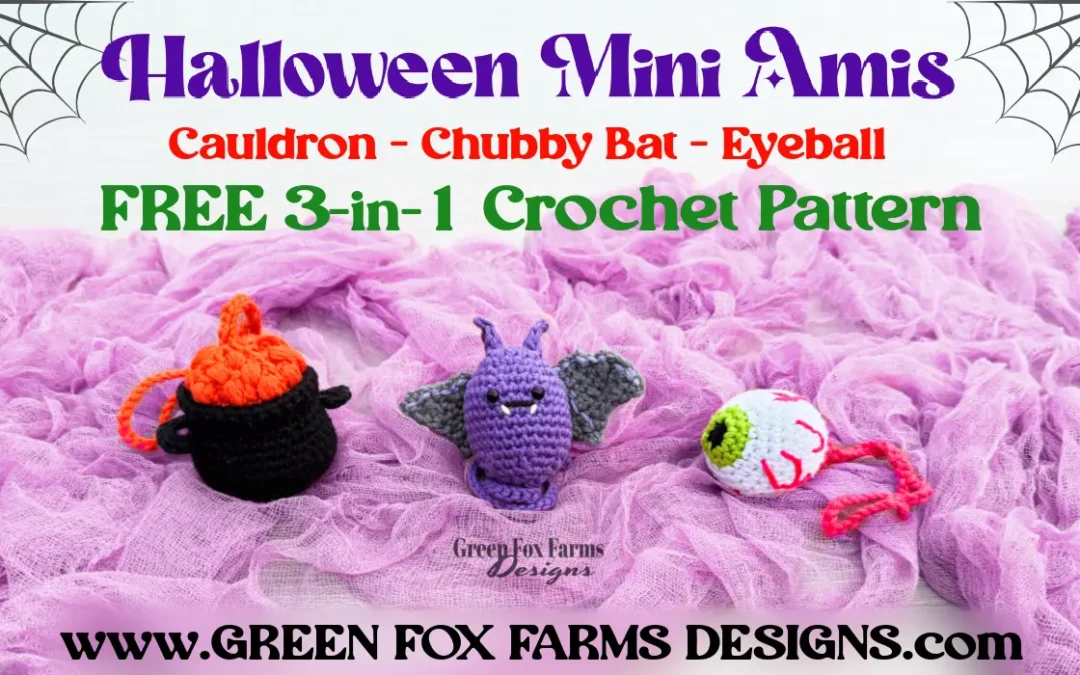
Free Mini Halloween Amigurumi Pattern
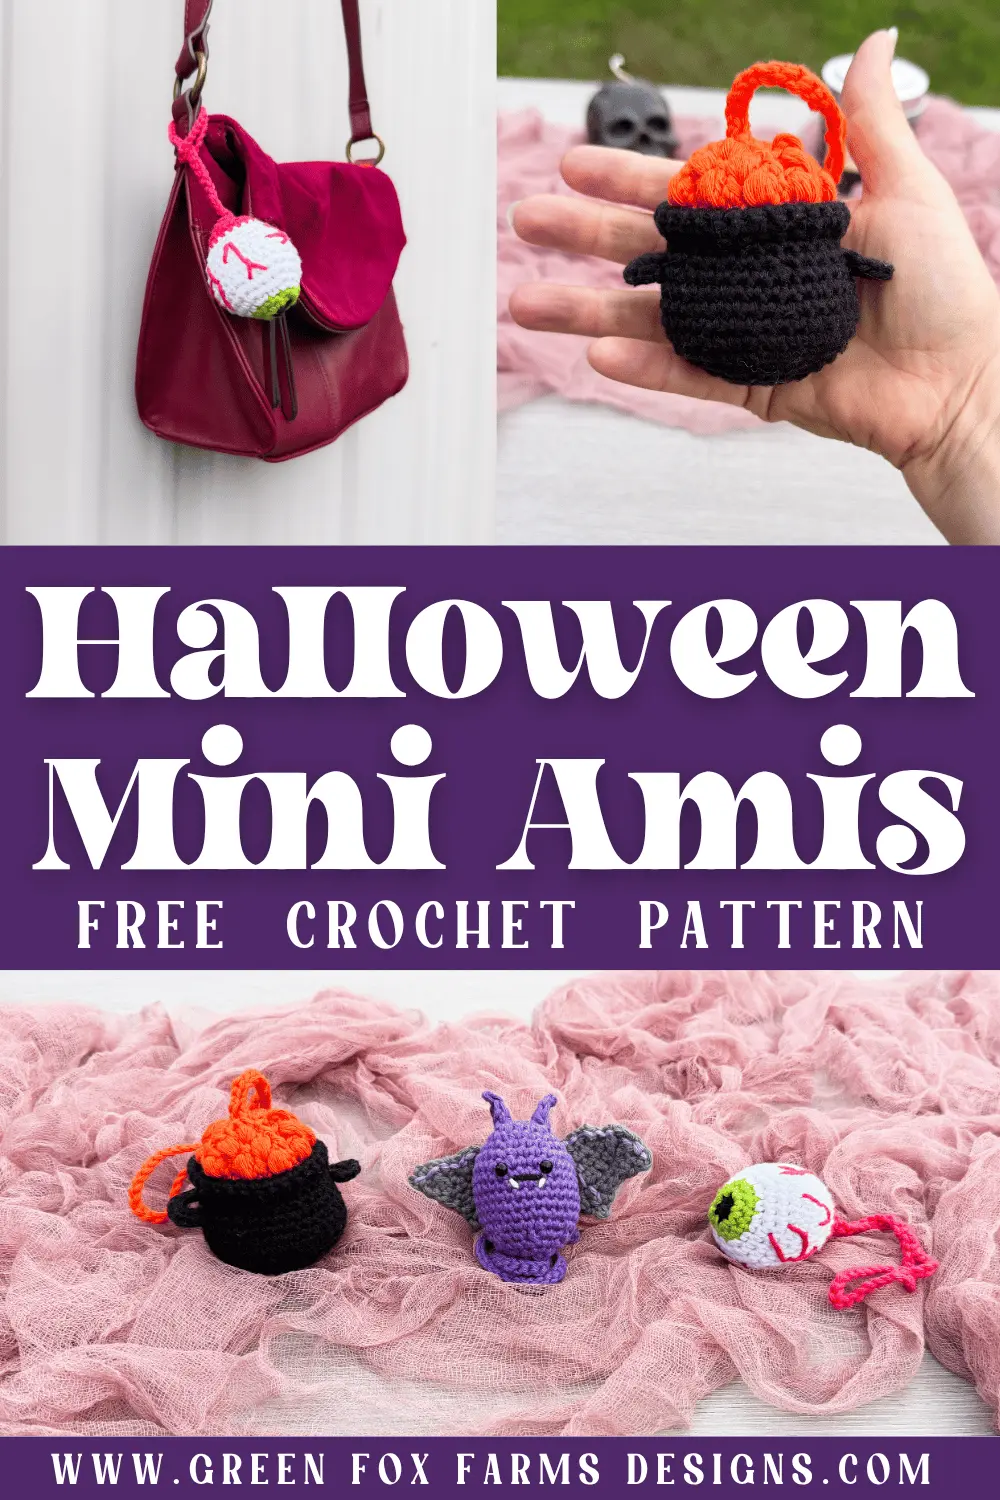
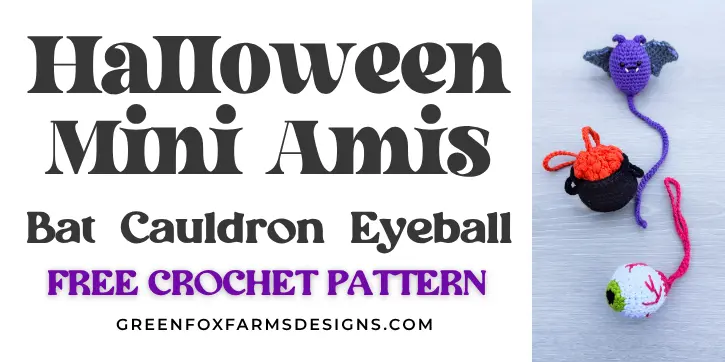
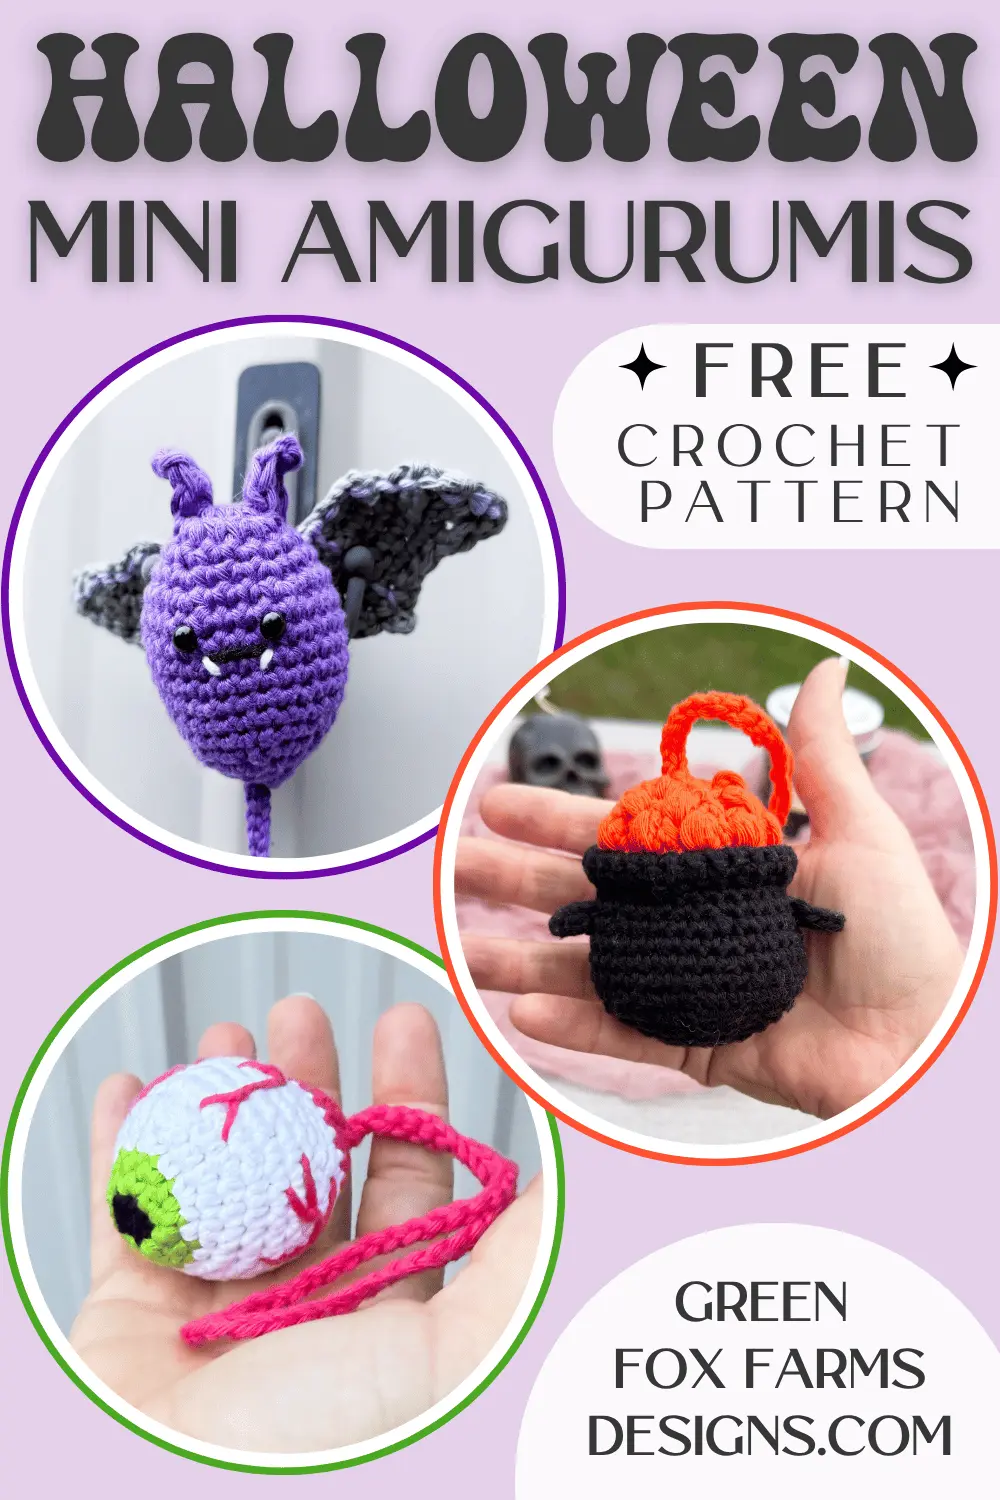
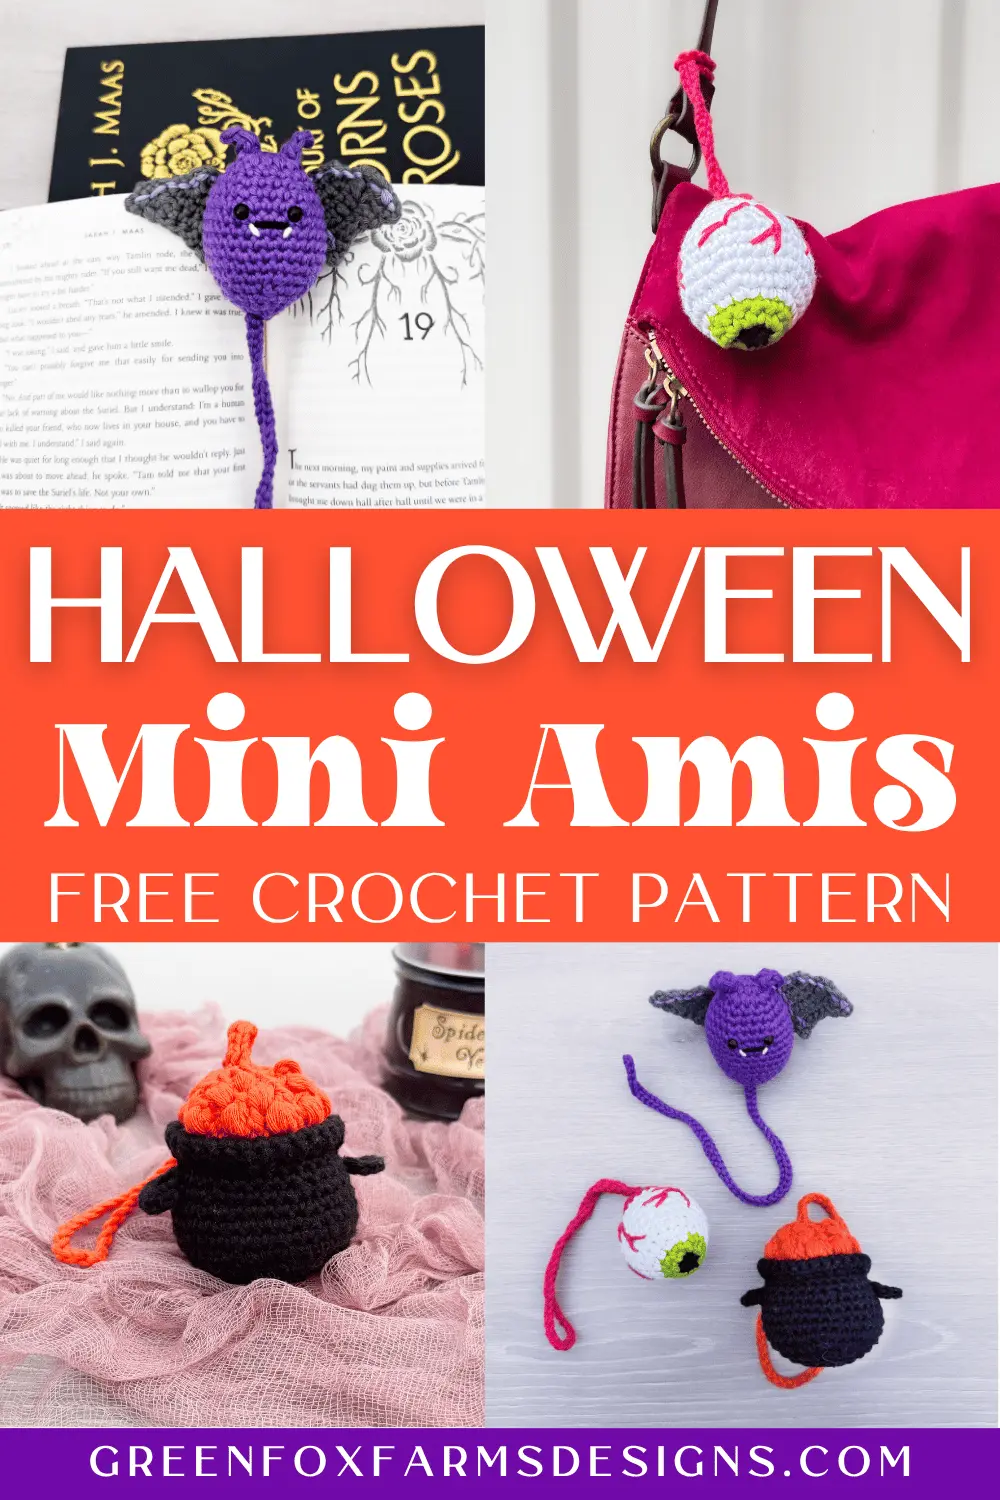
Y’all, I had so much fun with these! I couldn’t resist making several small Halloween crochet patterns. Let me introduce you to the Minis: the Everseeing Eyeball, Batty (Koda) and Cerridwen’s Cauldron Mini, my new free mini Halloween crochet patterns! These are simple amigurumi to make quick Halloween crochet patterns, and you can stitch up in a single evening. And this year, these fun and festive crochet Halloween ornaments are my contribution to the 2026 Halloween Crochet Along, so they are all 3 free right here on the blog!
Here’s my favorite part. These versatile scrap yarn Halloween projects do more than one job. Stuff them with fiberfill and you’ve got some fun mini Halloween amigurumis. But they don’t stop there! These crochet Halloween ornaments can also hang on the tree or wall as an ornament, clip to a zipper as a purse charm, hang from your keys, or mark your spot as a bookmark too! One pattern, five uses. If you’re here often, you know, multi-use is my kind of project!
If you’re new to amigurumi, these minis are a quick and simple way to learn. The pattern mainly uses basic stitches worked in the round, with no complicated shaping and barely any sewing. There are photos to help you with any challenging steps and stitches too! Confident advanced beginners can absolutely make these Halloween crochet plush, and experienced hookers can whip up a whole mess of them in a weekend. 💜👁️🥘🦇✨
DISCLOSURE: This post may contain affiliate links. See my Privacy Policy for more information.
3 Free Mini Halloween Crochet Patterns!
In this post you’ll find the complete free directions for 3 small Halloween crochet patterns, including materials, written instructions, photo tutorial and pattern notes. I’ll also show you five ways to use these versatile Mini Halloween Amigurumi, how to finish each of the 3 patterns to make the finished item you’re excited to make, and all the details on the 2026 Halloween Crochet Along, including how to enter the giveaway.
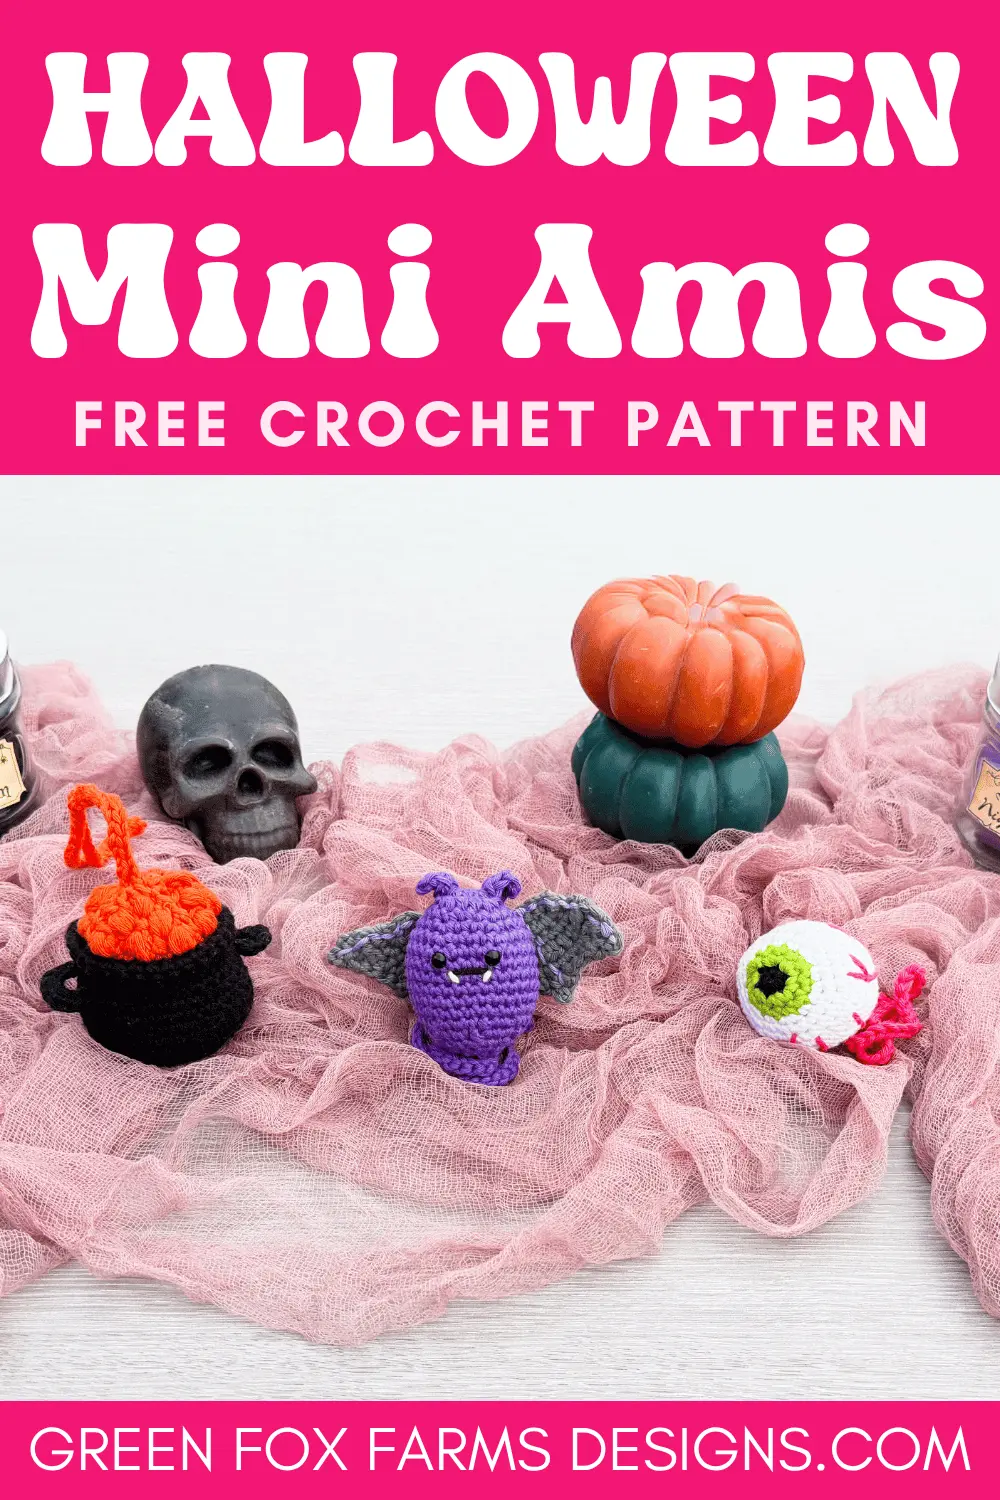
Pin it now so the Halloween crochet plush are easy to find when you’re ready to hook! 💜📌
Meet the Scrap Yarn Halloween Projects – Free Crochet Pattern
The Mini Halloween Crochet Patterns started with a simple idea: make a simple mini amigurumi, but make it extra fun and multi-use! I’ve made plenty of multi-functional patterns before, like my free Mini Mushroom Dice Bags and Earbud Pouch, Calliope Earbud Pouch and Gift Card Holder, Calliope Drawstring Pouch and/or Crossbody Bag, Veni Vidi Vici Valet Tray and Glasses/Dice Tray, and Freya the Fox Footbag, Ball and Bag Charm just to name a few…. So I knew the idea of a versatile pattern worked.
The designs are quite simple, with minimal sewing – really just a bit of embroidery that adds anice touch and I assure you is totally worth the effort! All 3 minis are worked in the round with simple shaping. No fiddly pieces, nor seaming. Each piece has one small part that is just a tiny bit challenging – so I will teach you one technique for each one and they you will know it – Yay!
Make 3 different low-sew or no-sew mini halloween amigurmi plush with this free crochet pattern! Beginner-friendly instructions, step-by-step photos, and only a little sewing required. 🧶🦇🥘👁️✨
So many uses!
- A Halloween mini plush
- A bookmark
- A keychain
- A hanging ornament
- A purse or bag charm

What exactly is included in this pattern anyway?
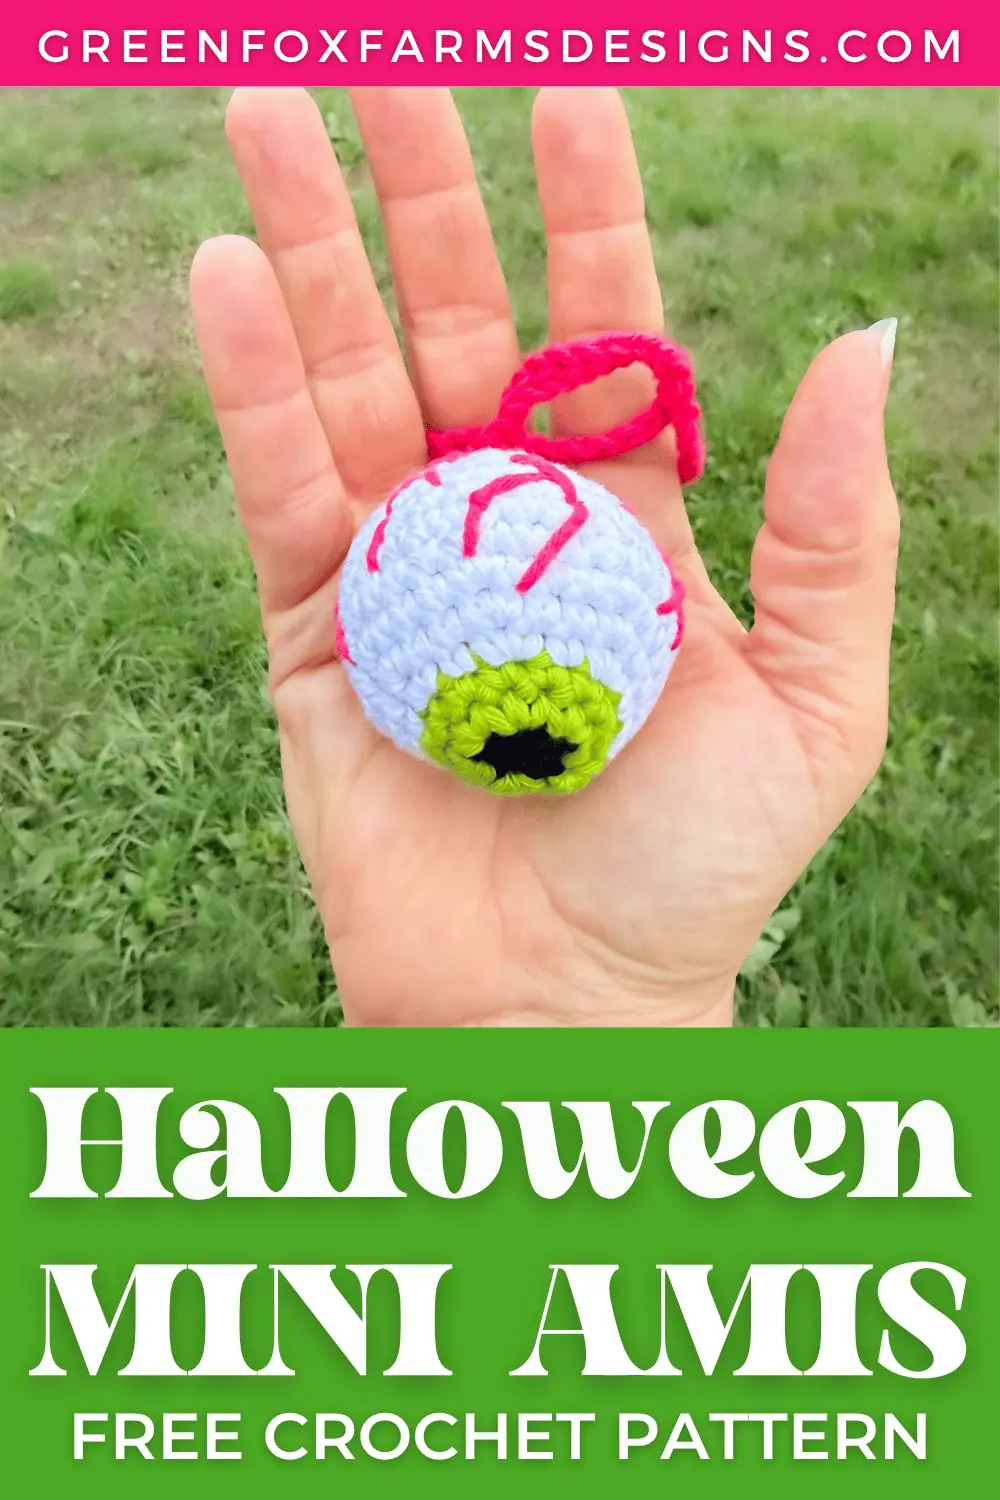
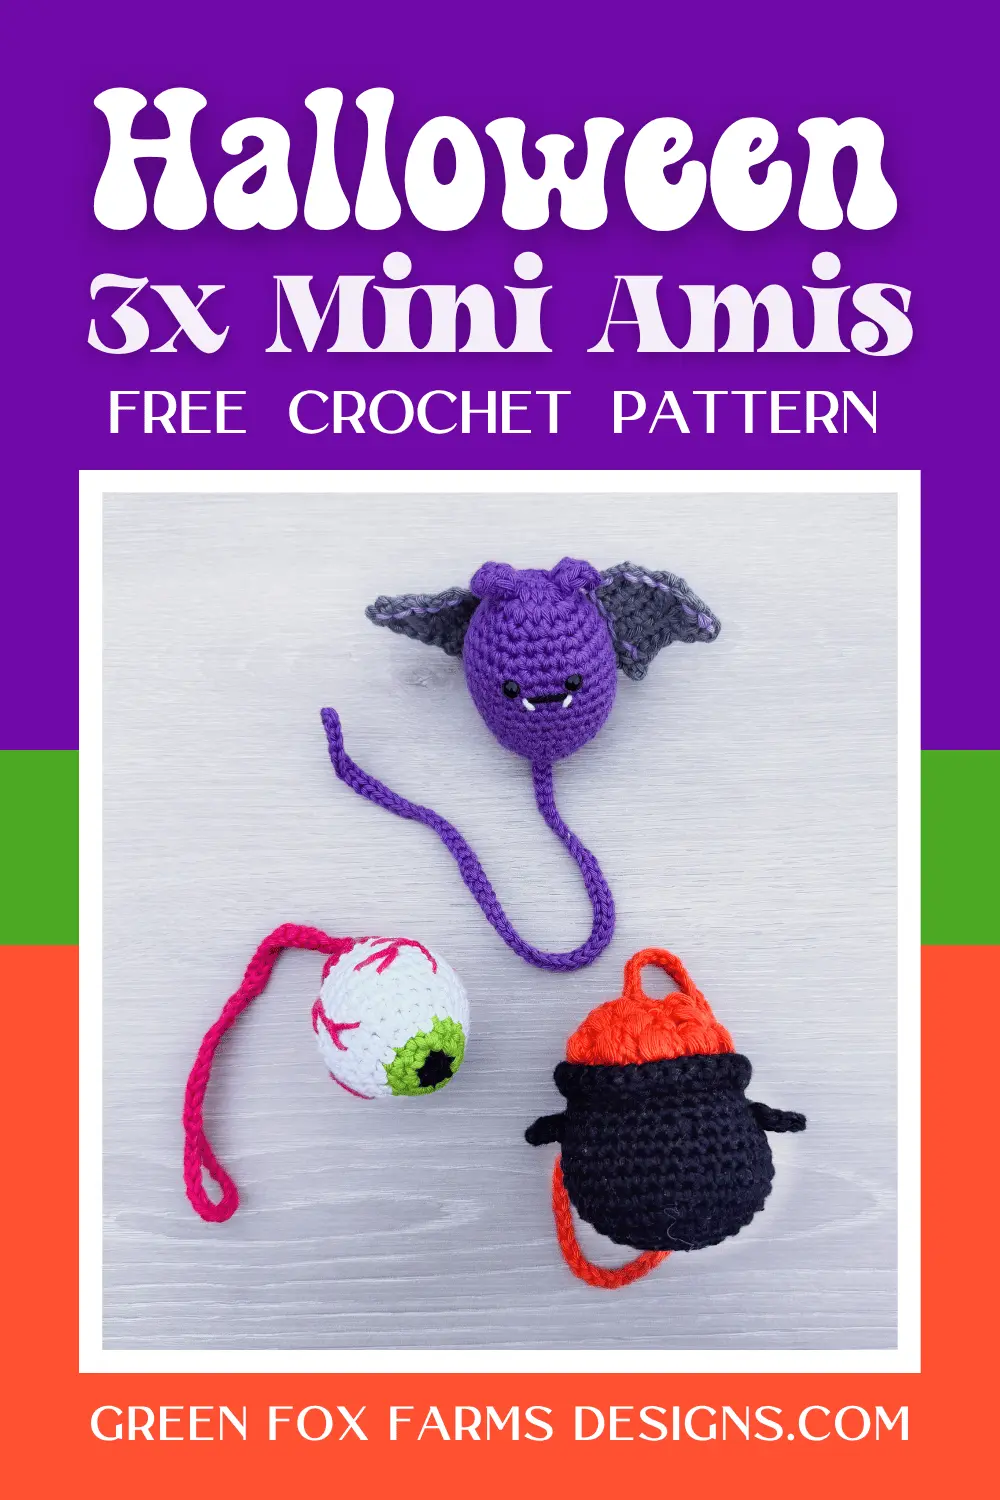
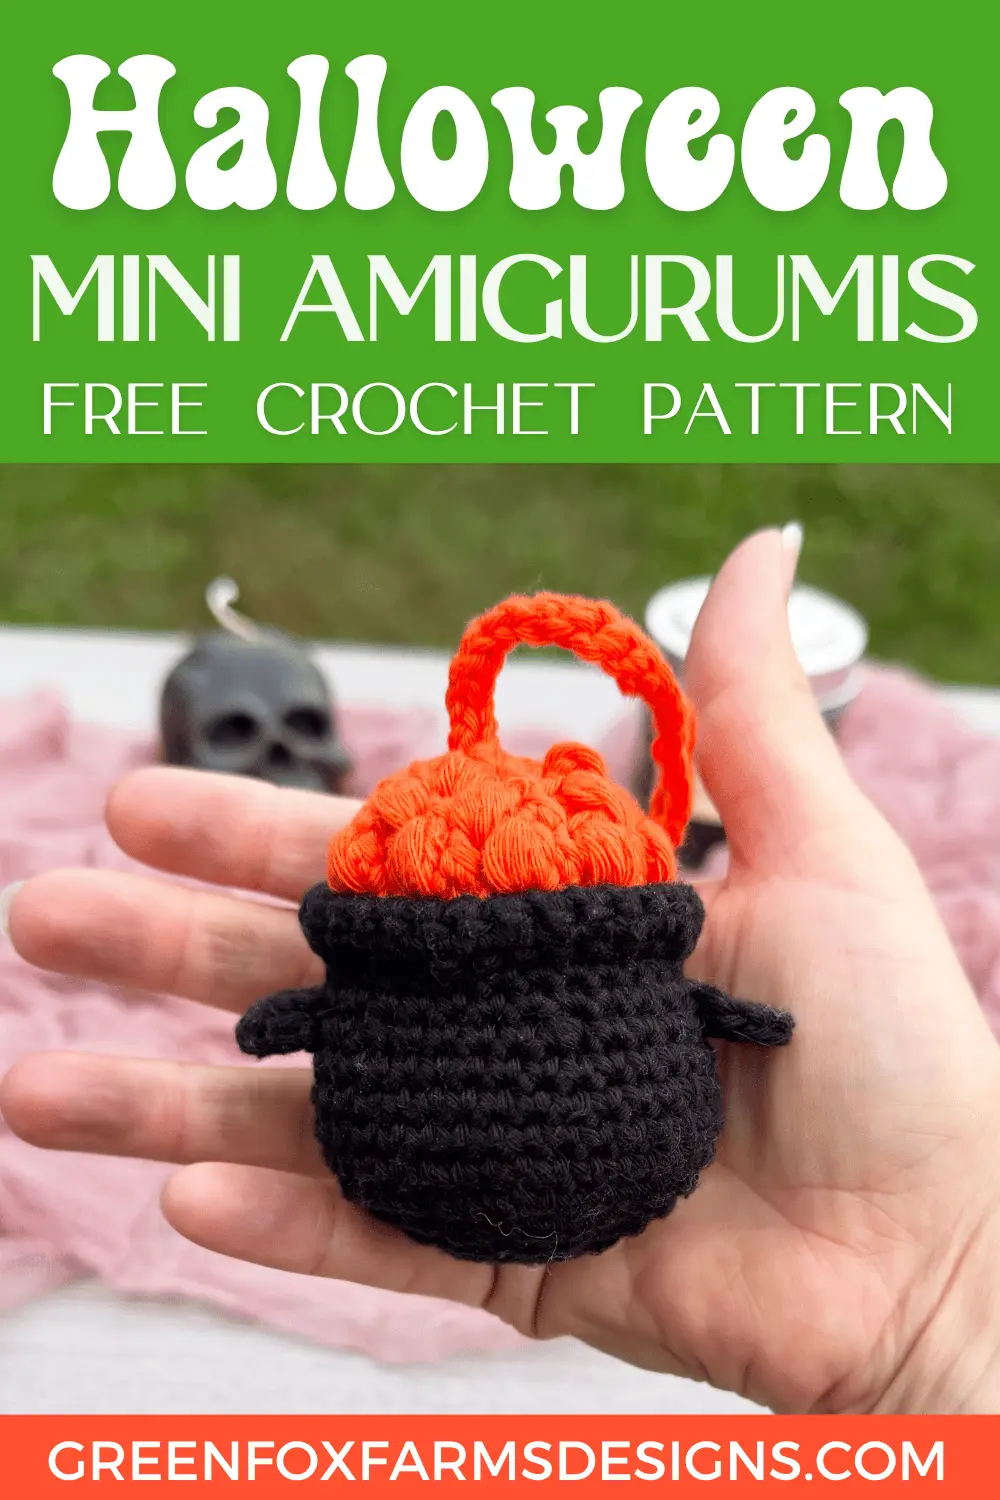
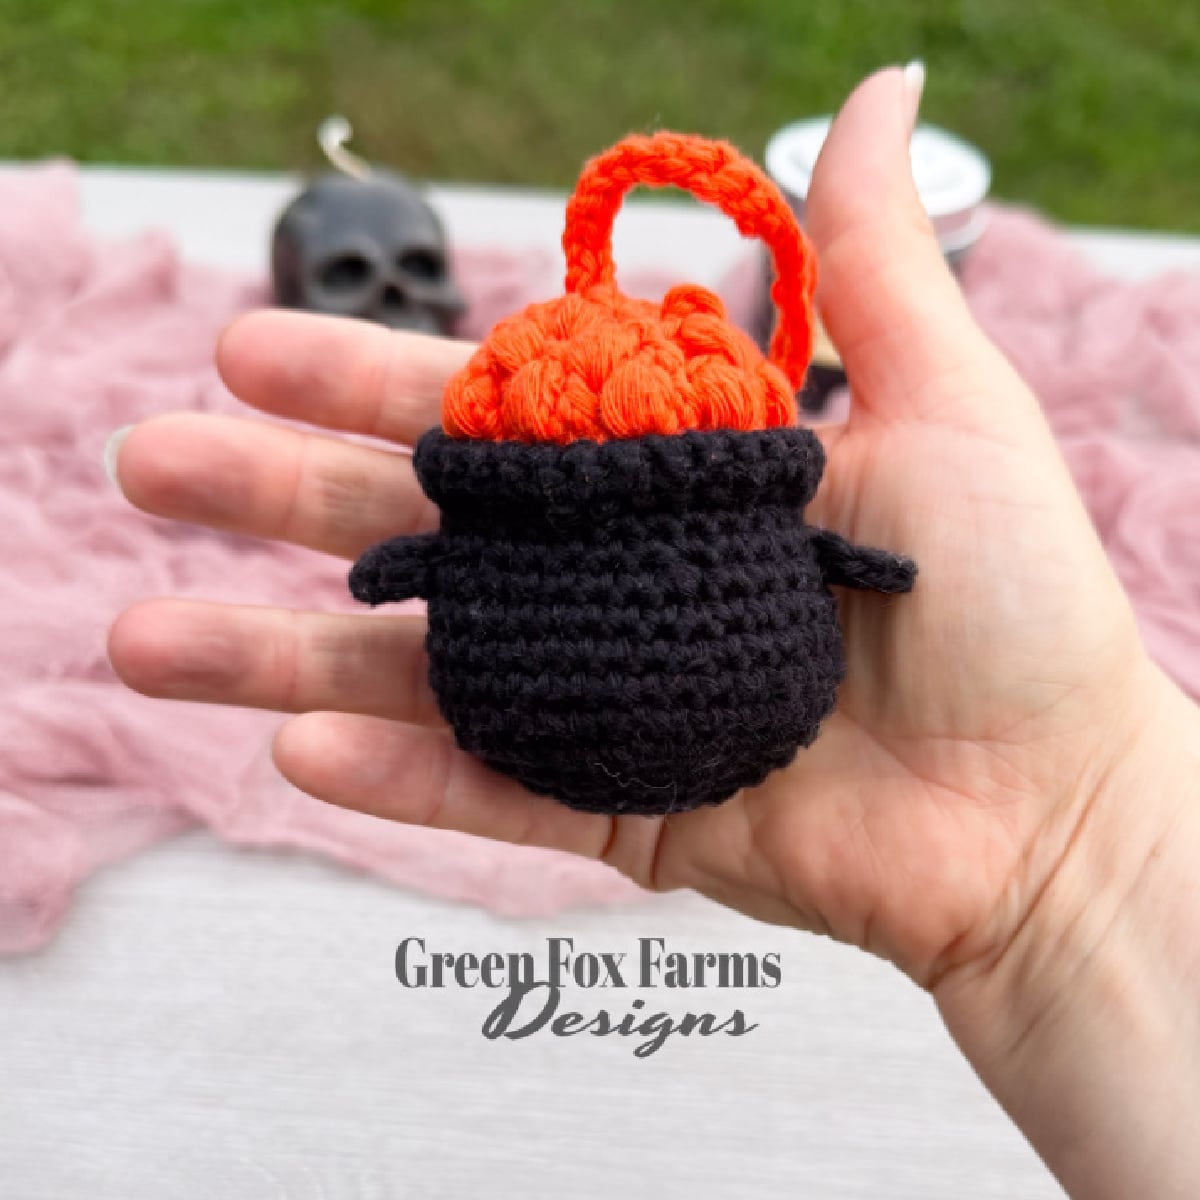
Get excited to make these fun amigurumi projects! You can crochet the Everseeing Eyeball, a free Halloween eyeball crochet pattern. It’s realistic without being gross, and a real conversation piece! The eyeball pattern will help you practice simple embroidery too. You can also crochet a Halloween bat pattern named Batty Koda after well, iykyk! He’s a cute chubby bat, made with simple pieces that you will enjoy making! You can play around with colors if you like, and learn to sew the wings to the bat body, and utilize a small amount of simple embroidery too if you want. Finally you can also make a Halloween crochet cauldron which is of course named Cerridwen’s Cauldron Mini. If you’ve seen my past patterns you’ll know I love a good cauldron pattern like Cerridwen’s Cauldron Drawstring Dice Bag and Cerridwen’s Cauldron Potion Coasters too! This fun pattern will teach you a simple puff stitch, and the only sewing is to add the 2 handles on the sides, easy peasy!
Join the 2026 Halloween Crochet Along – Free Halloween Pattern CAL!
I‘m super excited to be part of – and let you know about – this wonderful Halloween Crochet Along hosted by Underground Crafter with CAL Central Crochet! Every Monday and Thursday from August 10 – September 24, 2026, a new free Halloween themed pattern goes live on the designer’s blog. That’s 13 free crochet Halloween patterns from talented designers across the web, and Mini Halloween Crochet Pattern Set joins the lineup on Monday September 21, 2026! I adore creating amigurumi patterns, and every time my kids try to adopt my creations immediately! In fact, before I had even finishe the pattern my my youngest 2 kiddos were fighting over who got to hang the eyeball from their backpack… True story
Personally I’m obsessed with all things Halloween, especially crocheted things… How about you? If so, this Halloween CAL is the solution to your “problem” because you’ll find a whole set of amazing new Halloween decor and more to make. You can keep them, gift them, or donate them to charity. Last year I joined in with my Cerridwen’s Cauldron Drawstring Dice Bag, and this year I kept up the Cauldron theme, but I couldn’t stop with just one mini Halloween amigurumi!
And don’t skip the giveaway, y’all. Seven prize packages are up for grabs from some favorite craft companies! Enter on the main event post by Sunday, September 27, 2026 at 11:59pm Eastern. Share your finished Halloween Minis with #CALCentralCrochet so we can all cheer you on!
How To Join the 2026 Halloween CAL
Read all the details on the main event post from Underground Crafter!
https://undergroundcrafter.com/2026/08/10/2026-halloween-crochet-along/
Want the Power to Pause Your Project??
Want a better way to keep track of your works in progress? Download a FREE copy of my Printable WIP Cards and never forget which hook, or yarn, or pattern you were using again!

One Pattern, 3 Mini Halloween Amigurumi, Five Ways to Use Them
Did anyone else ready that as one pattern to rule them all…? Not just me right? Where are my fewllow LOTR nerds at?? Back to business! These cute small Halloween crochet patterns may be well, small, but they’re also mighty… versatile, as many of my designs are! What’s cool and easy is that the making of pattern stays exactly the same no matter what your finished project will be. What changes is the yarn size you choose, maybe your colors, and one or two small finishing changes. Every version is a fun, useful, spookily festive or all of the above. Pick your favorite, or make one of each!
1. Halloween crochet plush
Use a larger plush, chenille or blanket yarn, stuff your mini with fiberfill and your spooky little friend becomes a huggable plush, sized just right for small hands or fun festive decor. Your kid might just be the only one with any awesome plush Everseeing Eyeball!
2. Cute Crochet Halloween Ornaments
Add a simple chain loop to the top and your Halloween Mini transforms into an ornament ready to hang. Make a couple of all 3 to create an eerie Halloween garland, add them to doorknobs and unused hooks around the house, go all out with a Halloween tree. Stuff this version lightly so they hang gently instead of dragging the branch down.
3. Mini Halloween Amigurumi Purse Charm
The process to create a bag or purse charm with your Halloween Minis is very similar to that for the ornament! You will create a chain and then leave an opening large enough to pop the mini back through, and slip stitch in the last few chains to create a loop. Just wrap that chained loop around the strap of a bag and pull your mini through the opening. Then your spooky mini friend easily hangs from a purse, backpack, or anywhere you like. Change the size by selecting a smaller or larger yarn weight!
4. Halloween Crochet Keychain
Attach a split ring or a lobster clip to that same chain loop and she hangs from a purse, backpack, or set of keys. This version makes a fun little gift for teachers, teens, and fox-loving friends, and it uses up almost nothing from your stash. Just like with the Purse charm you can easily change the size by selecting a smaller or larger yarn weight!
5. Bookmarks for your Spooky Fall Reads
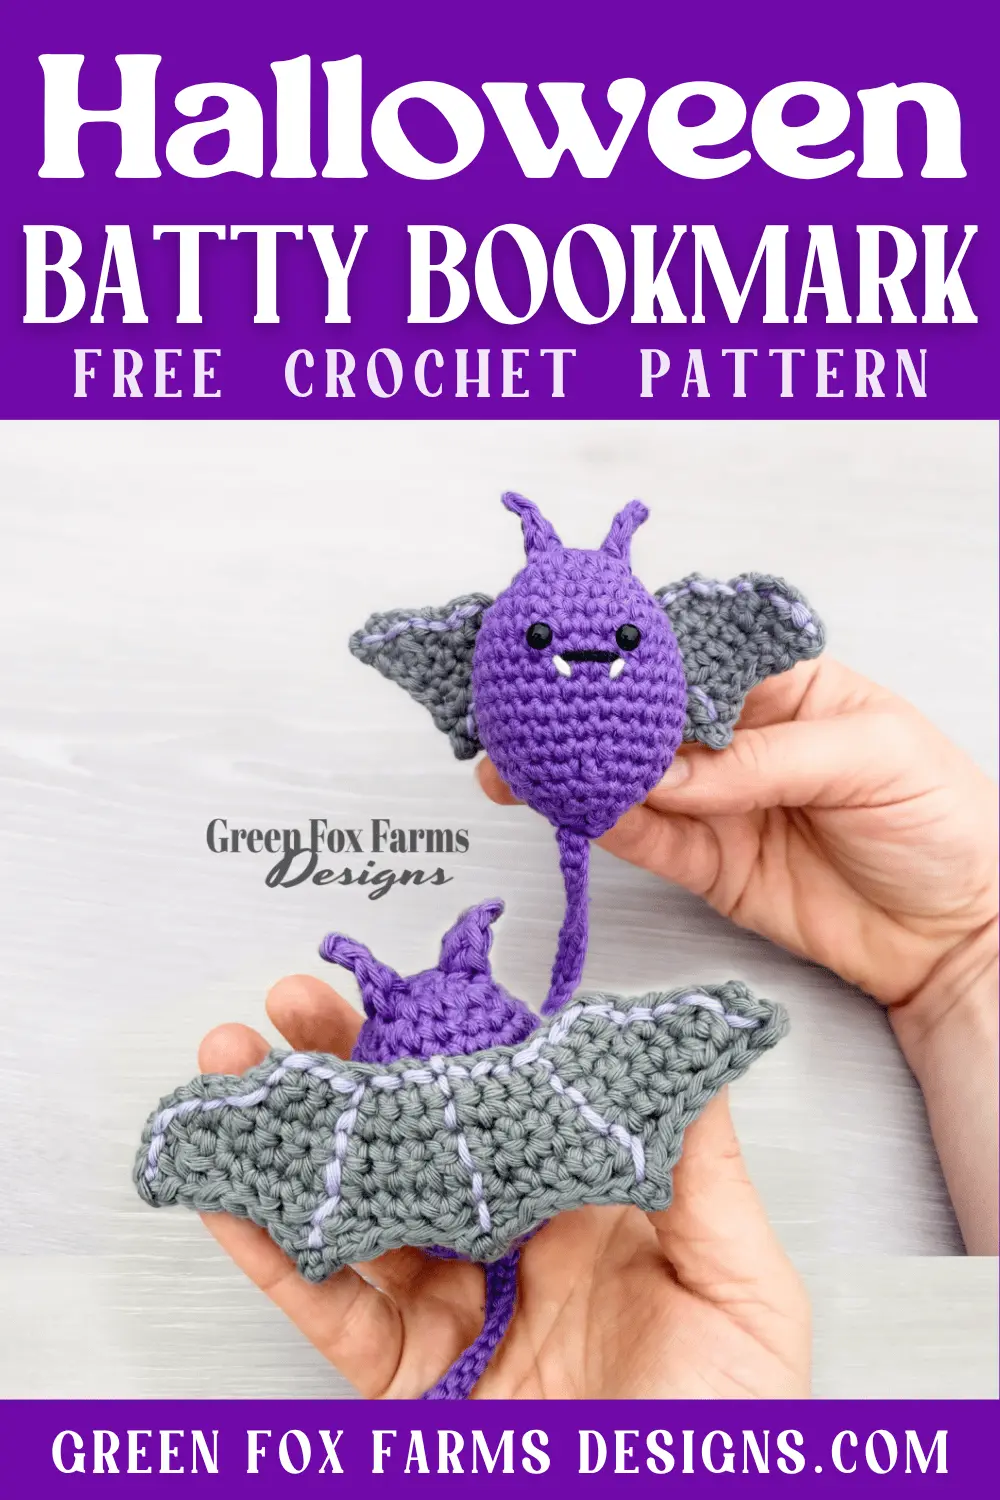
Finally this one is for my fellow book nerds! Use a dk cotton or even sport to make an even smaller version of your mini and stuff lightly with fiberfill. Once you finish the mini, just follow the instructions to add the long chained tail to create an awesomely spooky bookmark for October, or year round!
Quick Halloween Crochet Patterns are great Gifts!
Handmade items always make thoughtful gifts, and these scrap yarn Halloween projects are no exception. They’re a unique and fun addition to bags or keys, and yet fun enough to bring out at Halloween parties as prizes, favors or decor. A set makes a perfect gift for friends who love spooky décor, kids or adults at a Halloween party, or neighbors you’d like to (really) surprise with something handmade. They also make a great thank you gift for kids and teens, or as part of a Halloween care package.
How you present them can make the gift even more special. Gift a plush version with a bag of candy corn (<– this one is freeze dried!), caramel apples, or other fall treats. Gift the ornament version with an eerie Halloween Candle set in spooky shapes or festive fall scents to help create the mood. For an extra thoughtful touch, pair the bookmark version with a new spooky novel or a tin of spooky themed tea. Wrapped up with a little care, these small Halloween crochet patterns become a lasting gift that’s sure to be a delight to both gift and receive!
Like Free Patterns? Then make sure you check out my most popular Free Pattern –> DC Dice Bag & Tray! Want to see even more? You can find all of my other Free Crochet Patterns <– Right here!!
What I’m Watching & Listening To (While I Crochet)
I love to binge a series on Prime and/or book on Audible while I Crochet. I know that many of y’all do too! The simple, repetitive stitches of this little foxy footbag mean you can get into a rhythm and enjoy crocheting, while still leaving plenty of attention for that new show you’ve been dying to see. So whether you watch your fave movie on Netflix or Prime Video, or give a listen to your latest bingeable audiobook, you’ll have a blast relaxing and crocheting Plus, Freya is a quick project, so you can easily finish one in an evening or a whole skulk for your market table in a weekend!
Right now, I’m obsessed with anything dystopian and/or fantasy, as always.
Right now, I am watching Season 2 of The Boys on Prime (so good!), as well as re-watching seasons 1 & 2 of House of the Dragon so I can start watching season 3! Yes I have a type for books and shows lol! In keeping with that I am currently listening to (and loving!) The Kingdom of Copper, the second book (and equally as engrossing as the first!) in the Daevabad Trilogy by Shannon/S.A. Chakraborty. I highly recommend this excellent series and author if you like unique fantasy and world building.
I’m deep into my re-read / re-listening to the ACOTAR A Court of Thorns and Roses series by Sarah J. Maas in anticipation of the long awaited new books coming out in October and January! I’m currently on book 5 A Court of Silver Flames. Next up after this one will be starting my re-read / re-listen of the Crescent City series also by Sarah J. Maas because there are crossovers and I’ll not say anything more about that because I’m not spoiling it for anyone! I’ve read every book she’s written and they do not disappoint!
What are you watching and listening to these days? Tell me in the comments! 🧶💜


Want the Power to Pause Your Project??
Want a better way to keep track of your works in progress? Download a FREE copy of my Printable WIP Cards and never forget which hook, or yarn, or pattern you were using again!
Freya the Fox Crochet Hacky Sack Pattern is featured on the Toy Box Crochet Along!
Freya’s big moment is here! My free fox stuffie pattern is the featured Toy Box CAL pattern for the week of July 20, 2026! I’m thrilled to be part of this event with CAL Central again, because the organizers know how to celebrate everything we love about dolls, stuffies, and amigurumi. A brand new free crochet toy pattern drops every Monday from June 1 to August 3, 2026, and there are prizes from some amazing crafting companies up for grabs too!
The event lives in the CAL Central Facebook and Ravelry groups, where hookers from all over share their finished toys. Make your fox stuffie to keep, give her as a gift, or donate her to a charity that gets handmade toys into little hands. And truly, half the fun is watching everyone else’s projects roll in all summer long. 🌞
EVENT DETAILS:
Every Monday from June 1 to August 3, 2026, a designer shares a free crochet toy pattern. That adds up to 10 free patterns covering dolls, amigurumi, plushies, and more. No themed rounds this year, just a full summer of new toys. Don’t forget to enter the giveaway by Sunday, August 9!
How To Join the 2026 Toy Box CAL
Read all the details on the main event post from Underground Crafter!
https://undergroundcrafter.com/2026/06/01/2026-toy-box-crochet-along/
Join the Crochet Along Group on Facebook:
https://www.facebook.com/groups/CALCentral/
Join the Crochet Along on Ravelry:
https://www.ravelry.com/groups/cal-central-crochet
MAKE A MINI HALLOWEEN CROCHET PATTERN!
A really fun and easy Halloween Amigurumi Minis Pattern!
Halloween Crochet Plush Materials:
** These are the materials I used for my samples. You can use the yarn and hook size of your choice. I recommend using 1 hook size down from the hook size suggested on the yarn label to get good tight stitches.
MINI AMI / CHARM / KEYCHAIN YARN: Paintbox Cotton Aran Worsted Weight 4 yarn, (100% cotton, 1.7 oz/50 g, 93 yds/85 m)
YARDAGE: 20 – 50 yds per Mini
SAMPLE COLORS: Blood Orange, Jet Black, Pansy Purple, Stormy Gray, Lime Green, Paper White, Lipstick Pink
HOOK: US F-5 3.75 mm
OR
BOOKMARK YARN: Paintbox Cotton DK 3 yarn, (100% cotton, 1.7 oz/50 g, 137 yds/125 m)
YARDAGE: 20 – 50 yds per Mini
HOOK: US E-4 3.5 mm
OTHER SUPPLIES:
1 oz stuffing
Scraps of embroidery floss/ yarn to embroider face
Yarn needle
Scissors
Stitch markers
OPTIONAL SUPPLIES:
Keyring + bag clip for charm
Finished Sizes: **Sizing is approximate, measured after stuffing from my own samples. Sizing will vary depending on the yarn weight/type and your stuffing material/
EYEBALL: 5.5“ around x 2.75” long
CHUBBY BAT: 7“ around x 3” tall (not counting ears) x 4.5” wingspan
CAULDRON: 7“ around x 3” tall
Gauge: 22 sc x 22 rows = 4” square (Gauge is not very important)
Experience Level: Advanced Beginner / Easy

How to Make Easy Crochet Halloween Ornaments
Pattern Key: Written in US English Crochet Terms
st(s) – stitch(es)
sp(s) – space(s)
ch – chain
sl st – slip stitch
sc – single crochet
hdc – half double crochet
dc – double crochet
inv dec – invisible decrease (see spec sts)
picot – see special stitches
puff st – see special stitches
ear stitch – see special stitches
BLO – back loop only
FLO – front loop only
yo – yarn over / yu – yarn under
FO – fasten off
Quick Halloween Crochet Patterns Instructions
Special Stitches:
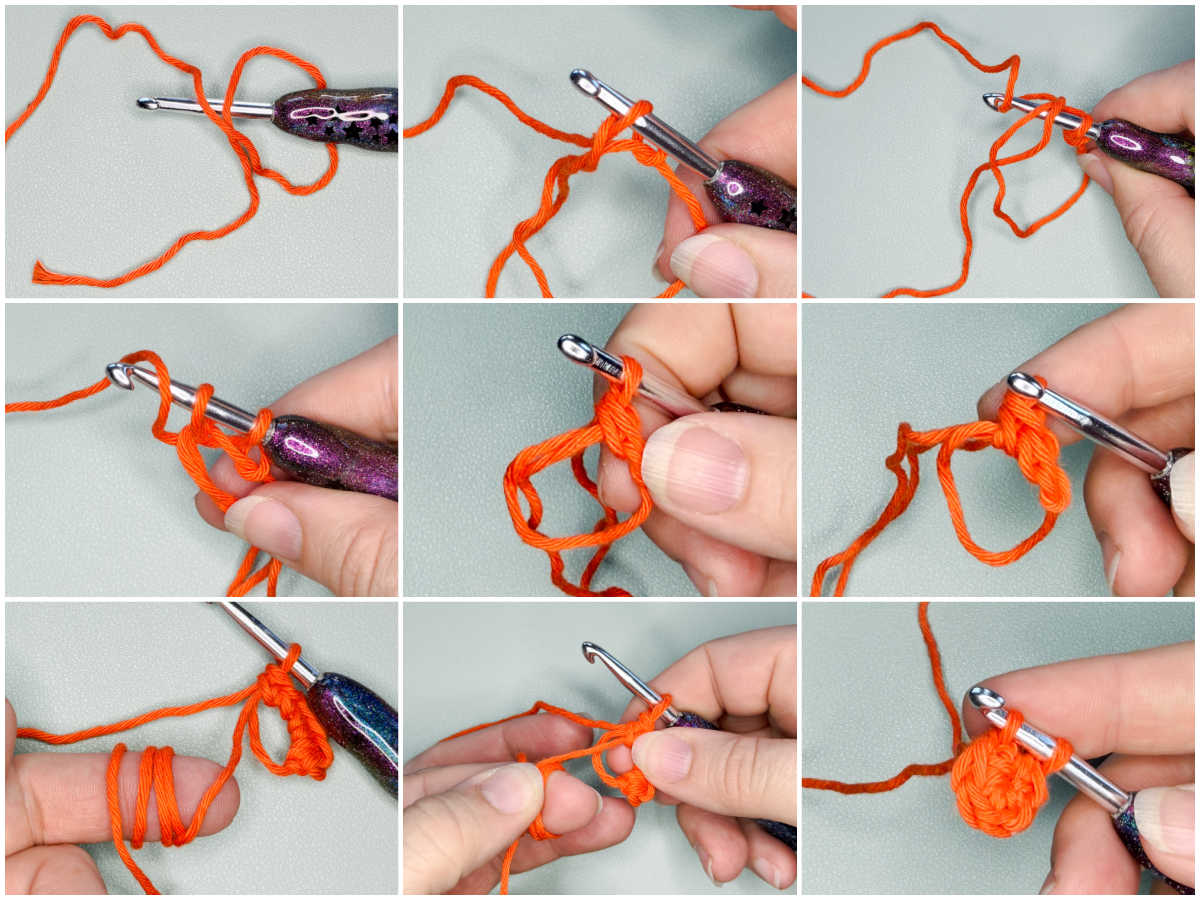
Magic Circle Tutorial:
STEP 1: Create a loop with yarn, place hook through the loop, YU and pull the yarn through the loop, keeping the loop open in a circle instead of pulling the yarn tight.
STEP 2: Ch 1, insert hook back in circle, YU and pull up a loop through the circle.
STEP 3: YU again and pull through the 2 loops on the hook, 1 sc completed! Repeat Step 2 to create additional stitches. Hold stitches with one hand, gently pull yarn end with other hand to close the circle. YU = yarn under technique used instead of yarn over for a tighter stitch
Picot Tutorial: Ch 3, sl st in 3rd ch from hook. Picot completed.

Ear Stitch: Worked all stitches in same stitch in FLO (hdc, dc, picot, dc, hdc).
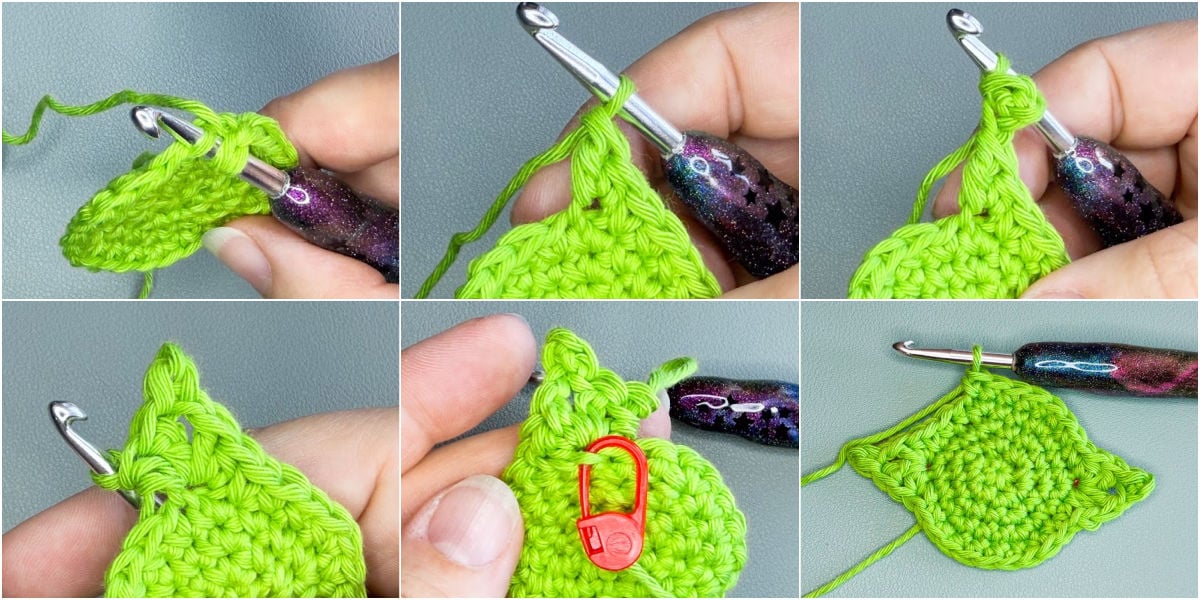
Invisible Decrease (inv dec): Insert hook in FLO next st, and FLO of next st, YU (yarn under) and pull up a loop through both loops, YU and pull through both loops on hook like a traditional single crochet. Invisible Decrease single Crochet completed.
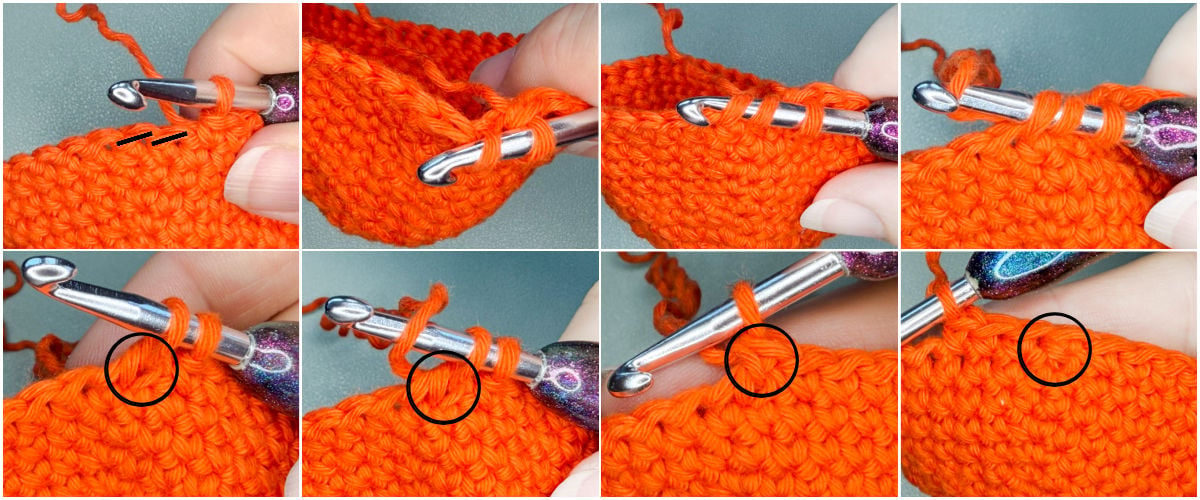
Puff Stitch Instructions: (Keep a looser tension on loops while working for best results.)
STEP 1: Yo, insert hook in next st, yo and pull up a loop (3 loops on hook).
STEP 2: Yo, insert hook in same st, yo and pull up a loop (5 loops on hook).
STEP 3: Yo, insert hook in same st, yo and pull up a loop (7 loops on hook).
STEP 4: Yo, insert hook in same st, yo and pull up a loop (9 loops on hook).
STEP 5: Yo and pull through all 9 loops on hook, ch 1 to close, Puff st completed.

NOTES:
- Read through the entire pattern first to familiarize yourself with the process.
- This pattern is designed to work with any yarn weight of your choice. Use a hook 1-2 sizes lower than the yarn label suggests.
- Repeat stitches between [ and ] { and } the number of times indicated. Place all stitches between ( and ) in same space.
- This pattern is worked in a single piece.
- Pattern is worked in continuous rounds (with the exception of the snout). Use a stitch marker to mark the first stitch.
- Snout is worked in rows, crocheted directly on head after Round 11, and then needs to be stitched down on both sides.
- In Round 6 for ear stitches you will fold the ear out of your way and work stitches into the marked BLO of those stitches. At the next stitch, fold it back and work the rest as usual. Do the same for Round 12 with the snout.
- This pattern is FREE, and has been thoroughly tested and tech edited. Please feel free to share any comments or ask any questions you may have! I welcome your feedback!!
- This post and all it contains including the pattern and photographs are my intellectual property and copyright protected property of GreenFoxFarms LLC © 2026. You are welcome to make as many as you like to sell, giveaway, etc. You may NOT sell, or alter and claim as your own this pattern. You may not use my photographs. This pattern is not for mass production.
- If you want to share this pattern online, you must only share a link to my blog post. You may not copy and paste my text or the pattern to another site. Thank you for respecting my work.
- By using this pattern, you are agreeing to abide by these terms.
Pattern Release Details:
Prefer a printable, ad-free PDF? This multi-use Halloween Minis crochet pattern is now available for purchase in my Ravelry and Etsy shops! If you love the pattern, will you please go and show it some love ❤️ on the platform of your choice, which not only helps YOU easily find it quickly in your faves, but it will also help my patterns to get seen by more people! Thank you so much friends!! 🙂 The links below will take you to the Quick crochet Halloween pattern in my Ravelry or Etsy shop, so you can shop at your favorite place to buy the pattern now or save it for later!
Do you love discounts? I mean, you’re human right?? If YES then you will love my VIP List and/or Facebook Community where you can find a coupon to use on patterns in my Etsy or Ravelry shop! Also, my VIPs are the first to hear about new pattern releases, sales (some are exclusive to my VIPs only!), CALs (crochet alongs), and lots of fun crochet discussions!
Pattern Download RAVELRY
Click the Buy NOW button below to purchase a Printer Friendly, Ad-Free, FULL PDF Pattern Download version including many more detailed photo tutorials of the 3 Mini Amigurumi Halloween Crochet Pattern on RAVELRY!
Pattern Download ETSY
Click the Buy NOW button below to purchase a Printer Friendly, Ad-Free, FULL PDF Version Download: including many more detailed photo tutorials of the 3x Halloween Mini Crochet Pattern on ETSY!
Mini Halloween Amigurumi on the Halloween CAL!
I’m so excited to share that my new Mini Halloween Crochet Patterns was featured on the Halloween CAL with CAL Central! The CAL invites crocheters to make fun Halloween projects for gifts, decor, to sell, or to donate to charity while chatting with others in our groups and sharing projects for the chance to win giveaway prizes. This is our eighth annual Halloween CAL.
Marie from Underground Crafter has put together an amazing Halloween CAL Event! Not only can you find a Brand NEW FREE Halloween themed Crochet Pattern every Monday and Thursday from August 10 – September 24, but you can win prizes from some amazing crafting companies too!
How To Join the 2026 Halloween CAL
Read all the details on the main event post from Underground Crafter!
https://undergroundcrafter.com/2026/08/10/2026-halloween-crochet-along/
FREE MINI HALLOWEEN CROCHET PATTERNS:
3x Mini Halloween Amigurumi Pattern Directions:
HALLOWEEN CROCHET CAULDRON:
- Do not join. Work in continuous rounds using a stitch marker to mark the 1st st.
Round 1: Make a Magic Circle with cauldron color, ch 1, 6 sc in magic circle, (6 sc).
Round 2: 2 sc in each st around, (12 sc).
Round 3: [Sc, 2 sc in next st,] 6 times, (18 sc).
Round 4: [Sc in next 2 sts, 2 sc in next st,] 6 times, (24 sc).
Round 5: [Sc in next 3 sts, 2 sc in next st,] 6 times, (30 sc).
Round 6: [Sc in next 4 sts, 2 sc in next st,] 6 times, (36 sc).
Rounds 7-10: Sc in each st around, (36 sc, 4 rounds).
Round 11: [Sc in next 4 sts, inv dec,] 6 times, (30 sc).
Rounds 12-14: Sc in each st around, (30 sc, 3 rounds). Mark round 13 for handles.
Round 15: Work in FLO this round only. Sl st in FLO of 1st st, ch 1, sc in FLO of same st, sc in each st around, do not join, (30 sc).
Rounds 16-18: Sc in each st around, (30 sc, 3 rounds). After final round, sl st to join, FO and leave a long tail. Fold/roll the last 4 rows down, and push up on final row to create a rounded lip. BLOs of Round 15 should be at the top, on the inside. This is where we will work the potion yarn. Use the yarn tail to stitch the lip to the cauldron at Round 15. Weave in ends.
CAULDRON HANDLES: (Make 2)
STEP 1: Ch 9, sl st in 2nd ch from hook, and each ch, (8 sl sts). FO and leave a long tail to stitch to the cauldron.
STEP 2: Stitch handle to cauldron at Round 13, with handles curved, leaving about 3 sts between each side of the handle. Repeat for the other handle on the opposite side. Weave in ends.
CAULDRON POTION:
- Join potion color to 1st st of Round 15 of cauldron, working round 1 of potion in the BLO of Round 15 of cauldron.
- See photos p. 8 for first round details.
Round 1: Ch 1, sc in BLO of round 15 and each st around, sl st to join, (30 sc).
Round 2: Ch 1, [inv dec, puff st in next st] 10 times, sl st to join, (10 sc, 10 puff st).
Round 3: Ch 1, [inv dec, puff st in next st] 6 times, inv dec, sl st to join, (7 sc, 6 puff st).
Round 4: Ch 1, [inv dec, puff st in next st] 4 times, sc, sl st to join, (5 sc, 4 puff st).
Round 5: Ch 1, [inv dec] 4 times, sc, sl st to join, (5 sc). Continue with finishing of your choice.
FINISHING CAULDRON MINI:
SIMPLE MINI: FO and use the yarn tail to close any remaining opening in the last round, weave in ends.
KEYCHAIN: Insert a split jump ring through any 1-2 stitches of the last round of the potion. Close the ring securely and attach to the chain or ring of your hardware. Add any additional hardware like a keyring and/or bag clip or charms for fun.
BOOKMARK: Join yarn to the mini with a sl st, through any of the central stitches in the first round or where you’d like bookmark cord to originate from. Ch 56, sl st in 2nd ch from hook and each ch, (55 sl st). FO and use the yarn tail to close any remaining opening in the last round, weave in ends.
BAG CHARM: Join yarn to the mini with a sl st, through any of the central stitches in the last round or where you’d like bag charm cord to originate from. Ch 55, skip the first 40 chs, sl st in the last 15 to form a loop. FO and weave in the ends. (Adjust the length that the charm hangs by increasing or decreasing the number chains in the cord. Change the size of the loop by adjusting the number of skipped stitches in the loop.
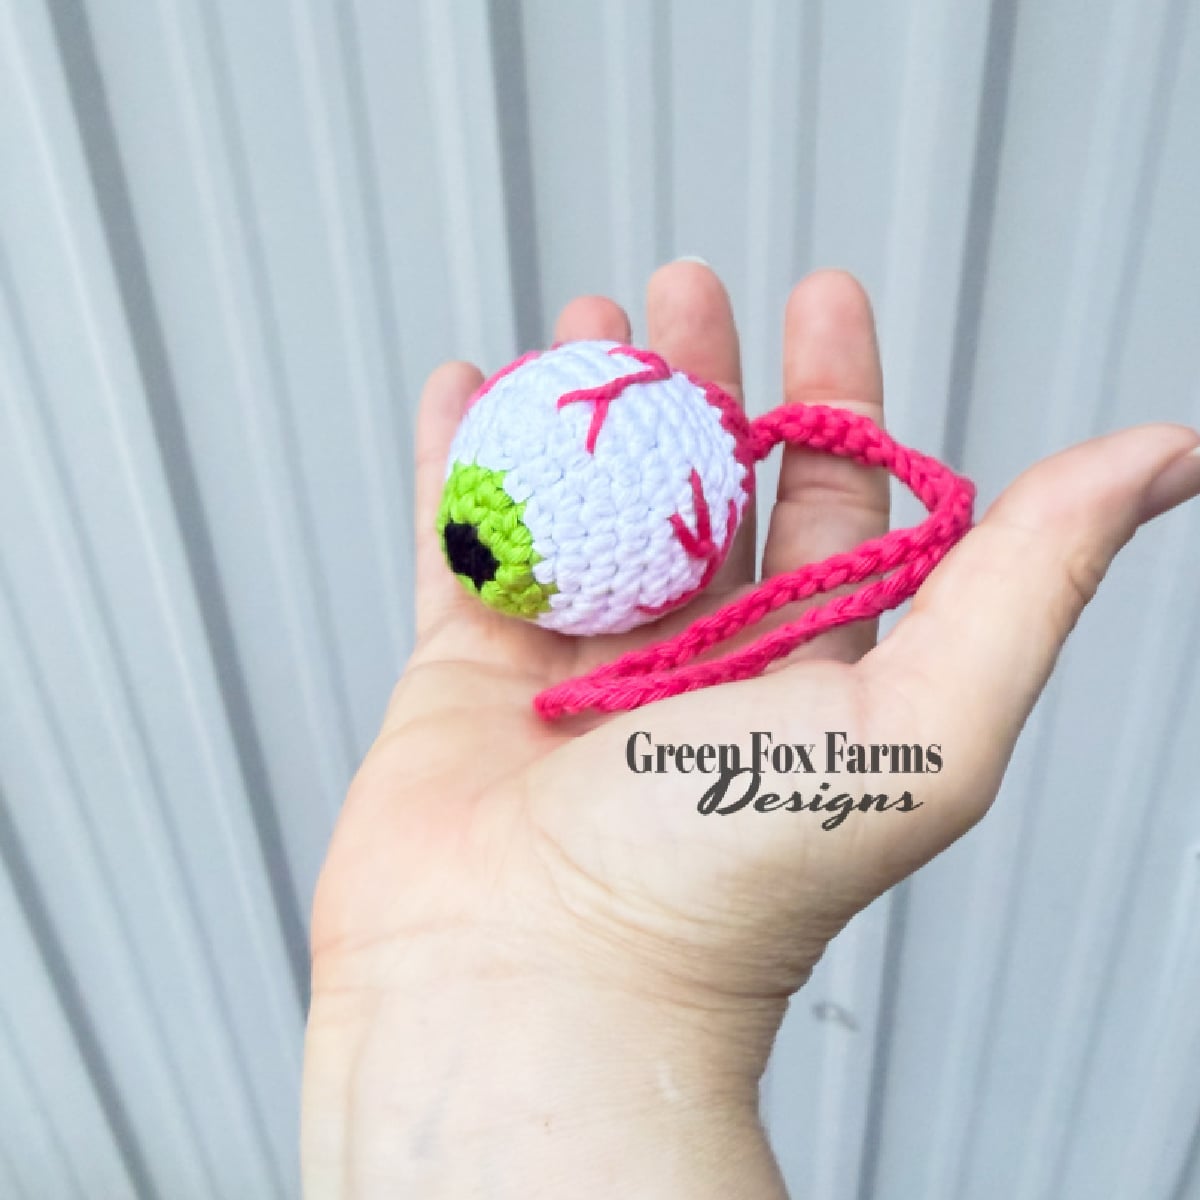
FREE HALLOWEEN EYEBALL CROCHET PATTERN:
- Do not join. Work in continuous rounds using a stitch marker to mark the 1st st.
Round 1: Make a Magic Circle with black yarn. Ch 1, 6 sc in magic circle, sl st to join, (6 sc). FO Black and join Iris color.
Round 2: With Iris color, 2 sc in each st around, (12 sc).
Round 3: Sc in each st around, sl st to join, (12 sc). FO Iris color and join white yarn for sclera.
Round 4: [Sc, (2 sc) in next st] 6 times, (18 sc).
Round 5: [Sc in next 2 sts, (2 sc) in next st] 6 times, (24 sc).
Round 6: [Sc in next 3 sts, (2 sc) in next st]
6 times, (30 sc).
Rounds 7-11: Sc in each st around, (30 sc).
Round 12: [Sc in next 3 sts, inv dec,] 6 times, (24 sc).
Round 13: [Sc in next 2 sts, inv dec,] 6 times, (18 sc). FO white yarn.
STOP HERE and add embroidered capillaries if desired. I used a back stitch. See photos for inspiration.
Round 14: Join dark pink or red yarn. Sc in each st around, (18 sc).
Round 15: [Sc in next st, inv dec,] 6 times, (12 sc).
Stuff the eyeball before continuing.
Round 15: Inv dec 6 times, (6 sc). Continue with finishing of your choice.
FINISHING EYEBALL MINI:
SIMPLE MINI: FO and use the yarn tail to close any remaining opening in the last round, weave in ends.
KEYCHAIN: Insert a split jump ring through any 1-2 stitches of the last round of the eyeball. Close the ring securely and attach to the chain or ring of your hardware. Add any additional hardware like a keyring and/or bag clip or charms for fun.
BOOKMARK: Ch 56, sl st in 2nd ch from hook and each ch, (55 sl st). FO and use the yarn tail to close any remaining opening in the last round, weave in ends.
BAG CHARM: Ch 45, skip the first 30 chs, sl st in the last 15 to form a loop. FO and weave in the ends. (Adjust the length that the charm hangs by increasing or decreasing the number chains in the cord. Change the size of the loop by adjusting the number of skipped stitches in the loop.)
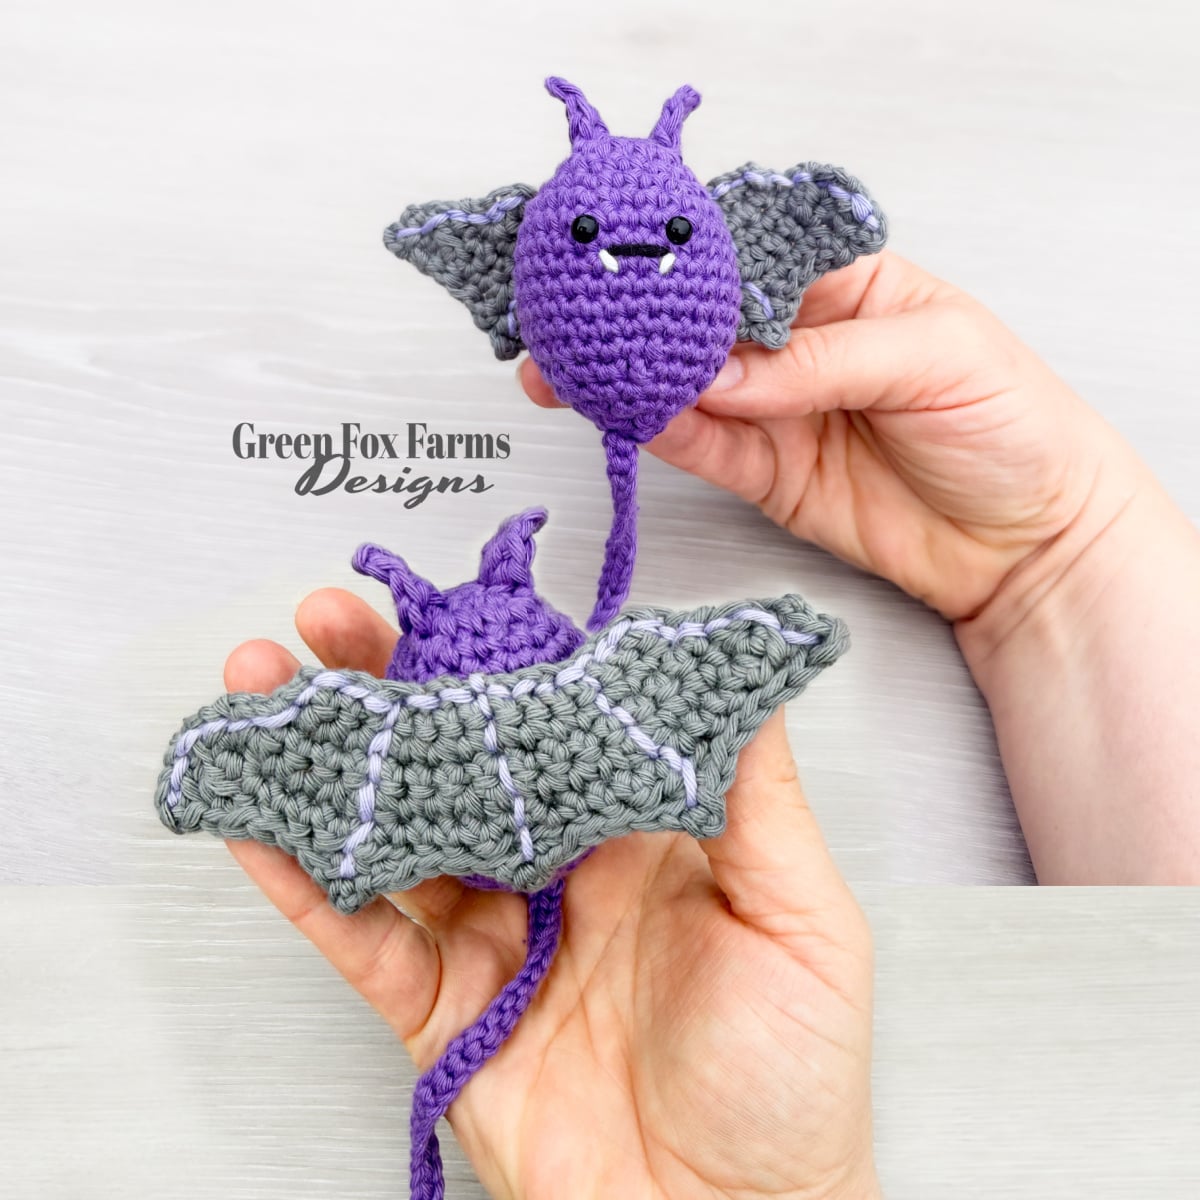
HALLOWEEN BAT PATTERN:
BAT WINGS:
Row 1: With Gray, ch 16, sc in 2nd ch from hook and each ch across, turn, (15 sc).
Row 2: Ch 1, sc in each st across, turn, (15 sc).
Row 3: Ch 1, (2 sc) in first st, sc in next 13 sts, (2 sc) in last st, turn, (17 sc).
Row 4: Ch 1, [(2 hdc) in next st, sc in next 3 sts,] 4 times, (2 hdc) in last st, turn, (12 sc, 10 hdc).
Row 5: Ch 1, [hdc in next 2 sts, sc in next 3 sts] 4 times, hdc in last 2 sts, (12 sc, 10 hdc).
Row 6: Ch 1, [(sc, picot) sc, sl st in next 3 sts] 4 times, (sc, picot) sc, (10 sc, 5 picot). FO, weave in ends. Set aside, make body.
BAT BODY:
- Do not join. Work in continuous rounds using a stitch marker to mark the 1st st.
Round 1: Make a Magic Circle with purple yarn. Ch 1, 6 sc in magic circle, sl st to join, (6 sc).
Round 2: [(3 sc) in next st, (ear st) in FLO next st (place stitch marker in BLO), (2 sc) in next st] 2 times, (10 sc, 2 ear sts).
Ear Stitch See Photo tutorials above
Round 3: [Sc in next st, 2 sc in next st, sc in next st, push ear down and (2 sc) in BLO, sc in next st, 2 sc in next st] 2 times, (18 sc).
Round 4: Sc in each st around, (18 sc).
Round 5: [Sc in next 2 sts, 2 sc in next st] 6 times, (24 sc).
Round 6: [Sc in next 3 sts, 2 sc in next st] 6 times, (30 sc).
Rounds 7-11: Sc in each st around, (30 sc, 5 rounds).
Round 12: [Sc in next 3 sts, inv dec,] 6 times, (24 sc).
Round 13: [Sc in next 2 sts, inv dec,] 6 times, (18 sc).
STOP HERE and add eyes and mouth. Add Eyes at Round 7-8 centered, 3 sts apart, between the ears. I used 6mm safety eyes. Add Mouth/Fangs at Round 9 centered below eyes. See photos for inspiration.
Round 14: Sc in each st around, (18 sc).
Round 15: [Sc in next st, inv dec,] 6 times, (12 sc).
Stuff the bat body before continuing.
Round 15: Inv dec 6 times, (6 sc).
Continue with finishing of your choice.
FINISHING HALLOWEEN BAT MINI:
SIMPLE MINI: FO and use the yarn tail to close any remaining opening in the last round, weave in ends.
KEYCHAIN: Insert a split jump ring through any 1-2 stitches of the first round of the bat body. Close the ring securely and attach to the chain or ring of your hardware. Add any additional hardware like a keyring and/or bag clip or charms for fun.
BOOKMARK: Ch 56, sl st in 2nd ch from hook and each ch, (55 sl st). FO and use the yarn tail to close any remaining opening in the last round, weave in ends.
BAG CHARM: Ch 50, skip the first 35 chs, sl st in the last 15 to form a loop. FO and weave in the ends. (Adjust the length that the charm hangs by increasing or decreasing the number chains in the cord. Change the size of the loop by adjusting the number of skipped stitches in the loop.)
Once you have finished the bat body you will stitch the wings to the back. Line up the center of the wings with the center of the body, top of the wings at Round 5. Stitch part way down the center wings to give some division to them, then stitch across the top in the center to secure wings to the body. Feel free to add additional back stitches to add definition to the wings. FO and secure ends.
Mini Halloween Amigurumi Pattern FAQs
Frequently Asked Questions
What is included in the Mini Halloween Crochet Pattern?
This one pattern includes 3 designs: the Everseeing Eyeball, Batty the Bat, and Cerridwen’s Cauldron. Each mini can be finished as a plush, an ornament, a keychain, a bag charm, or a bookmark, so you get 15 possible projects from a single pattern.
How long does it take to crochet a mini Halloween amigurumi?
Most crocheters finish one mini in a single evening. These are quick, small projects worked mostly in simple single crochet rounds, so even a whole set of three is easy to knock out in a weekend.
Is this Halloween crochet pattern good for beginners?
Yes, this pattern is rated advanced beginner. It uses basic stitches worked in the round with minimal sewing, and step-by-step photos walk you through the one slightly trickier technique in each design (embroidery on the eyeball, sewing wings on the bat, and a puff stitch for the cauldron potion).
How much yarn do I need to make a Halloween mini amigurumi?
Each mini only takes 20–50 yards of yarn, which makes this a great stashbusting or scrap yarn Halloween project. You can use worsted weight cotton for a plush, keychain, or charm, or a lighter DK/sport weight for a smaller bookmark version.
Can I turn this crochet pattern into a keychain or bag charm?
Absolutely. Each of the 3 designs includes separate finishing instructions for a keychain, ornament, bag charm, bookmark, or simple stuffed plush, so you can customize the exact same base pattern for whichever use you want.
What crochet techniques will I learn from this pattern?
You’ll get practice with basic embroidery on the eyeball, sewing pieces together on the bat, and a puff stitch on the cauldron’s potion. Each design teaches one new skill, so working through all three is a nice mini skill-builder.
Is this a free crochet pattern?
Yes, the full written pattern is free right here on the blog. An ad-free, printer-friendly PDF version with extra photo tutorials is also available for purchase on Etsy and Ravelry if you’d rather have a downloadable copy.
Please Share your own Mini Halloween Crochet Patterns!
I hope you enjoy making these quick Halloween crochet patterns as much as I enjoyed designing it – just for you! I would love if you would share your sea turtle projects on social media and on Ravelry!!! I adore getting to see your finished items!! The best part about being a crochet pattern designer is getting to see the amazing creations y’all make with my patterns! It makes me smile and it’s the reason I do what I do!! (TBH: The yarn benefits are pretty sweet too! 😉)
Do you LOVE Free Crochet Patterns (<– like these) and do you want to see more of them on my blog? If so, please help me grow by sharing this blog Post with you crochet loving friends, and subscribing to my VIP newsletter! Thank so much for your support and for joining me on this journey, filled with yarn! If you have questions or need help of any kind with the pattern, don’t hesitate to contact me or leave a comment on the blog. I’m here to help!
Want the Power to Pause Your Project??
Want a better way to keep track of your works in progress? Download a FREE copy of my Printable WIP Cards and never forget which hook, or yarn, or pattern you were using again!


These are SO awesome! As for what I’m reading, I have many on the go – have you tried the Spell Shop series by Sarah Beth Durst? Very enjoyable.
Hi Dulcie,
I am so glad you love the patterns, thanks for visiting! I have NOT read that series but I will definitely check that out. Thanks so much for the rec.
Happy Hooking!
Lisa Fox